A DIY Christmas Light Pallet – Mantel Pt. 3
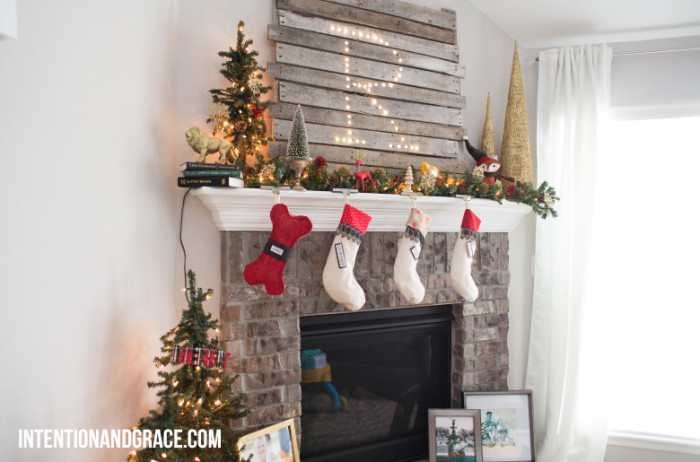
The other night, my husband showed up at the house with pallets sardined in his car and I had no idea where this was going to go. He said it was a surprise for me and went outside for about ten minutes. Hearing the machine tools going, I couldn’t help but wonder what this beat up pallet was going to become…a shelf? a wine rack? a bench or coffee table? Who knew…
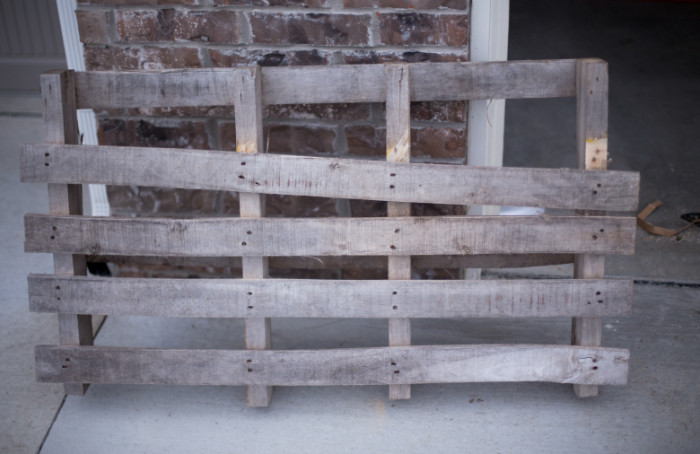
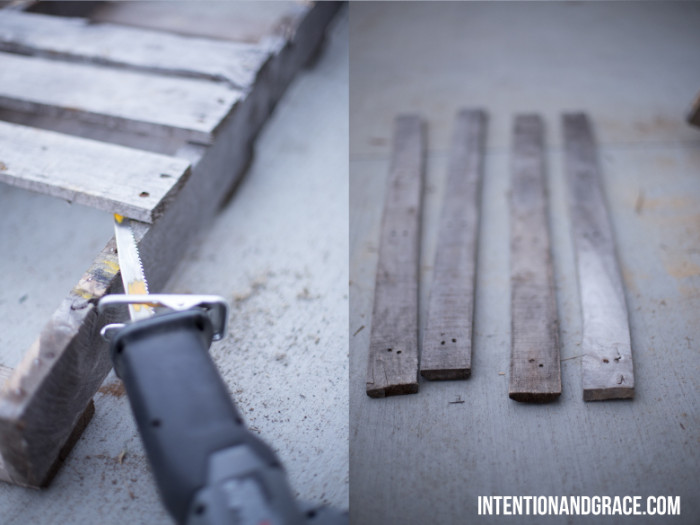
This is what he was doing while I was inside wondering: 1. He wanted to keep the rustic integrity of the wood by keeping the original nails, so he used a jig saw to saw the pieces off their base cutting the nails right in half. He was then left with several planks to work with.
2.He then laid them out on the ground face down, and used two extra pieces to support the structure on either side. By only using two of these it made it incredibly light, yet sturdy. He simply screwed the pieces together on each plank and voila! He had a solid piece to set up on our mantel.
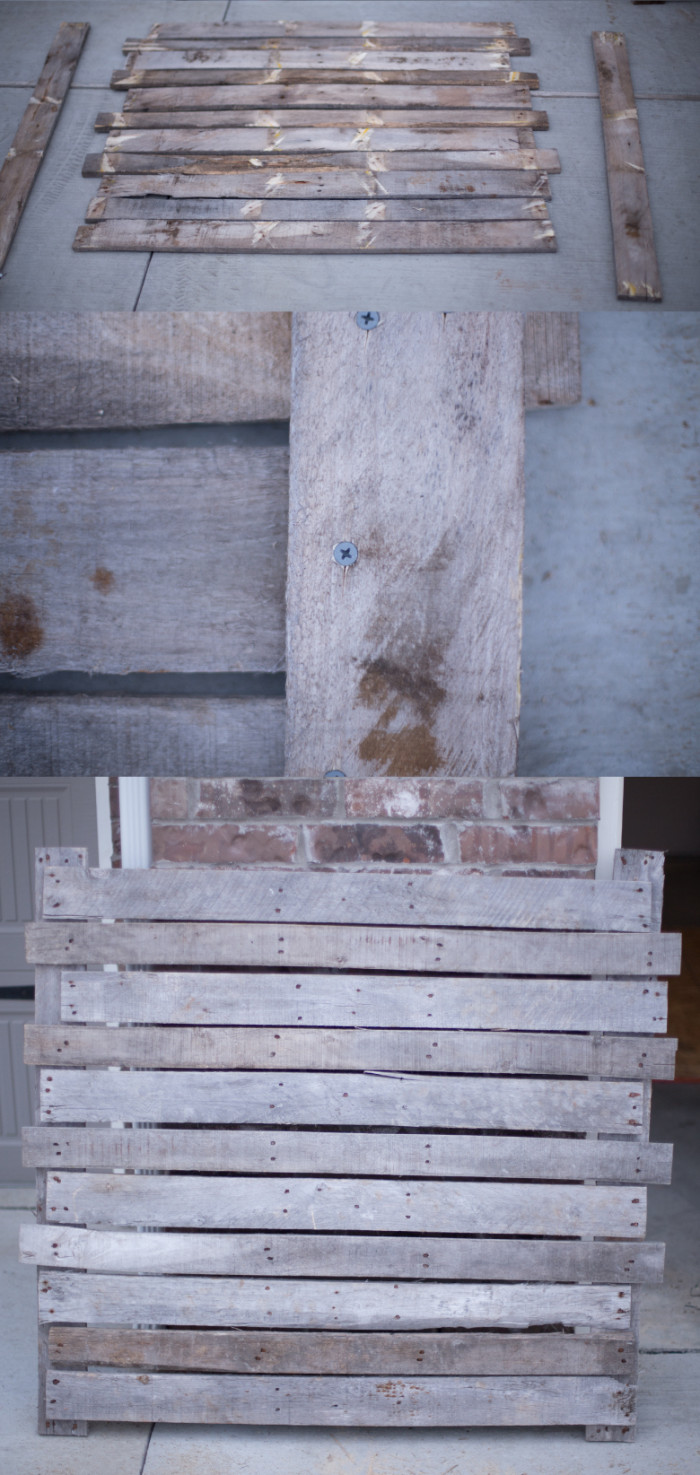
At this point I thought, oh cute! I can hang a wreath from that, or some ornaments, but he wasn’t done…
3. He had a strand of 50 lights, so he used 50 pieces of tape to mark out what he wanted on the pallet to make sure it was spaced correctly and would appear clearly as a letter once it was complete.
4. He then used a spade bit with a diameter the same size as the bulbs that he was going to use on the pallet. Scoring them on the front first, so they didn’t split the wood, and then turning the pallet to the backside to finish the whole all the way through. He made 50 clean cuts in about 10 minutes.
5. After that, the fun part, feed the bulbs through the holes following the shape from one end to the other and plug them in!
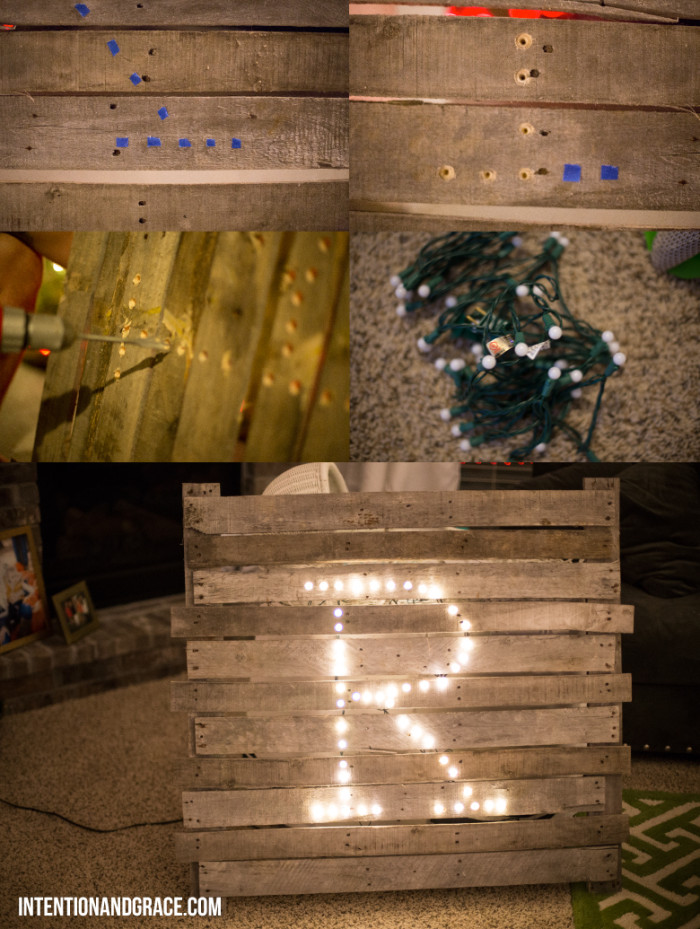
We intended to staple the cord down on the back side, but were out of staples for our stapler, and we were too excited to wait, so we went ahead and hung it on the mantel. You can’t even see the cords behind the sign and I love the way it looks. It lights up our mantel and fits in with our rustic little theme this year. It was such a simple project, and could be used all year long as a headboard, or accent in a bedroom or any other room.
Thanks babe for being such a crafty and handy man! I love it!


1 Comment
This is so cute!!! You two are so crafty!