DIY Taxidermy deer bust

I first saw these amazing cardboard deer busts when I was working on my sons Woodland themed bedroom last winter. But coming in at $45, they were a little steep for me, especially for several pieces of cardboard. But finally I found this amazing DIY with much fewer pieces, AND it utilized foam core, rather than cardboard, which I thought seemed a little cleaner looking, and would be easier to cut.
I wasn’t a huge fan of the shape of the antlers, and wanted something a bit more streamlined and simplistic for my home, so I made my own Deer Head Template modeling after this one. I wanted to use the same size foam core through out, so I adjusted the slit sizes, and added a crest for the body to mount on.
Then it was time to get to work.
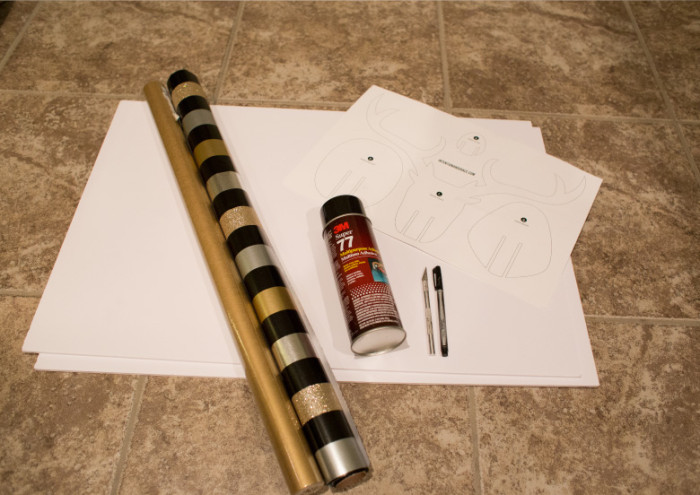
You will need two pieces of foam core, a can of spray mount (spray glue), a pen or scorer, an xacto knife, some wrapping paper or other material you want to cover your deer with, and the Template.
*Please note that my template is made to be printed on 12×18″ paper, which can be done very cheaply at places like office max, office depot, etc. Or you could select tile printing on your personal printer and assemble at home. :)
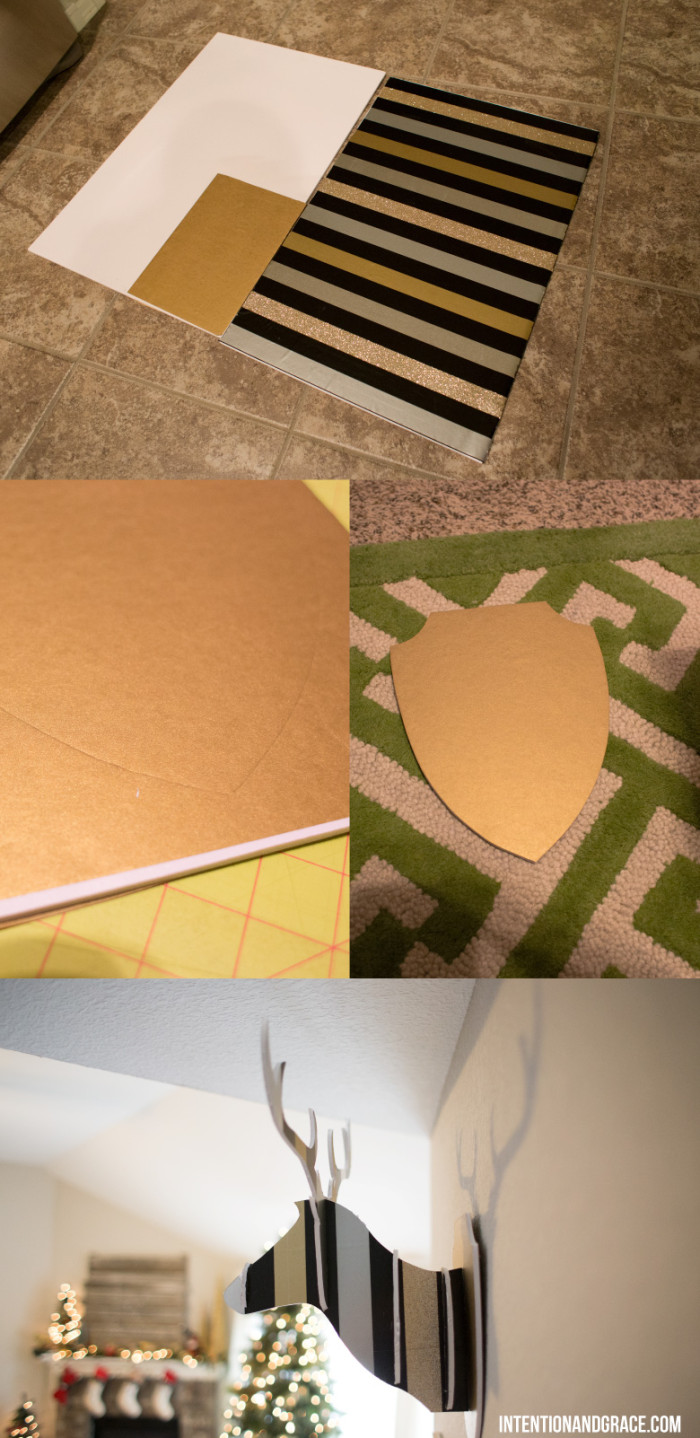
To start take your foam boards, wrapping paper and spray mount outside. I did mine in the garage since it is freezing outside right now. Spray your board down and press paper onto both sides. I only did a corner of my accent paper because I knew I would only need this for one piece.
Once your paper is attached to your board, you can begin tracing your template onto them. I found it best to lay it all out first to make sure they all fit like I wanted, keeping both neck pieces laid out similarly since they would mirror one another. If you have directional paper like I did, it is also important to make sure the pieces are all laid out with the paper going the same direction.
For tracing, you can use a pen if you like, but I found it more useful to use a scorer. You can find these at craft stores or online and they are my favorite for projects like these. But if you don’t have one handy, a mechanical pencil without the lead, or a long nail can do the trick for you as well. I preferred this method over the pen, because I anticipated that my trimming would not be exact and I didn’t want any pen marks to show.
Once you have all your pieces traced out, simply use an xacto knife to cut through them all. This will take some time. It took me around 30-40 minutes on my first one, but I eventually got much quicker at it. There are a few key points to remember: Always have a sharp blade and keep the blade vertical as you cut.
If you have not used an xacto before, its nothing to be afraid of. You just need to take it slow and steady and you should have no problem with this. The foam core is very smooth to cut through making it a fairly easy project. Its only the timing of it all that can be a bit tedious.
Once all of your pieces are cut out, its time to assemble them and hang!
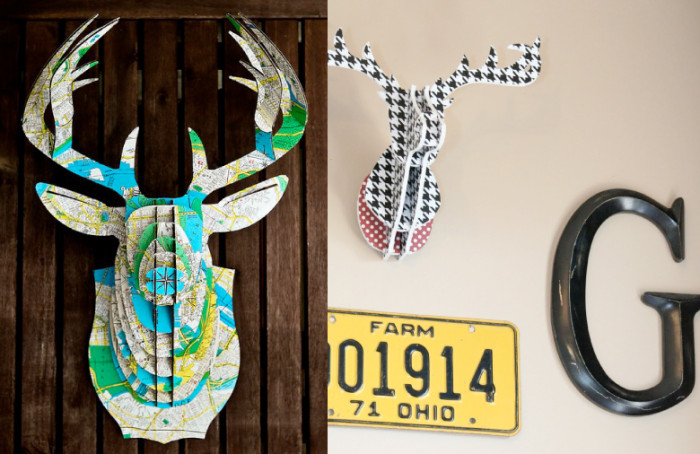
Although I am using ours as Christmas decor, these cute little guys can be used all over the house. I found these two that I am loving! I think they would be so cool in a child’s room, above a fireplace, or as an accent in an office space.
Comment
Categories DIY, Downloads, Holidays, Home