The $10 Cork Board
I really really don’t like clutter, so when I saw we were having quite a problem with no where to put invitations, bills, coupons etc. in our new house I knew something needed to be done. They were slowly taking over our beautiful new counter tops and our fridge is stainless and not magnetized so we were unable to utilize that space, which I actually kind of like because it keeps things looking clean and orderly.
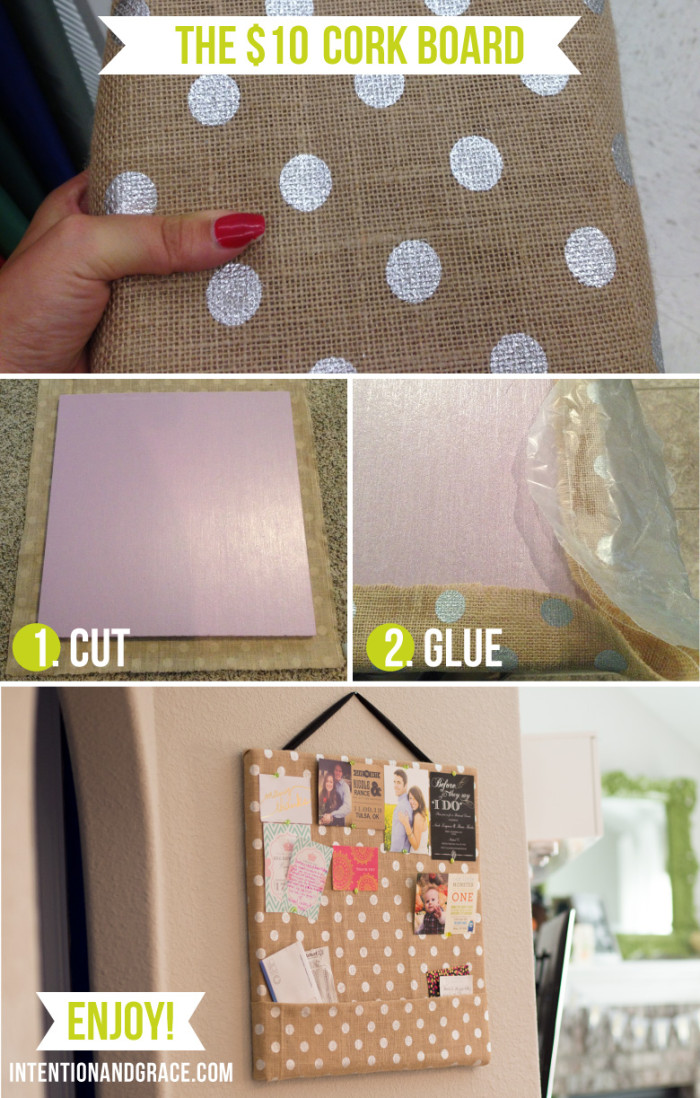
So, I found this super amazing fabric courtesy of my lovely neighbor, Jenny and immediately knew I had to use it in my home somewhere.
While shopping around Lowes for something to attach it to I came across these pre-cut insulation boards for about $6 a piece. They are about 2′ x 2′ squares which I knew would be the perfect size to fit on a spare wall in our kitchen/living room area.
They were so easy to make!
1.) Lay your fabric out flat on the floor, and place the board on top. cut the fabric around the edges living enough to overlap on the back side of the boar about 1-2 inches.
2.) I then used hot glue to attach my fabric all the way around the board. Because I was using such a porous fabric as burlap. I wanted to make sure it was really well engrained so it would hold secure. I used wax paper to press down the hot glue, not only saving my fingers from a sticky hot mess, but making a smooth glue backing to hold the fabric tightly. The wax paper allows you to press down with a towel or other material as well, saving your from burning yourself, which I usually tend to do while using the hot glue gun for any project… I started by gluing the center of each side down, to make sure the fabric was stretched evenly and well across the board, then worked my way towards the corners.
The best part about this, is you could be as messy as you want on the back side, but as long as the fabric is pulled tightly across the front, no one will see. ;)
Once you have glued it all the way around, you can add a piece of ribbon to the top to hang, and you’re done!
I added a pocket on mine to slide bills into as they come. That way my husband could easily see when they have arrived, and they are always in a place that is easily accessible. To do so, I added another strip of fabric to the bottom, gluing all the way around same as before.
The final product has been hanging in our house for about two months now and I love it! We have taken things on and off regularly and had no problems at all. It is especially great this time of year as we receive Christmas cards, giving us a very easy place to hang them as they arrive, so we can enjoy them all season long. :)
Hope you enjoy!
16 Comments
16 Comments
Where did you find that amazing fabric???
Angie, it’s from JoAnn’s! I hope you can find more. When I was there they had silver, gold, and red. :)
Absolutely love this post! Saw your pin on pinterest and got inspired to make something similar. Since your post was an inspiration I put this post’s link in my blog post and gave you credit. Here is my post if you want to see what i did! http://www.theadventuresofabayheadgirl.com/blog/diy-burlap-cork-board
How did you do the pockets? They are great. Love the idea.