Fancy Storage Wraps DIY
Although my son Maddax has been off of formula for a while now, I still had some containers sitting around the house. I have been trying to figure out how I could use them. Hoarder much? Then about a week ago, I got so sick of my ugly old nail polish container ruining our newly decorated master bedroom aesthetic I knew I had to change it up a bit. Enter genius idea #1: just wrap it with some adorable wrapping paper, duh!
It went from baby pink middle school weirdness, to a much more chic and modern box to store all my favorite colors in. And it only took about 5 minutes to do!

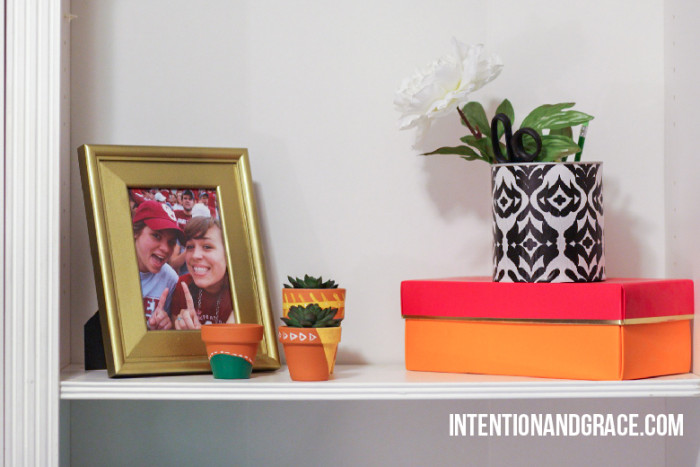
I immediately knew I had to use this technique in other areas around our home. Enter genius idea #2: wrap some old formula containers. Not only are they a great size for storage, but they have lids. So, if I did want to store something perishable like nuts, cereal, or flour, I could easily do so. And they are also cute enough I could just keep them on the shelf as simple office supply storage.
So here is how I did it:
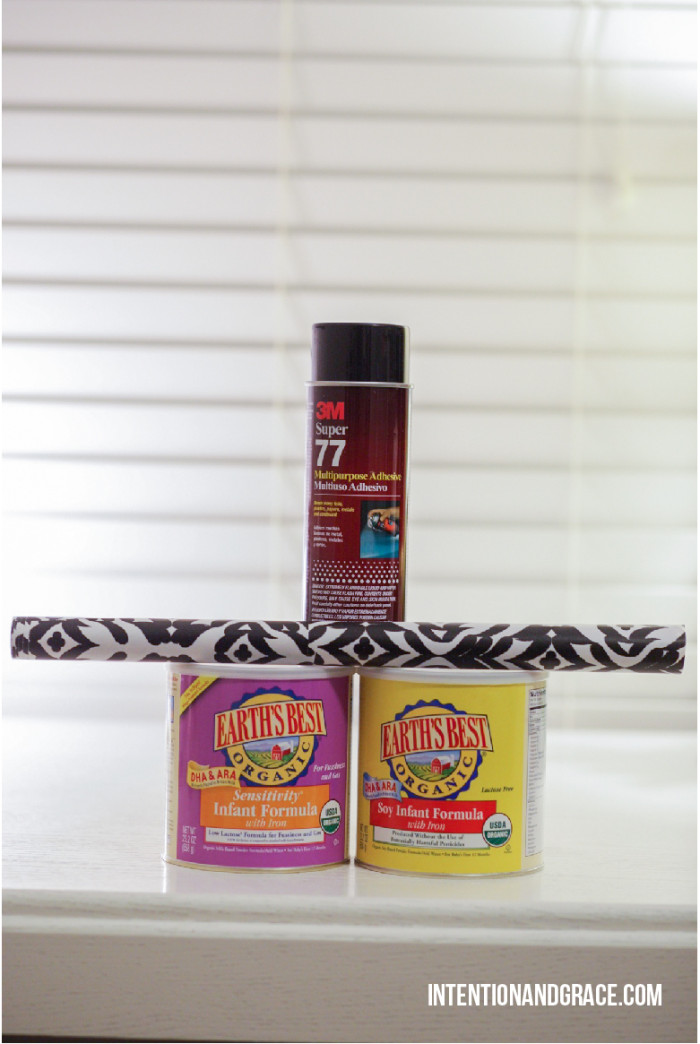
You will need:
1. Some easy containers to wrap. Round or square it shouldn’t matter. You can find some photo storage boxes at any local craft store (I got 5 for $2 each) or online. They come in tons of colors and would be very easy to cover.
2. Some cute wrapping paper. I love the ones in the $1 shop at Target. They are usually thinner than more expensive papers making them easier to work with. Plus, they generally have some pretty trendy and cute patterns to work from.
3. Spray mount glue. I love Super 77, but there are all kinds of multi-purpose adhesives out there to choose from.
Also, a piece of cardboard for the spray area and a pair of scissors would be helpful.
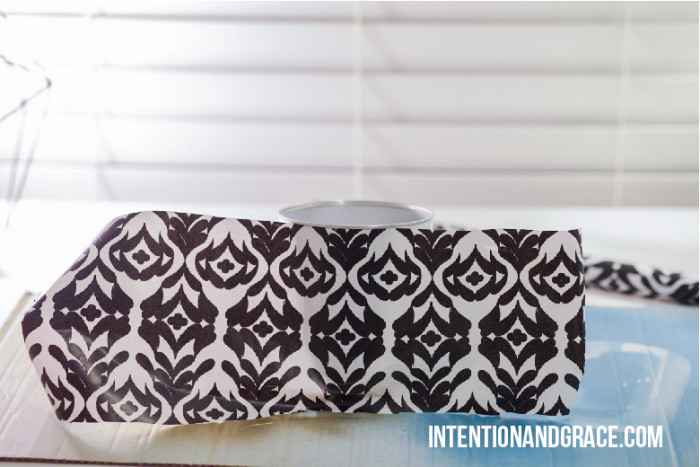
First, I took off the wrapping from my containers so they had a clean surface.
Then I very roughly cut the paper to the height and circumference of my container. This doesn’t have to be perfect at all, you won’t notice the cut edge as long as one edge is clean.
Then I sprayed the center of my paper so I could work my way around towards the seams. I don’t recommend spraying too heavy so if you need to adjust the paper it gives you a little give to pull off and reapply. Align the clean edge toward the top of the container so it aligns with the top or lip of the bin and wrap around the remainder of the container, spraying as you go.
Once you have everything placed as you want turn it over and wrap the edges onto the bottom of the container. You can cut them if you prefer but I think cutting out a circular shape can be tricky and I wanted my edges to look as clean and crisp as possible.
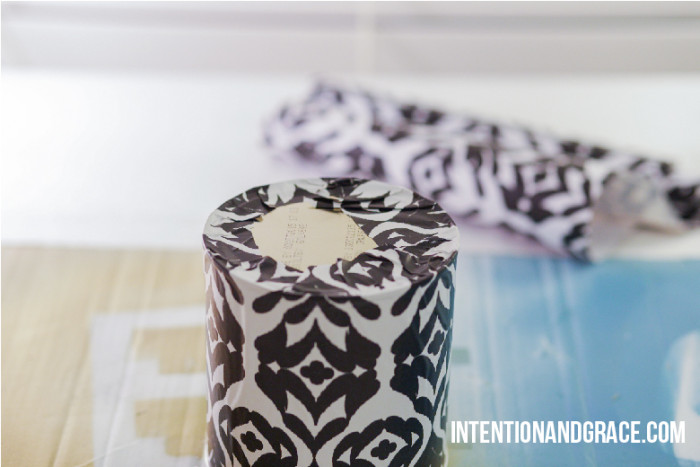
And viola! You’re done. And you have some adorable containers to show for your 5 minutes of hard work.

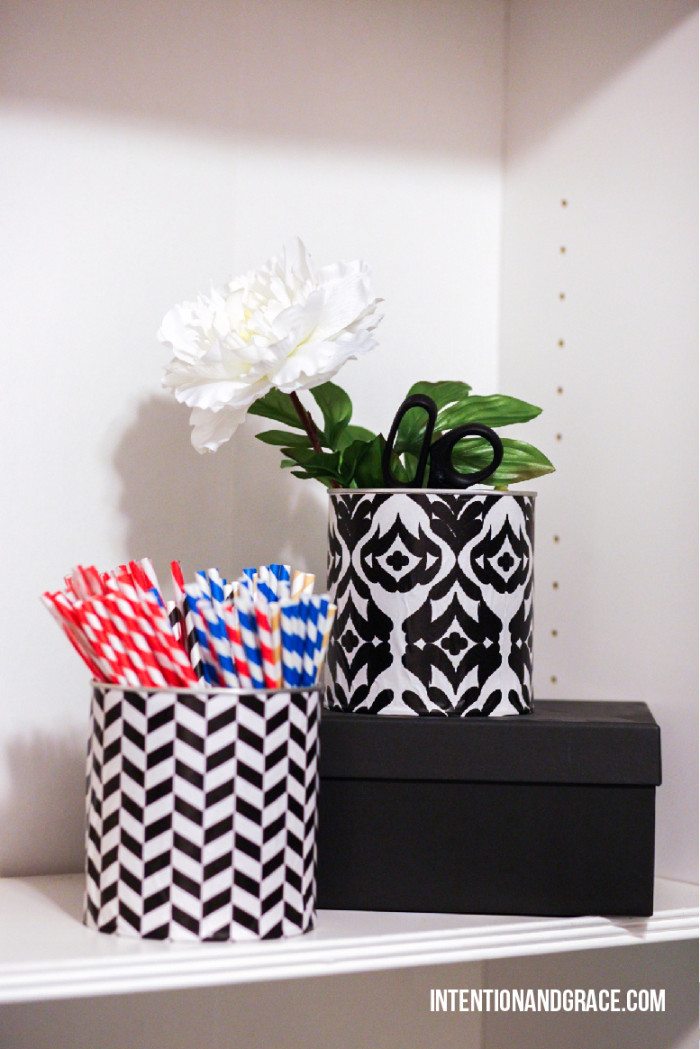
Stick them in a pantry to fancy it up a bit, or in an office space like show below, but either way they will be a practically free, one of a kind container to use all around the house. How will you use your cute containers?
Categories DIY
2 Comments
Cute! I saved a bunch for awhile but finally threw them out cuz they were just taking up space and I really had no plans for them :) you could spray paint the lids lime green or gold for an extra special touch!
Lacy,
How did I not think of that! These kids will be sprayed any day now! Fantastic idea! :)