DIY Pendant Lighting
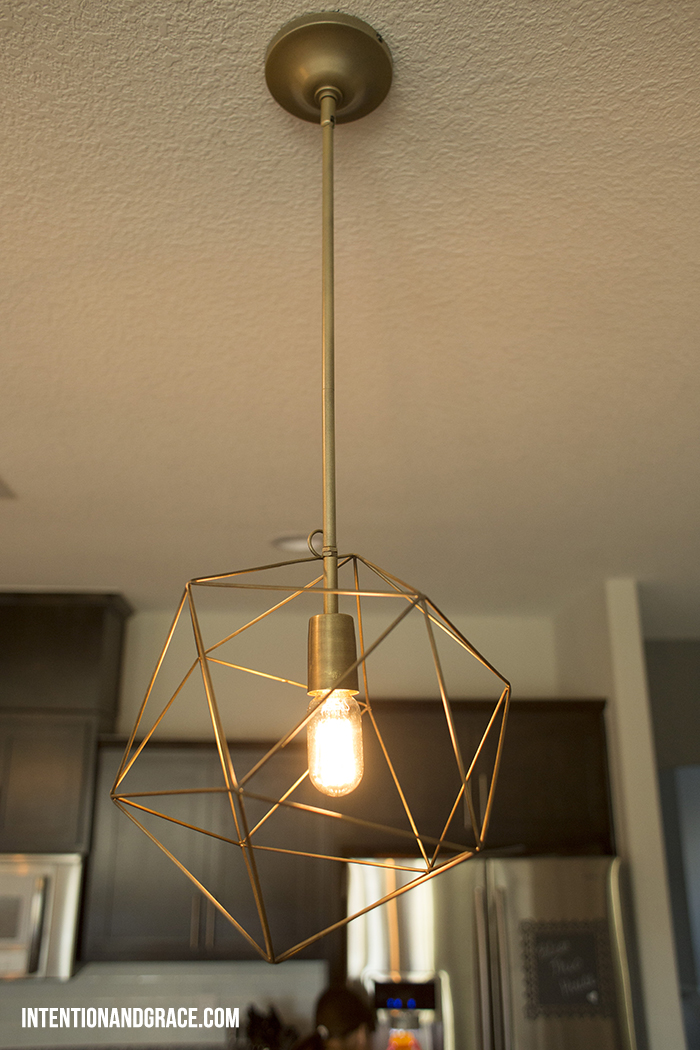
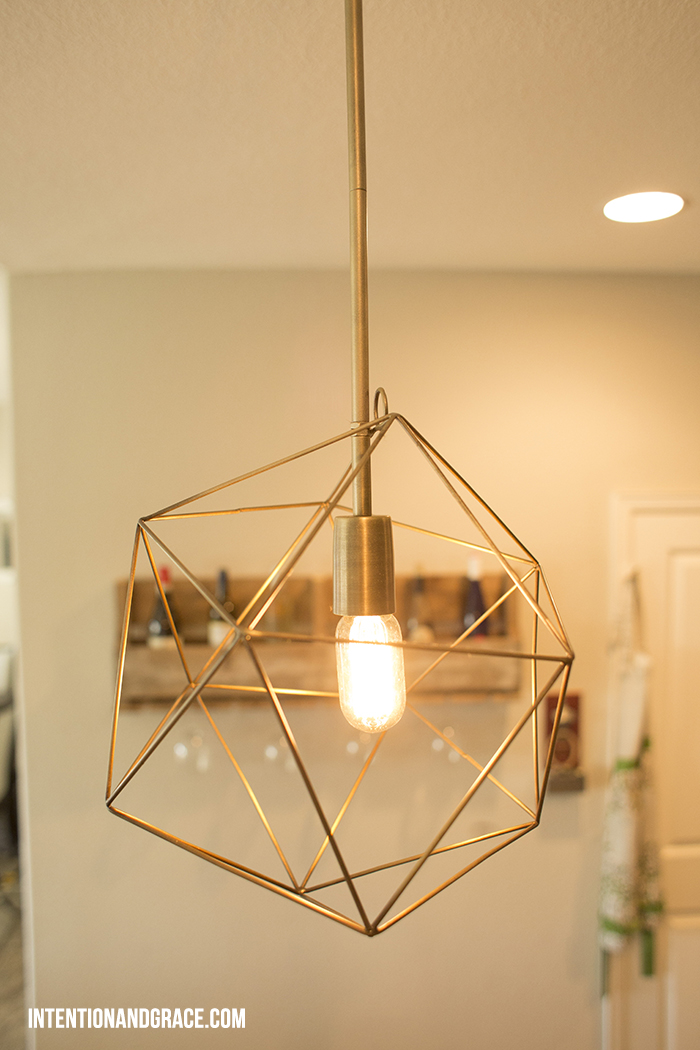
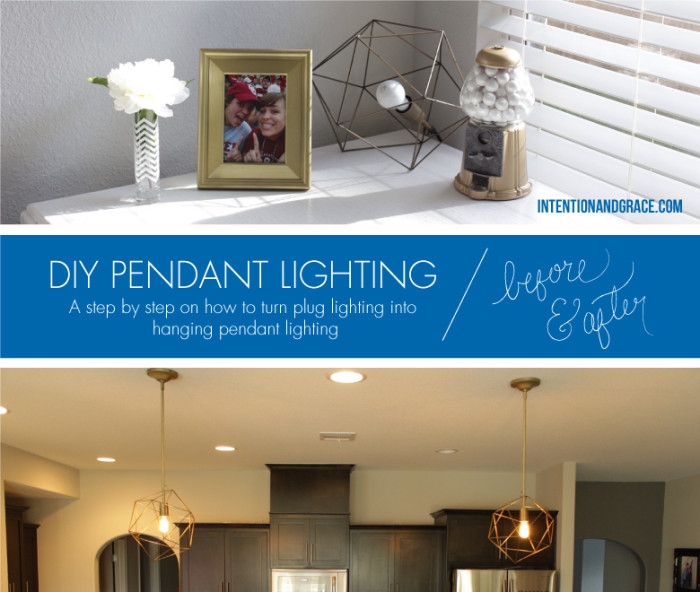 I had seen these amazing pendant lights on Pinterest months ago, but at nearly $800 each there was no way those were going to fit in our budget. Then a bit later I came across these from West Elm and fell in love with their style, but I wasn’t thrilled with their spotted glass style. So when I saw these geo desk lamps on Urban Outfitters for only $69, I knew they would work perfectly for what we wanted in our kitchen. Yay!
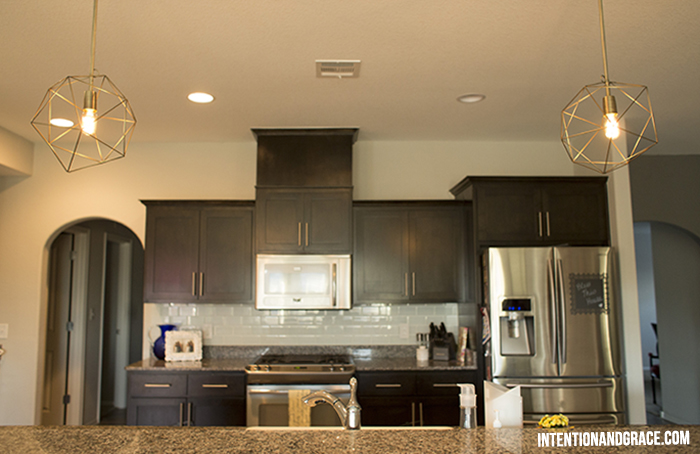
I’m sure you’ve seen them in my past posts here and here hanging out on my office desk, but we finally had time to put them up a couple of weeks ago and I could not be more thrilled with how they turned out!
This project could really be done with any plug-in hanging lights and it only took my amazing husband just over an hour total!
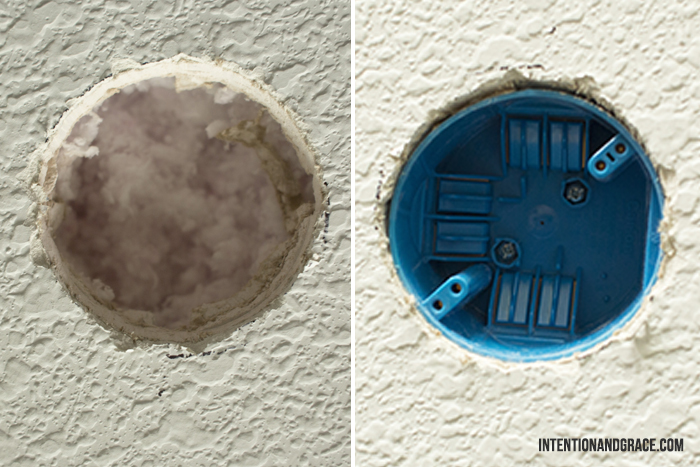
To do something like this in your home you’ll need a couple ceiling fan electrical boxes (we got ours at lowes for $2.72 each), wire cutters, a small saw, a sharpie/pencil, some wire ties, electrical wire, and string. We also purchased two pendant light conversion kits from lowes because I wanted something a bit more sturdy and professional in my kitchen than what was currently on the lights. They have several colors and styles to choose from and the were only $20 each.

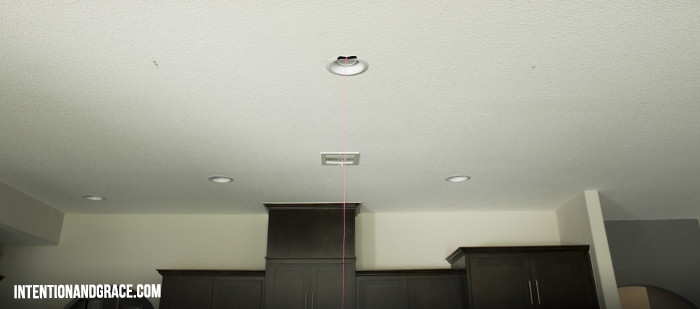
To start we hung string from our ceiling to get a better visual of where our center light was. Using a sharpie we marked the string at our desired height for the pendants to hang creating a visual guide of how low the new lights would hang. This guide also allowed us to view and measure where exactly we wanted our new lights to be installed. Measuring off our center light on both sides we marked the ceiling with a small black x and confirmed that all three lights would be in a straight line with one another.
Once the marking was done we simply traced the blue electrical box using a pencil and cut the holes in the ceiling. Once we made confirmed they were the perfect size for the fan boxes we went up into the attic and screwed the boxes into place.
Because our lights were being installed near an existing light the wiring was very simple, we just tapped off of the center can light and ran the wires through the electrical boxes.
NOTE: If you’re not confident in how to wire or change electrical wiring, please consult an electrician.
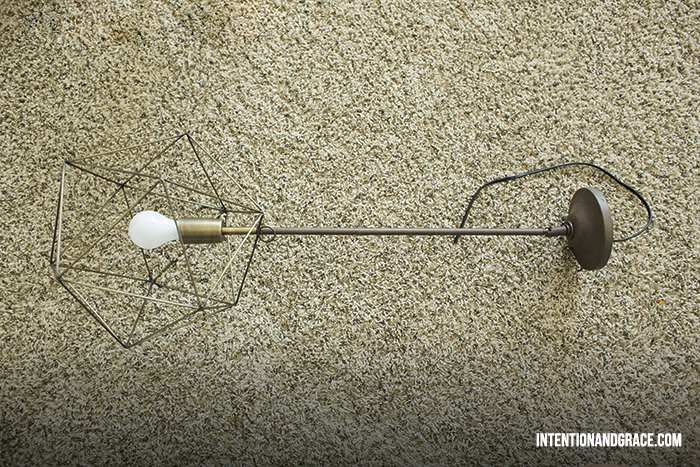
Now it was time to modify the existing lights. We cut the wiring below the switch on the desk lamps as shown below, making sure to leave a good amount of extra wire to work with. Then we took apart the pendant light kits we had purchased from Lowes, stripping them of their existing wiring leaving just the metal pipe.

Then it was time to run the lamp wire through the pendant light kits. Simply thread it up the pipe and through the end. We matched our pendant light kit as closely to the lamps as possible when we were purchasing them, but they weren’t the perfect match I was hoping for, so we took them outside and lightly dusted them with some extra gold spray paint. It worked perfectly!
Once the lights were wired into the fan boxes in the ceiling we simply screwed on the pendant bases and we were done! I could not believe how well they turned out for under $90 each! Not only are they one of a kind, but they are better in my opinion than the two I had previously found online. Saving hundreds of dollars doesn’t hurt either.
I hope you enjoyed this lil DIY from our house to yours. If you ever have any questions about your DIY project please don’t hesitate to ask!
Comment