Apr. 15, 2014
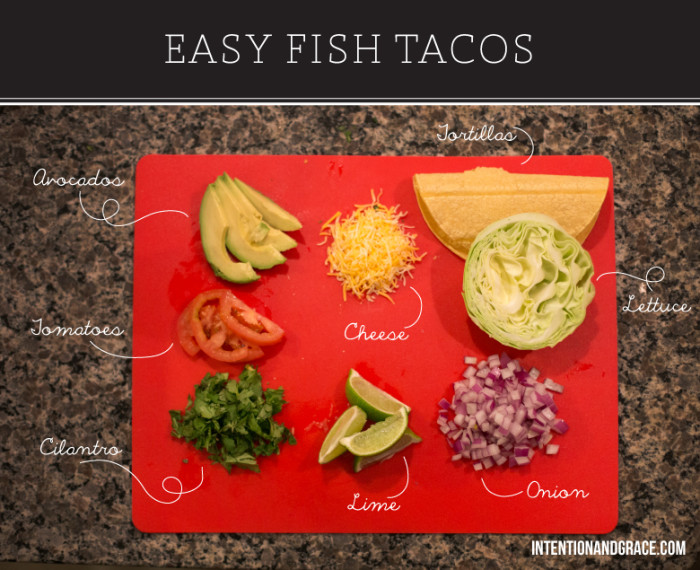
We love Mexican food at our house and are always looking for new easy recipes. This is a modified recipe we use on Salmon every couple of weeks and I love how it turned out on these delicious tacos.
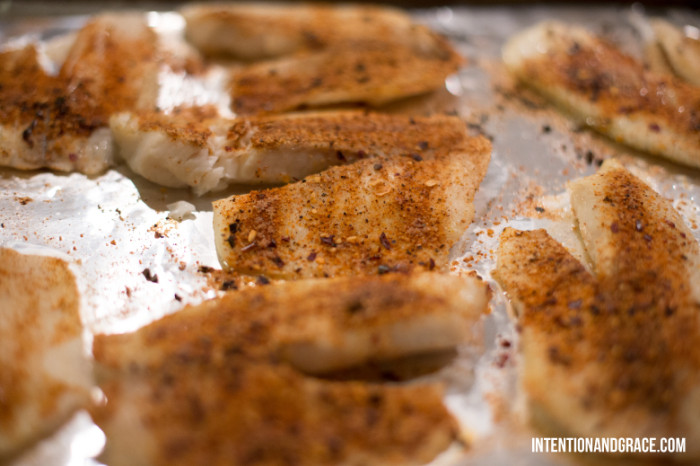
We used fresh Tilapia here for our fish. Fresh is the key here, I feel that previously frozen fish generally has a very fishy taste and I haven’t had very good luck with it.
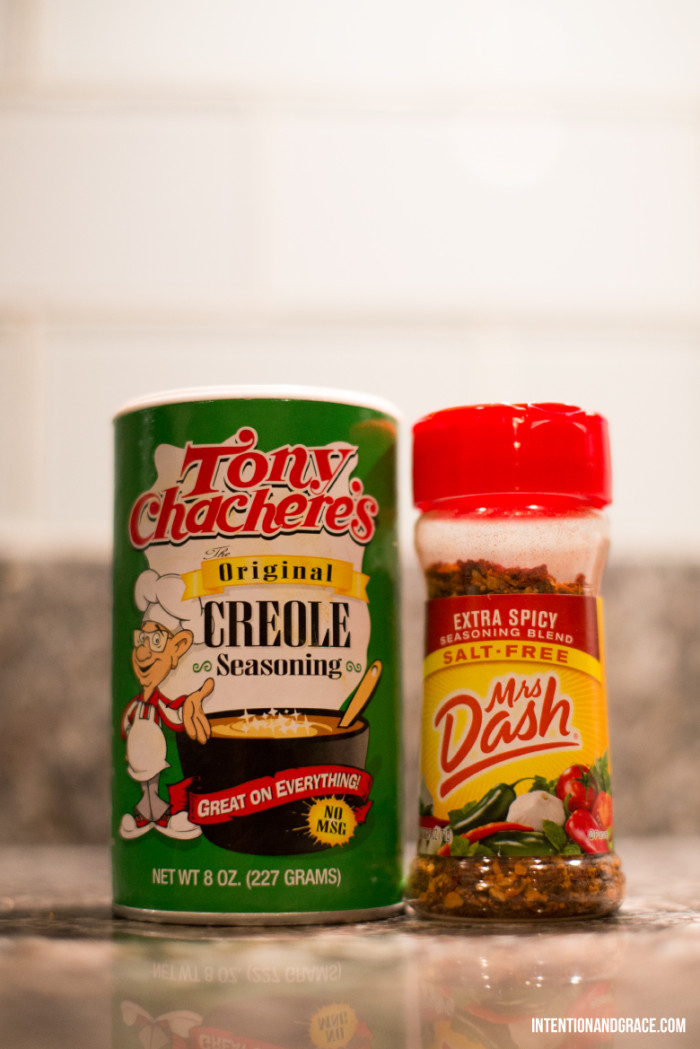
Simply place the filets on a foil lined baking sheet, sprinkle with some Creole Seasoning, and a squeeze of fresh lime juice and you’re good to go. We also included a little Mrs. Dash Extra Spicy because we love a little heat when we cook, but it’s completely optional if you prefer it non-spicy. We popped the pan in the oven and set it to broil and after about 5-10 minutes our fish was done. So easy! If you’re unsure if the fish is ready just pull apart a filet and make sure the fish is no longer translucent and cooked all the way through.
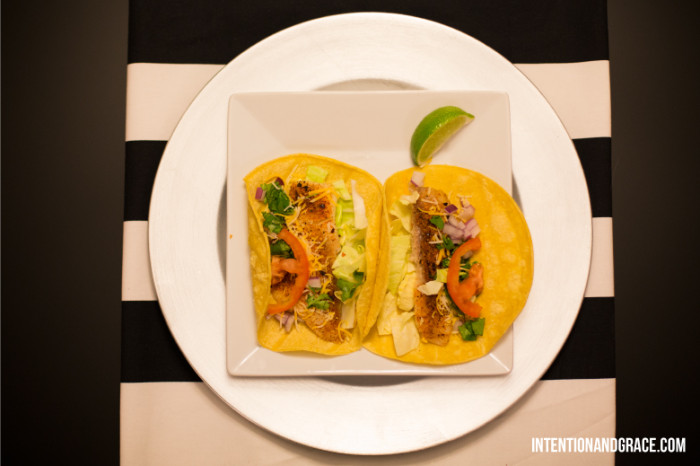
We layered our toppings onto some warmed corn tortillas, squeezed with an extra lime wedge and enjoyed.
I think the best part about these tacos is you could change them up by adding any toppings you want. Perhaps some cabbage, chopped jalapeños, and feta cheese is more your thing. These would be delicious so many ways.

Apr. 11, 2014
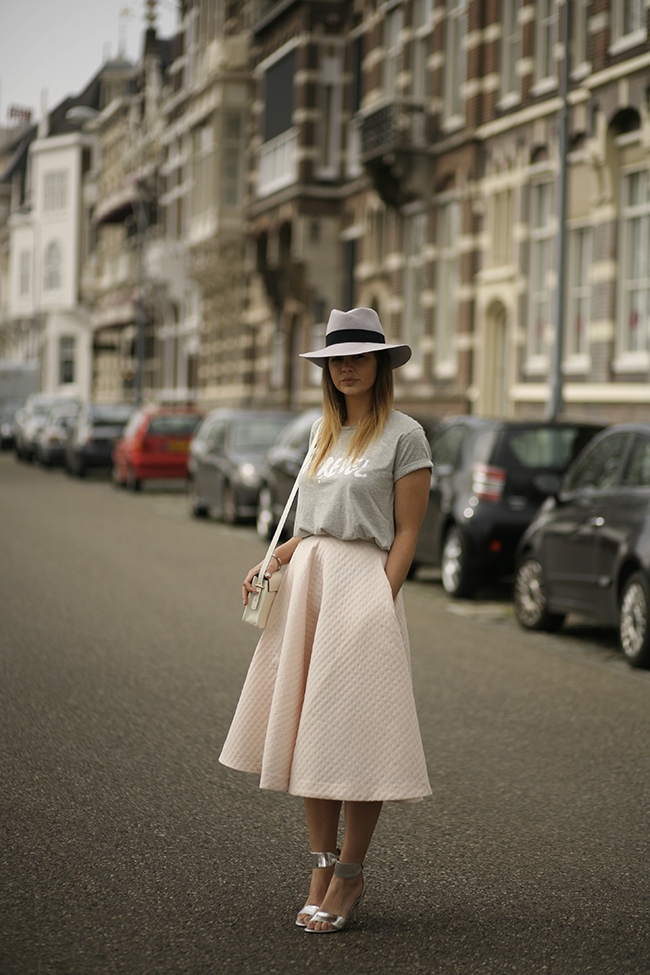
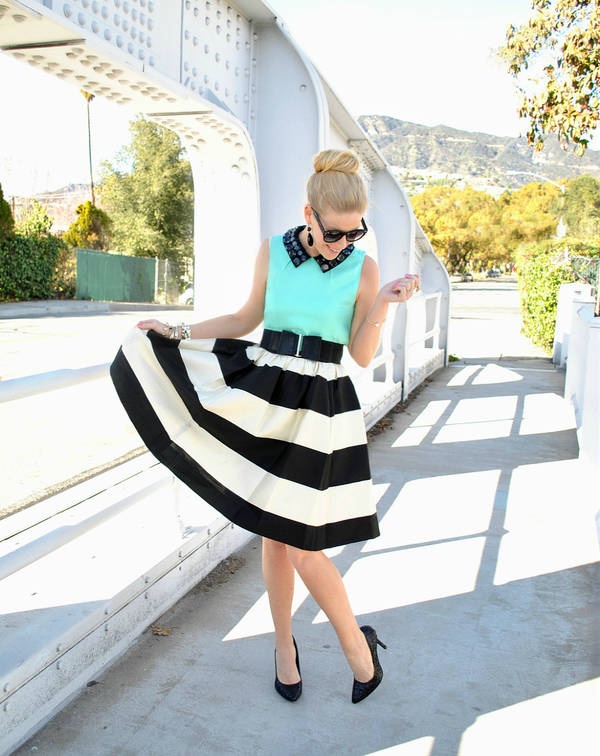
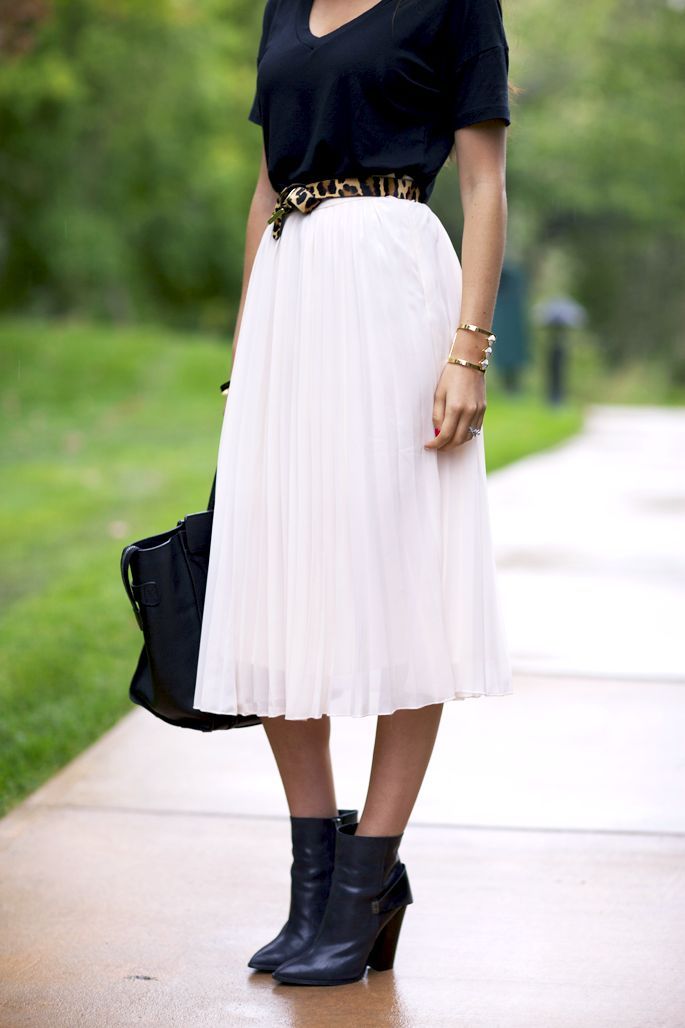
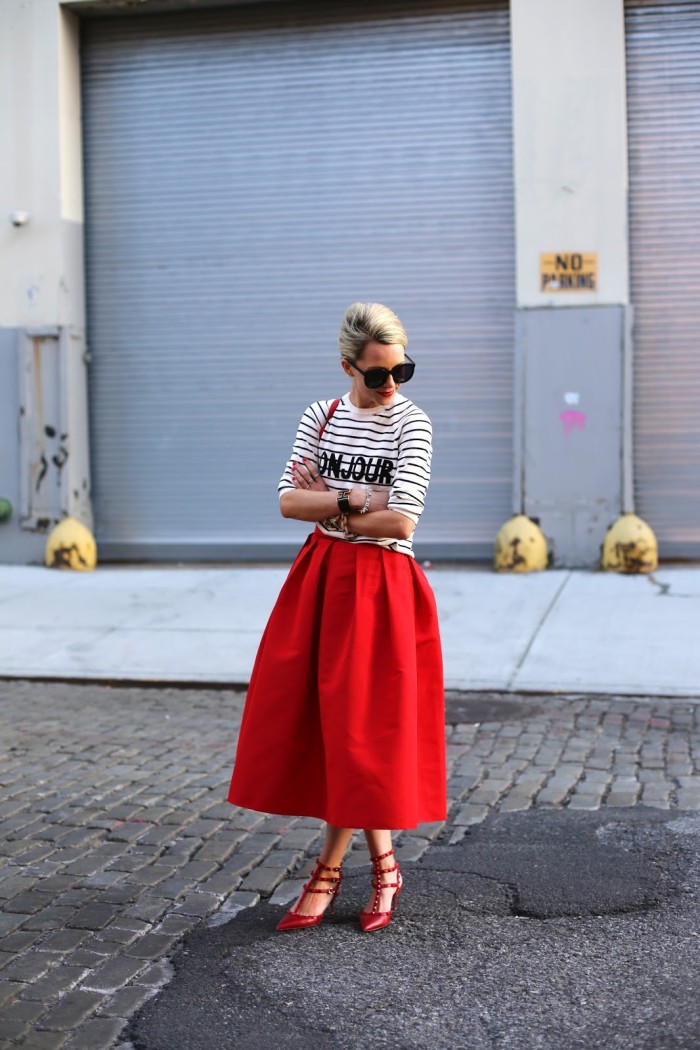
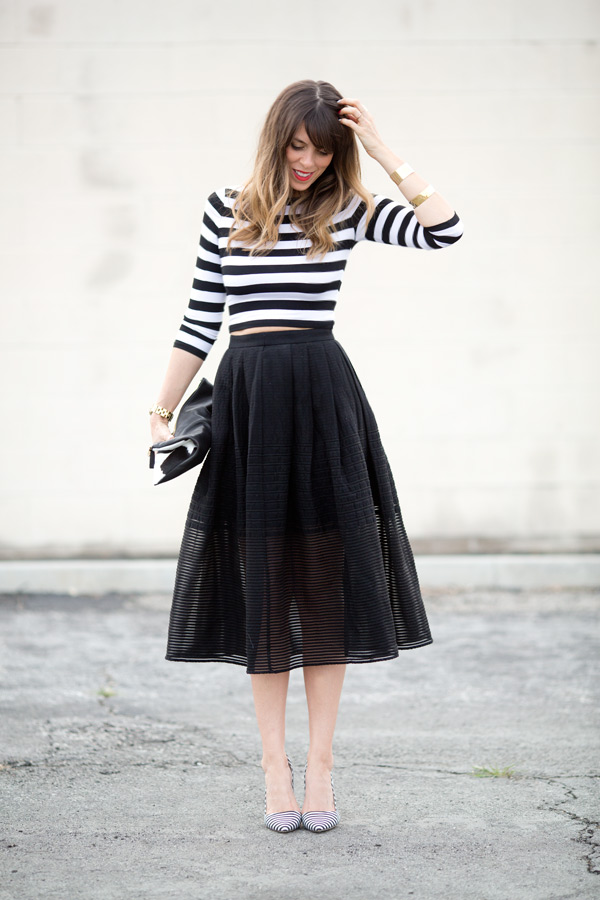
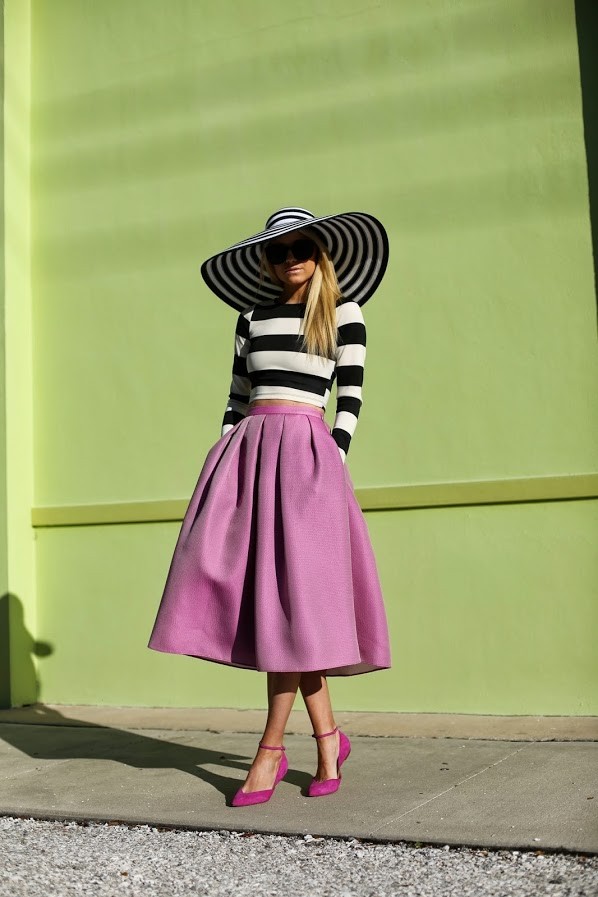
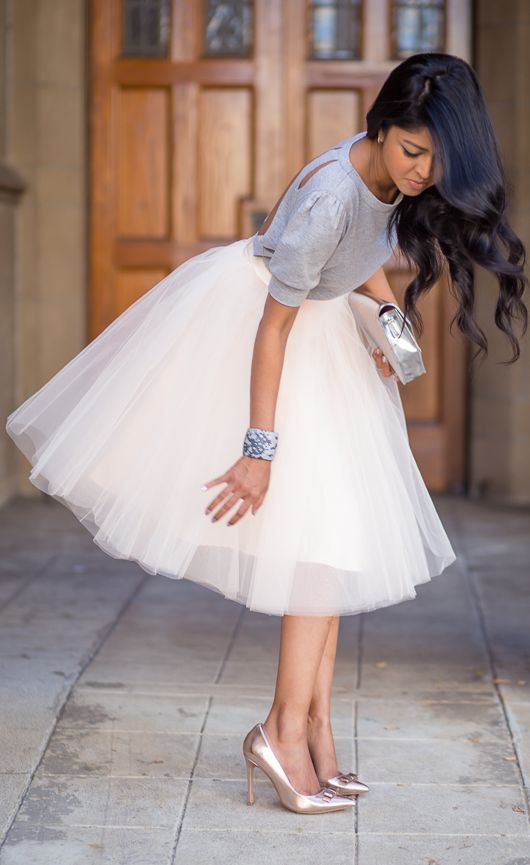
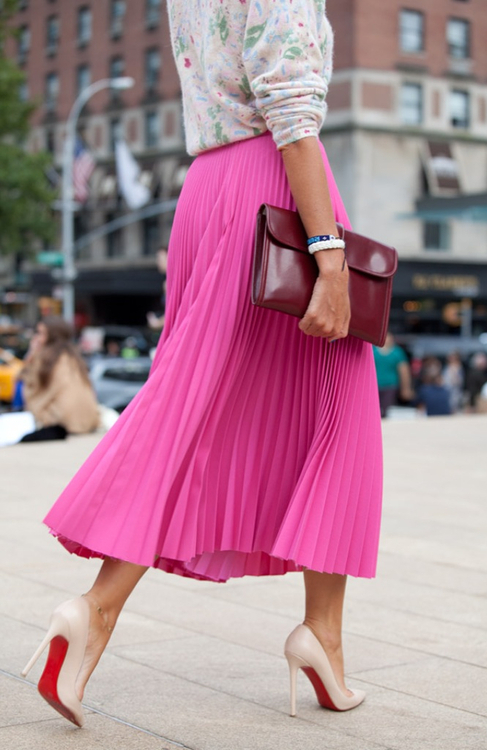
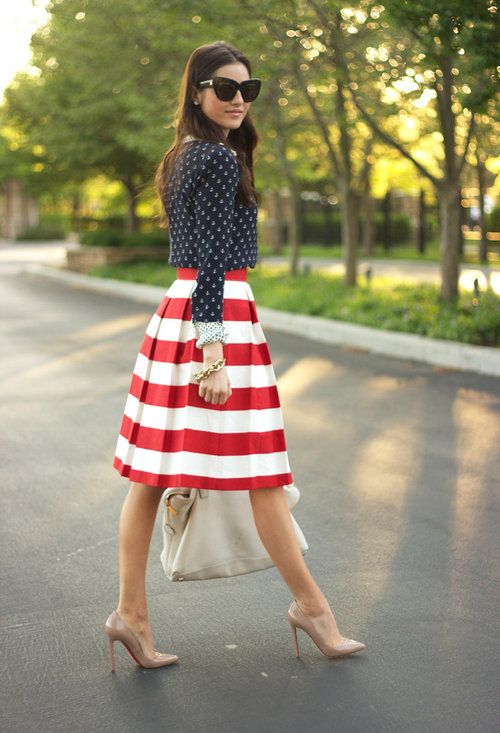
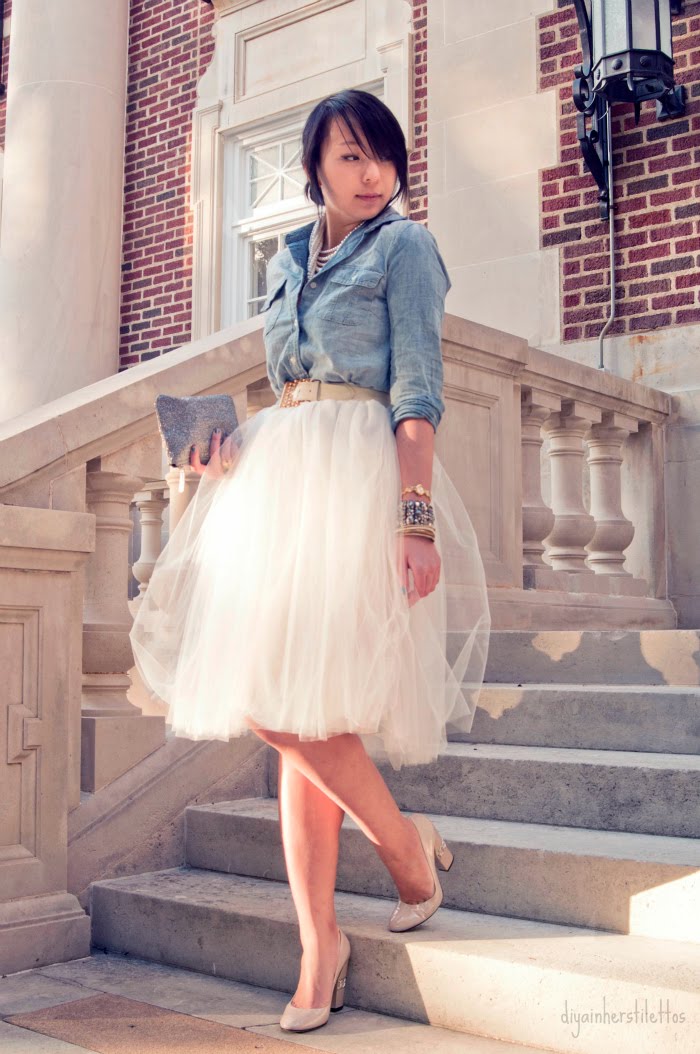
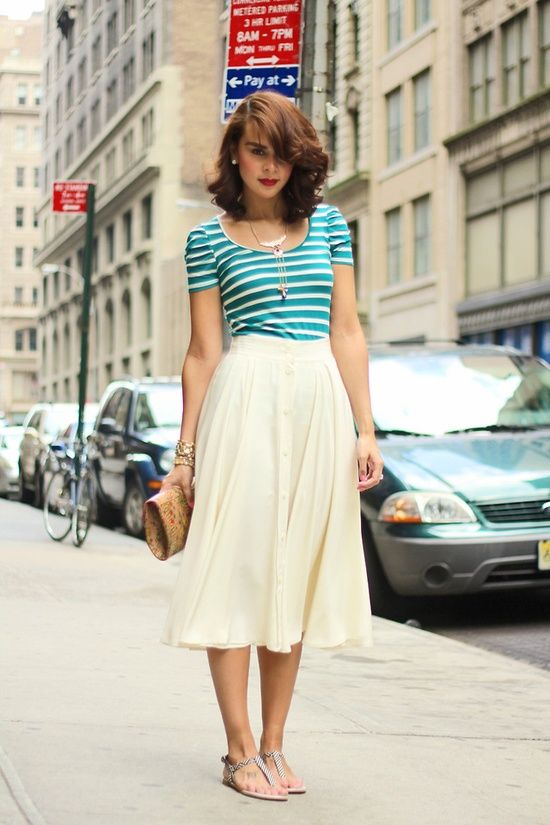
Last spring and summer the Maxi and Hi-lo were everywhere. Skirt or dress, it didn’t matter. It was (and still is) adorable, easy, and comfortable all around. But for 2014 I’ve got my eye on something new. The Midi Skirt. These half-calf or right below the knee girls are all rocking mid-length skirts with fashion and flirt, while still remaining modest and chic. These are not your grandmothers skirts anymore. My favorite ways I’ve seen them are of course with stripes or tulle, I just love the juxtaposition of something so dressy and flirty with a simple tucked in t-shirt or casual top. I can’t wait to find myself one of these adorable skirts, I know they will be a statement and asset to my wardrobe. What are your thoughts on the Midi? Love it? Hate it? Which look is your favorite?

Source
Source

Source
Source
Source
Source
Source
Source
Source
Source
Source
source
source
Apr. 8, 2014
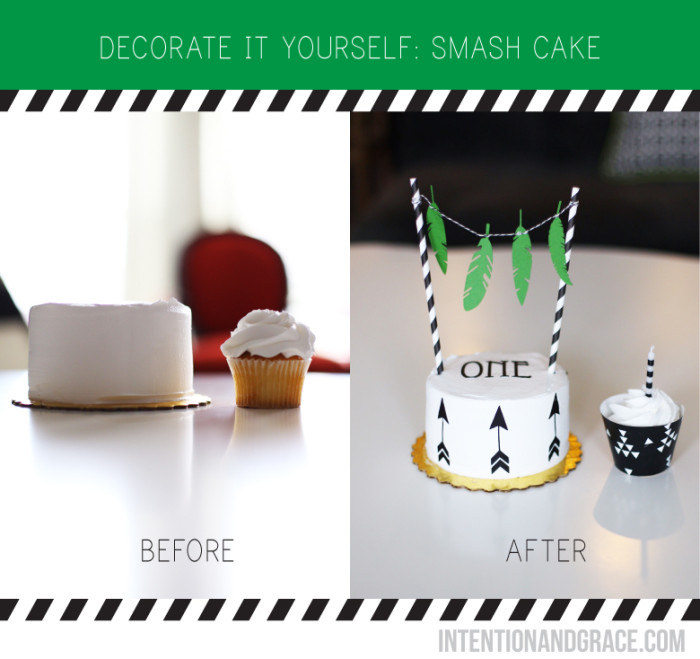
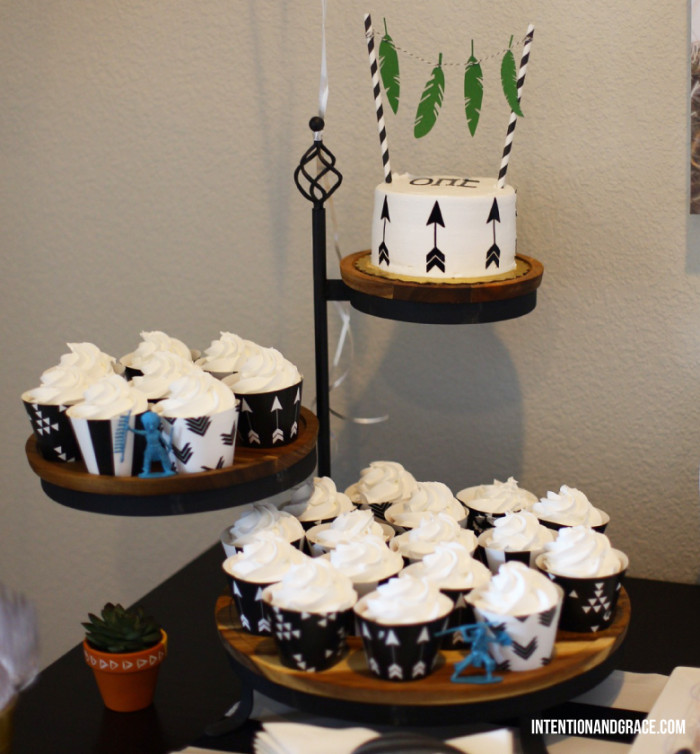
Continuing my post from Friday today I have our cake DIY. This simple Decorate it Yourself can be done on any size or shape cake to take it from plain to fab in just a few minutes.
Our son turned one at the end of March and although I knew I would not have time to bake his first birthday cake, I did find the simplest way to have a custom decorated cake for only $10.
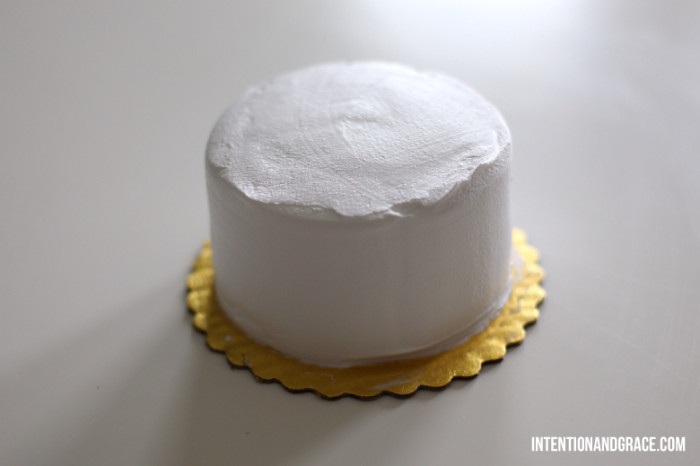
This cake was purchased from our favorite local bakery and cost a whopping $5! I told the baker I wanted one layer of white cake and one of chocolate with whip cream frosting and no decoration including border icing. We also got a couple dozen cupcakes in simple white floral frosting for guests to enjoy. I had originally planned on getting a sheet of fondant from our local craft store, but when I saw that one sheet was over $10 I was immediately reluctant. Fortunately, hanging right below the fondant was black sugar paper for only $2.40 with my 40% off Hobby Lobby coupon from the HobLob app. I was a bit concerned this would turn out looking cheap, turn my child’s mouth and teeth purple or be impossible for him to eat, but it turned out to be much nicer than I could have imagined and I loved working with it.
The edible paper came with a plastic backing on it, making it extremely easy to work with. I had originally planned on simply cutting triangle shapes to create a geometric pattern on the cake similar to this beauty. But when I saw how easy the material was to work with I decided to use my Silhouette Cutter to cut custom shapes out instead. If you too have a Silhouette cutter I set mine to the heavy card stock setting and it cut just fine. But for those of you who don’t have a Silhouette, using a simple ruler and pizza cutter could add some adorable stripes or a grab a simple shape die cut to punch out some shapes that fit your theme. Martha Stewart makes several, especially adorable border die cutters for a bit more fancy or girly cake theme. It’s that simple! You can have a custom cake in minutes for only a few bucks.
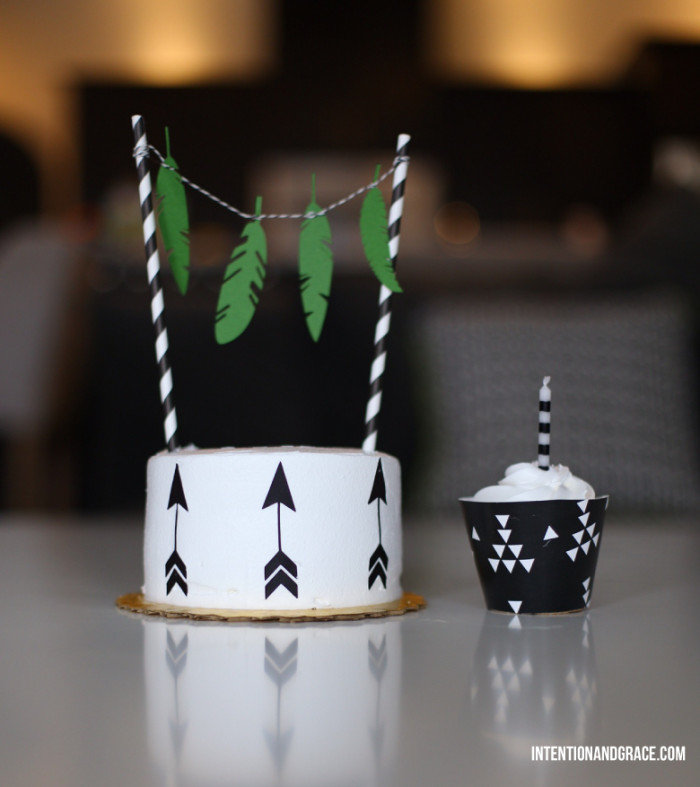
For the cake topper, I simply tied some twine around two straws that I got in a pack of 12 in the dollar section at Michaels with some die cuts from the scrapbook section.
And the cupcake wrappers were simple as could be also! I used this template and some printed card stock to make mine. Or you could pick out your favorite scrapbook card stocks to match your theme and cut or if you simply search “Cupcake Wrapper Printable” on Pinterest, hundreds of designs come up that you could print, cut and use.
I love how everything turned out and it was so special for me that I could have a part in making Maddax his first cake. Even if he won’t remember it. :)
Apr. 4, 2014
Update: To purchase aspects of this theme, please visit my Etsy Shop!
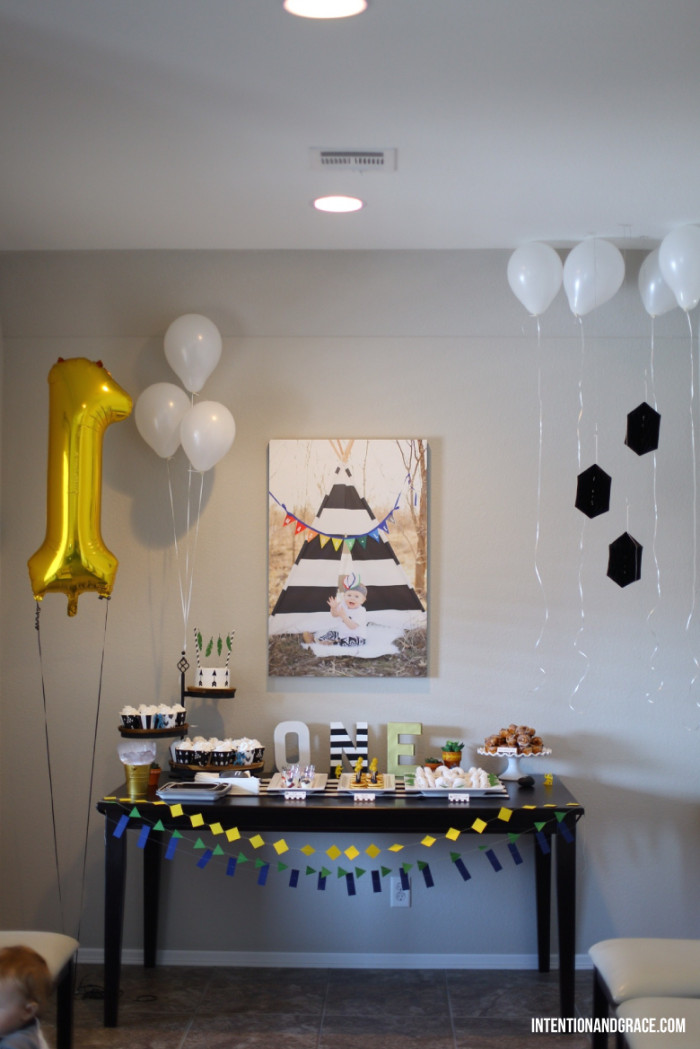
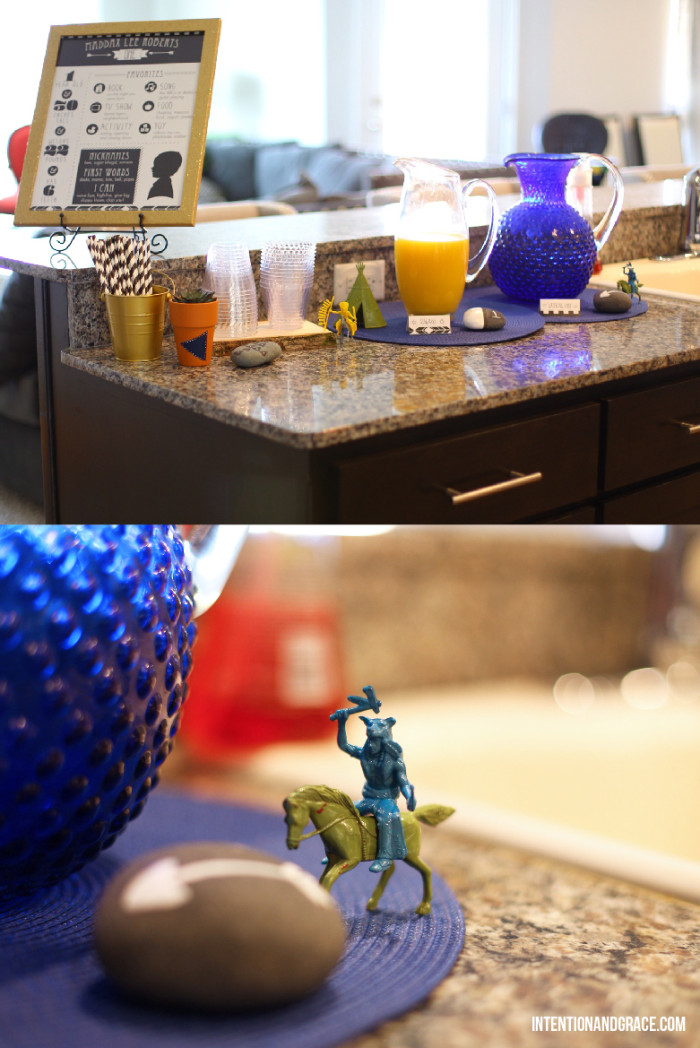
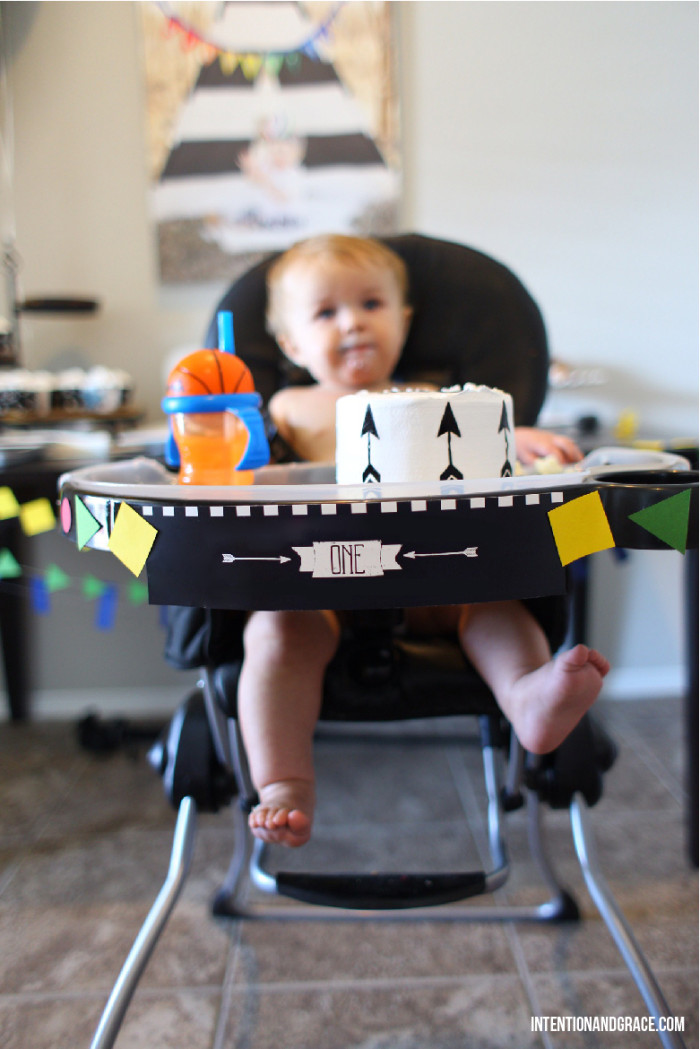
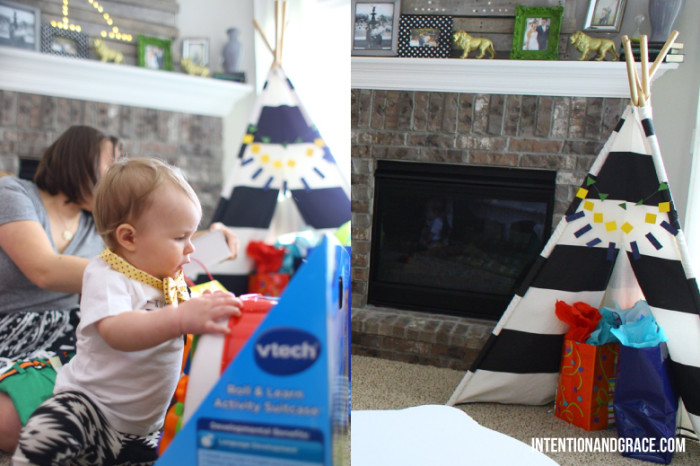
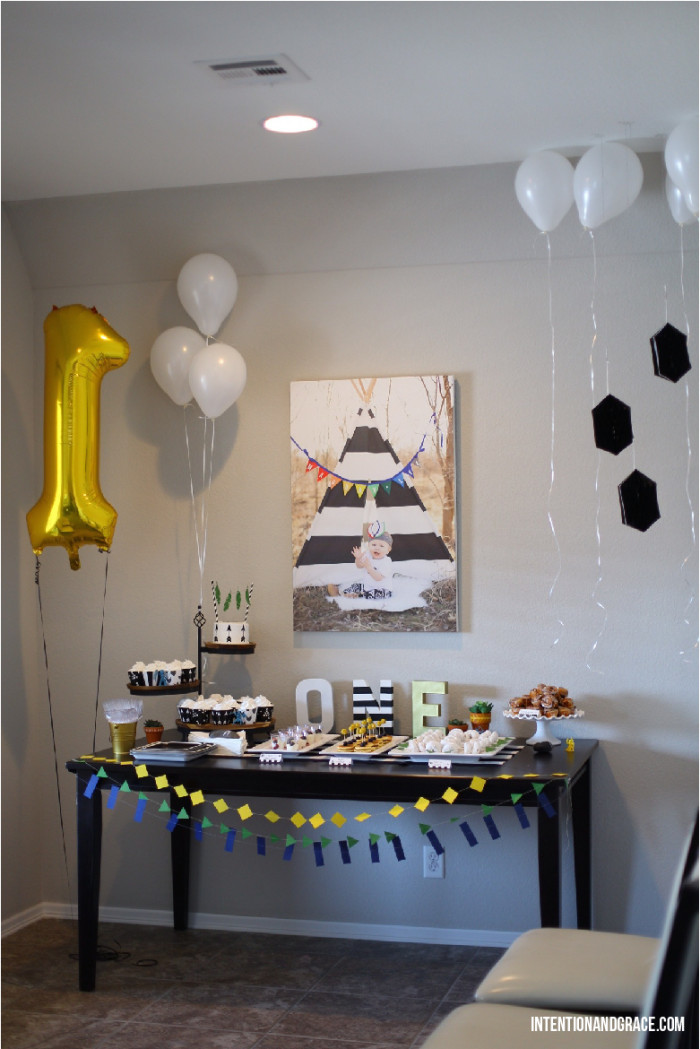
Our son turned one last Saturday and I wanted to share some photos from his Powwow themed first birthday party. I can not believe how fast one year can go! I know it is said all the time, but until you have a child of your own it is impossible to fully understand. I used to think first birthday parties were generally overdone considering the kids won’t remember them. But as the time neared to begin planning, I had so much love for this little guy that my craftiness and party-planning spirit was just bursting at the seams. So did I over do it? Maybe. But for me, it was so worth it.
To start our decor off we flipped our dining table around and pushed it against a wall to display the food in a festive and open way. This gave our guests a bit more room to grab a bite and chit chat when they arrived.
“Sun-rays” (orange juice) and water from the “Watering Hole” were served with some hors d’oeuvres style breakfast items.
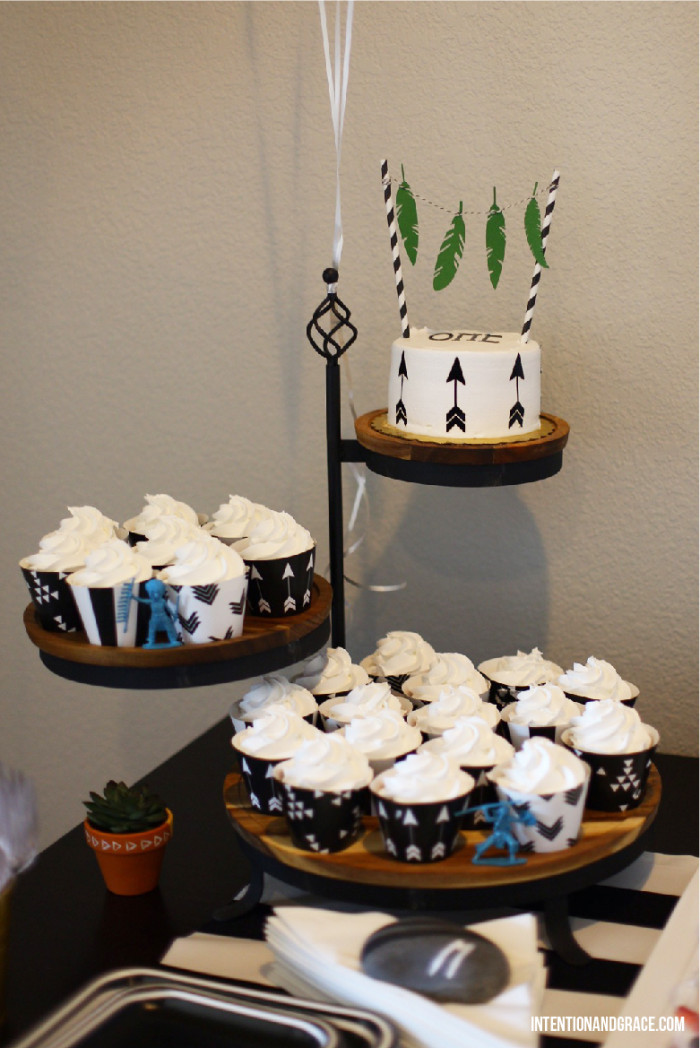
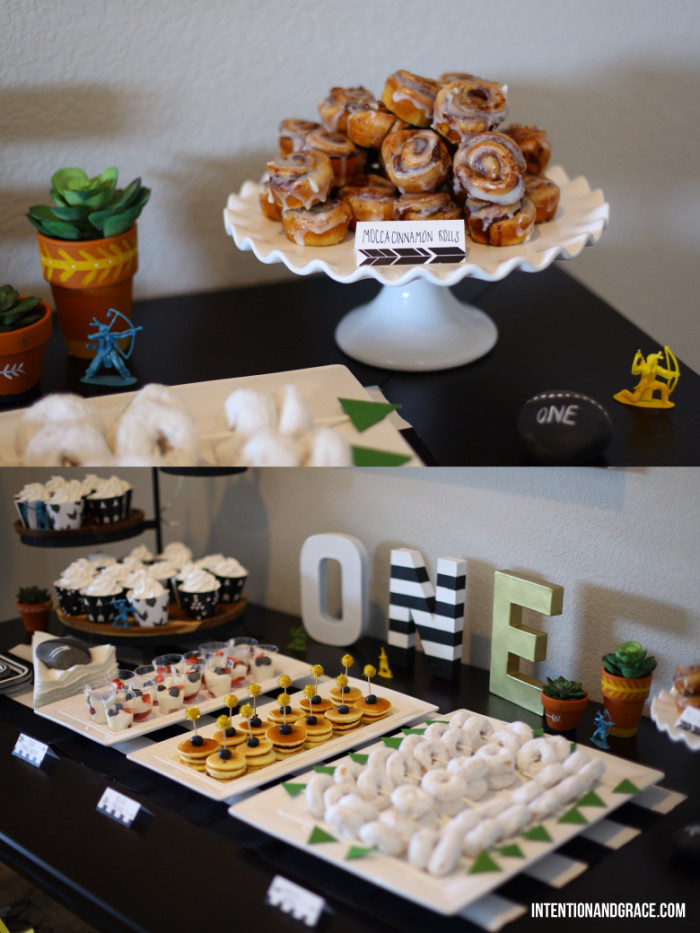
Maddax loves breakfast food so I knew I wanted to have a brunch style spread while also keeping it simple and easy, so we themed the spread around that using bite sized minis that the kids could also enjoy nibbling on. There were Mocca-Cinnamon Rolls, Yogurt Straight Shooters, Powwow Pancakes, and Powdered Arrows served along side some yummy cupcakes, juice and water. There was very little prep time for me so I could focus on making the presentation a bit more fun and I love how it all turned out!
We pulled out our beautiful striped teepee from this kiddos bedroom and utilized it as the designated gift area until it was time to open presents.
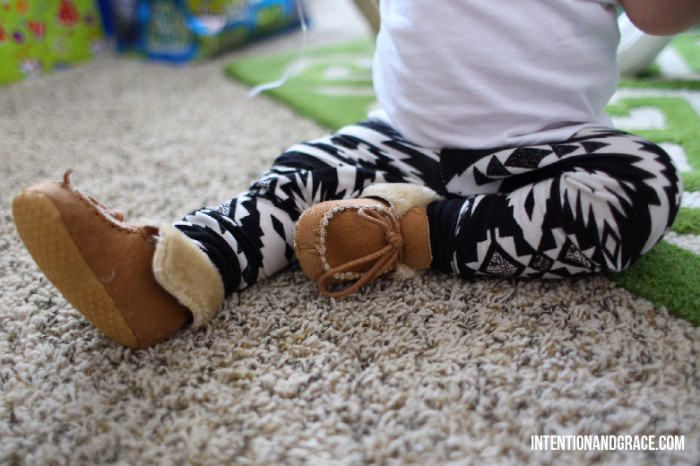
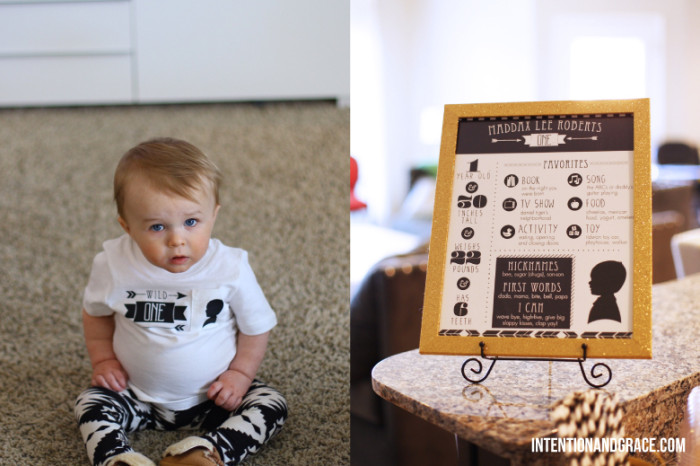
I got the most amazing leggings on Etsy and some Moccs on GroopDealz last fall that fit his birthday theme perfectly. For his shirt I used my Silhouette Cameo cutter (love!) to create a custom design and ironed it onto a white pocked t-shirt from Target. His little silhouette just fills me with joy.
We also framed a little infographic full of all things Maddax. His age, height, weight, and number of teeth. Favorite books, TV show, activity, song, food and toy. As well as his current nicknames, first words and some of the things he learned to do this year.
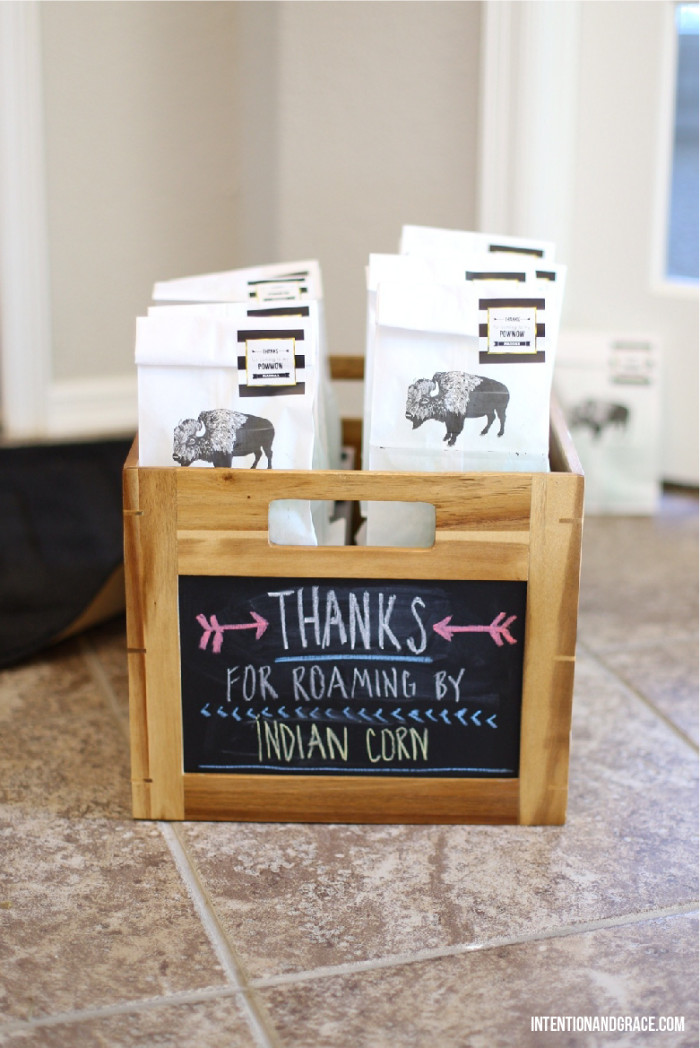
On the way out there were little goodie bags with “Indian Corn” (flavored popcorn) for guests to grab as they left. These were simple white paper lunch bags that I ran through the printer and printed buffalos on and sealed with some cute little stickers I got on sale for $5 online.
Our sweet little family was just overjoyed to celebrate the big O-N-E with so many of our loved ones. Thanks to all our friends and family for their love and support as we took on our first year of parenthood. We couldn’t feel more blessed or loved.

Apr. 2, 2014
Easter is just around the corner and has always been one of our families most celebrated holidays. Every year I can not wait to dye easter eggs and transform our home into a spring like atmosphere with tulips and bright colors all around. We are always trying to find new fun ways to decorate eggs, and these are just a few of my favorite ideas around the web this week:
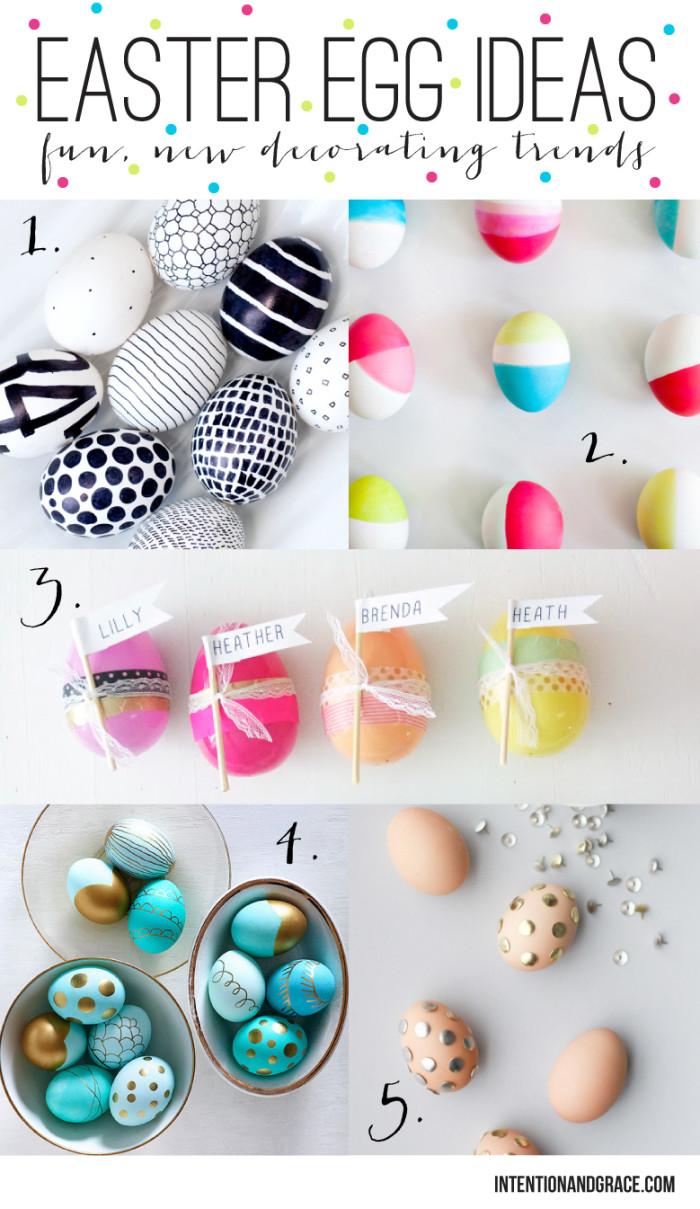
1. These adorable easter eggs from Obviously Sweet are so carefree and cute! And they don’t even require dying! Just grab a sharpie pen and doodle away.
2. Neon is so in right now! I’ve been seeing it everywhere lately and I love the super bright pop of color these awesome easter eggs from Oh Joy can bring to a room, while still keeping it clean and simple. The white gives the neon breathing room and simplicity, just my style.
3. With several rolls of washi tape hanging around our home, I jumped on an opportunity to use them on easter eggs. These plastic easter eggs from Oh My Little Dears wrapped with washi and ribbon are so cute for Sunday brunch place cards. They would also be a very easy project with the kids, no dye involved. ;)
4. Gold! We all know I love it, and these easter eggs from Better Homes had my heart at first glance. Simply dye some eggs a solid color or even leave them white for a very simple approach and grab a metallic sharpie pen. If you’re feeling adventurous you could even tape off a design or two and use it as a stencil.
5. I just couldn’t leave out these easter eggs from Paper & Stitch, they are genius! In no time you can take your hard boiled eggs from plain to fab with just a hand full of tacks!

