Dec. 15, 2013
Since this is our first year with an actual mantel, I decided to spice things up a bit and make my own stockings. Partially because I really enjoy sewing and crafting, but mostly because all of the stockings I liked were $30+ each and I didn’t want to spend that much money. I made all three of these for under $30, and have enough fabric left over for at least 3 more. :)
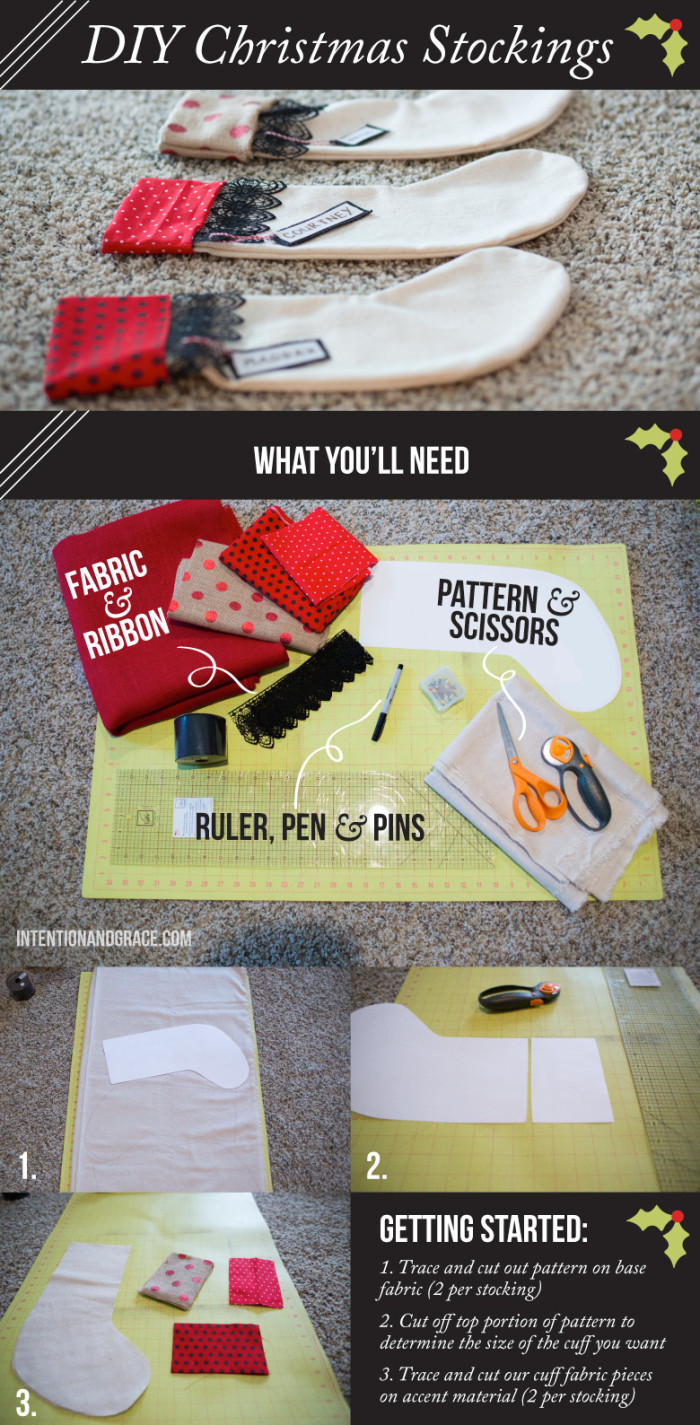
I will admit these were a bit more challenging than I had initially anticipated, but I love how they turned out and they are something I can feel proud of all season long.
To make your own, download the pattern here
You may also notice I kept my lil lion guys around for the holidays as well, you can see how they were made HERE. Merry Christmas.
Dec. 12, 2013
I really really don’t like clutter, so when I saw we were having quite a problem with no where to put invitations, bills, coupons etc. in our new house I knew something needed to be done. They were slowly taking over our beautiful new counter tops and our fridge is stainless and not magnetized so we were unable to utilize that space, which I actually kind of like because it keeps things looking clean and orderly.
So, I found this super amazing fabric courtesy of my lovely neighbor, Jenny and immediately knew I had to use it in my home somewhere.
While shopping around Lowes for something to attach it to I came across these pre-cut insulation boards for about $6 a piece. They are about 2′ x 2′ squares which I knew would be the perfect size to fit on a spare wall in our kitchen/living room area.
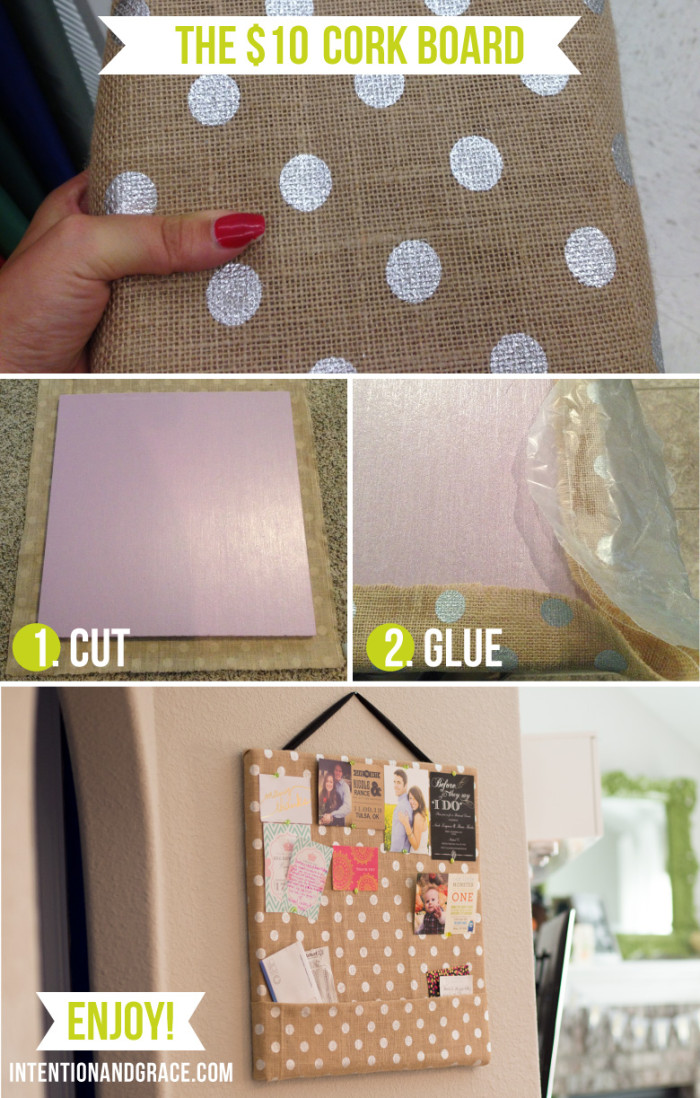
They were so easy to make!
1.) Lay your fabric out flat on the floor, and place the board on top. cut the fabric around the edges living enough to overlap on the back side of the boar about 1-2 inches.
2.) I then used hot glue to attach my fabric all the way around the board. Because I was using such a porous fabric as burlap. I wanted to make sure it was really well engrained so it would hold secure. I used wax paper to press down the hot glue, not only saving my fingers from a sticky hot mess, but making a smooth glue backing to hold the fabric tightly. The wax paper allows you to press down with a towel or other material as well, saving your from burning yourself, which I usually tend to do while using the hot glue gun for any project… I started by gluing the center of each side down, to make sure the fabric was stretched evenly and well across the board, then worked my way towards the corners.
The best part about this, is you could be as messy as you want on the back side, but as long as the fabric is pulled tightly across the front, no one will see. ;)
Once you have glued it all the way around, you can add a piece of ribbon to the top to hang, and you’re done!
I added a pocket on mine to slide bills into as they come. That way my husband could easily see when they have arrived, and they are always in a place that is easily accessible. To do so, I added another strip of fabric to the bottom, gluing all the way around same as before.
The final product has been hanging in our house for about two months now and I love it! We have taken things on and off regularly and had no problems at all. It is especially great this time of year as we receive Christmas cards, giving us a very easy place to hang them as they arrive, so we can enjoy them all season long. :)
Hope you enjoy!
Nov. 22, 2013
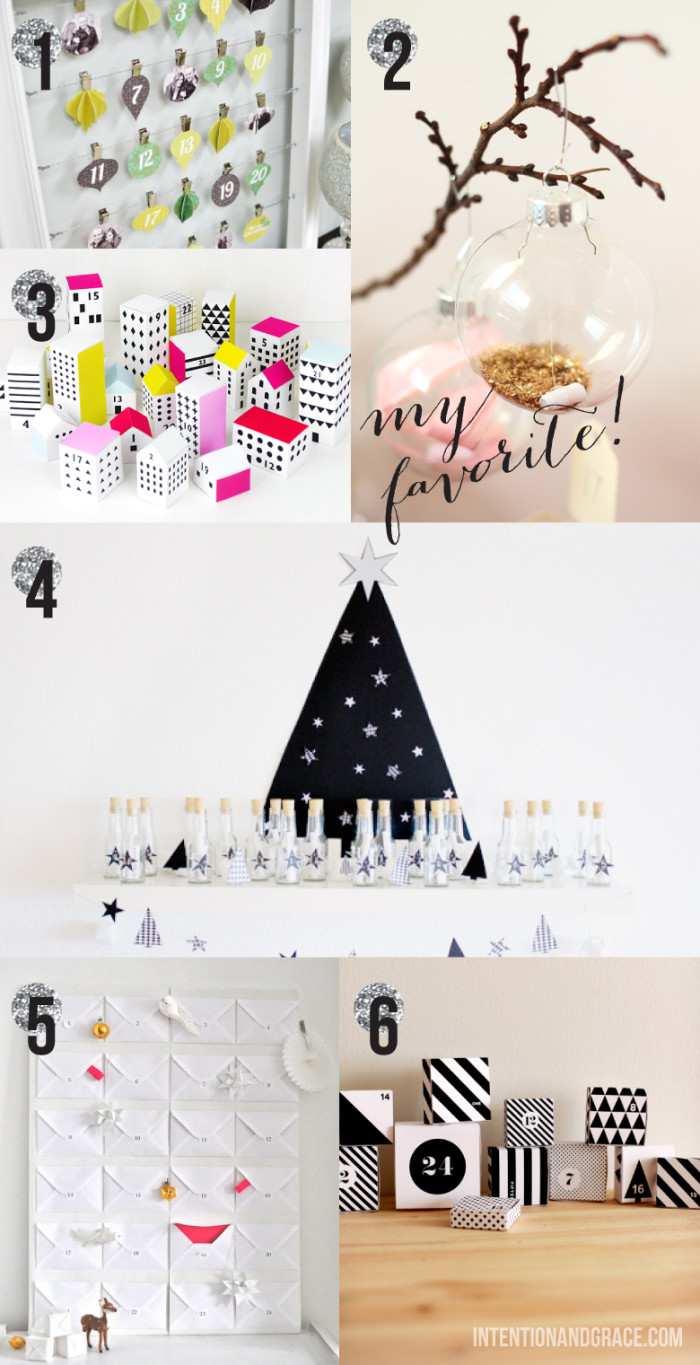
My little guy is still too young to really know what is going on with an advent calendar, but I am still dying to make one. Still, I have always struggled a little bit with what to put in them… it seems impossible to find 25 cute toys that are tiny enough to include and I’m not a huge fan of the candy idea, but when my friend Denise told me she was including a name of someone to pray for on each day I knew I was hooked. Such a great idea! Which one is your favorite? I’m kinda leaning towards the beautifully filled ornaments, but am also loving the simplicity of those black and white graphic boxes. They are just my style!
ONE / TWO / THREE / FOUR / FIVE / SIX
Nov. 15, 2013
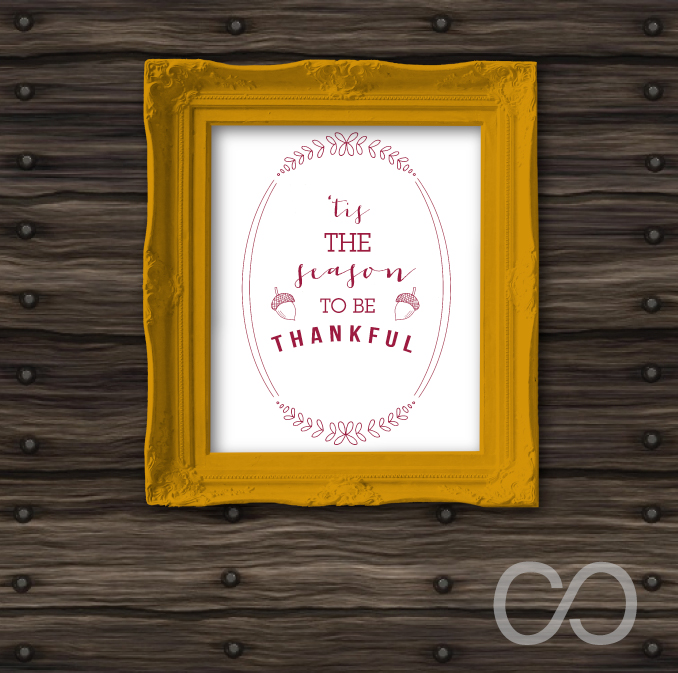
Happy Friday! This week it was really starting to feel more like winter was nearing. The temperature here has dropped significantly along with a whole lot of leaves. Fall is my absolute favorite time of the year and I’m not ready for it to be over so soon. With a couple weeks until Thanksgiving I’m hoping to relish in this season as long as possible and luckily it warmed up to the mid 60s today so I can enjoy the sunshine for a bit longer. So, whether you’re feeling the same or not here is a Free Printable Download from my shop for you to enjoy. You can frame one as a gift for someone special, hang it on a gallery wall in your home or layer it up on your mantle. Mine is taped up in my desk area and I love the reminder of it every morning when I walk in. Today (and everyday) I should be thankful (winter or not)!
Have a great weekend!
Oct. 29, 2013
Happy Halloween week friends! I don’t know about you, but its been crazy busy in the Roberts household these past few months…so if you are needing some last minute Halloween decor for your home here are some free printable from my shop. One for now, two for later! Happy holiday season. :)
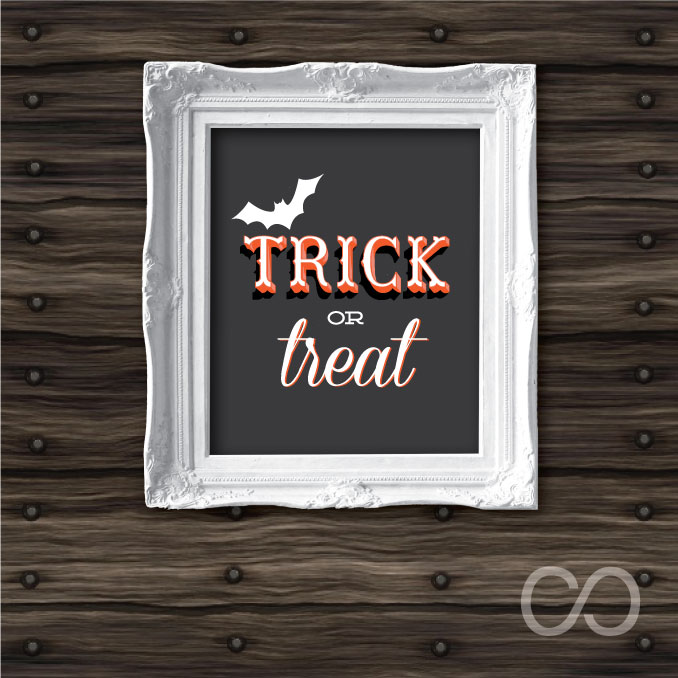

Download all three. Trim, print, frame and enjoy!
8×10 | 11×14 | 16×20

