Mar. 28, 2014
Geometric is everywhere right now, and I am really digging it! Whether styling for a fun party or adding a different kind of accent to a room, geometrics can bring a fun fresh vibe to any space. I’ve been finding myself drawn to them more and more lately and can’t wait to try a few of these fun DIYs this weekend. Those crates would be so perfect in my sons room! I love how something so raw and inexpensive can be spruced up and made so modern with a bit of black paint. From adding a simple triangle here and there to full blown 3D geo cubes, there are lots of options to go around. Here are 13 of my favorites from the web this week:
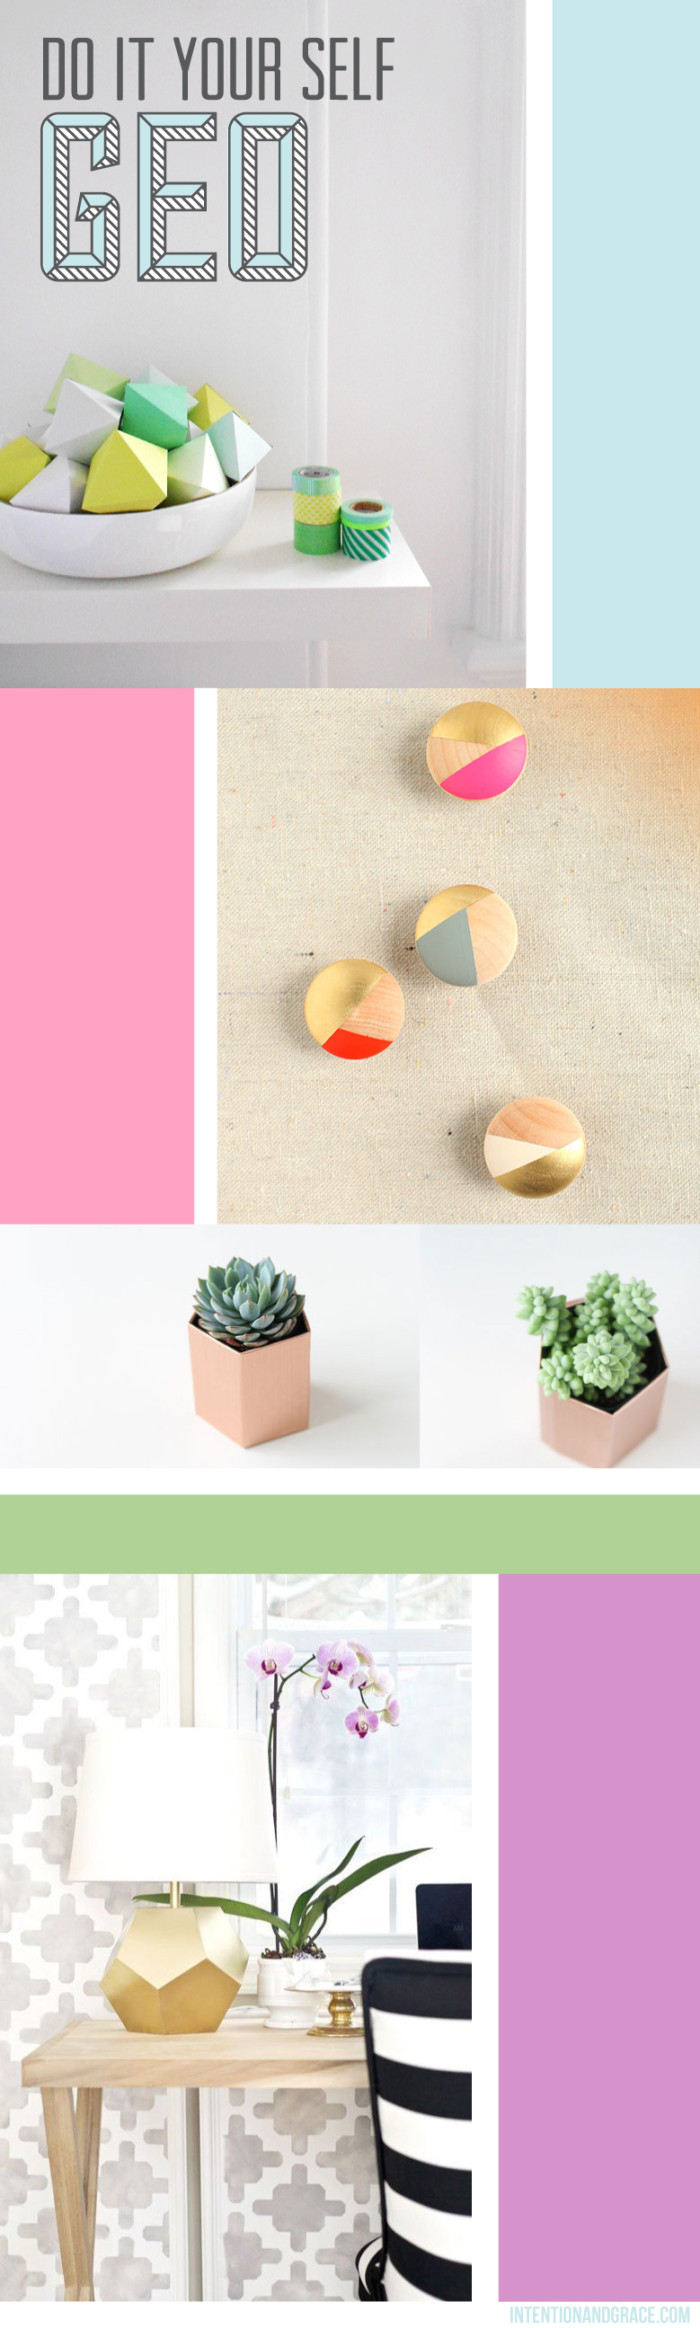
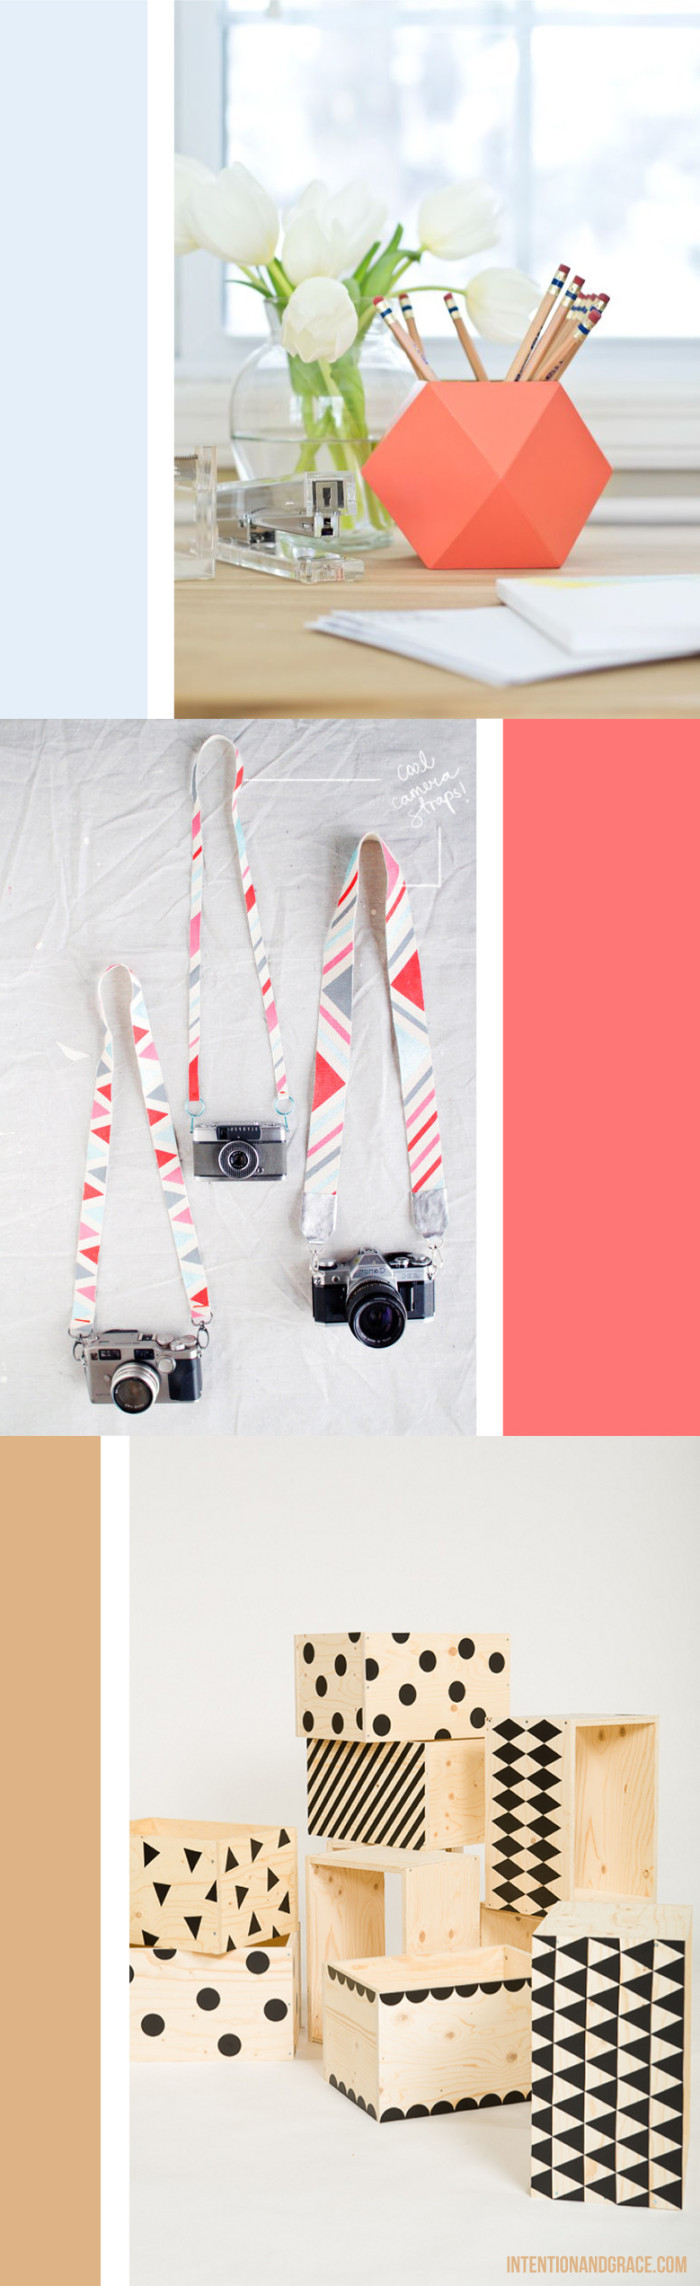
Geo Paper boxes | painted wooden drawer pulls | Copper succulent planters | gold lamp | coral pencil holder | painted camera straps | wooden storage crates
Incase these aren’t enough for you, I also have my eye on this amazing gold Geo Plant Hanger, this super simple and cute gold triangle garland, the cutest nursery mobile for any new little sweetie, this fabulous pair of hex and leather earrings, and this awesome wooden geometric cube pendant light.
Feb. 26, 2014
It has been too long since I have been posting regularly, opps. But I am finally back with a wonderful how-to and one of the many reasons I’ve been so busy lately.
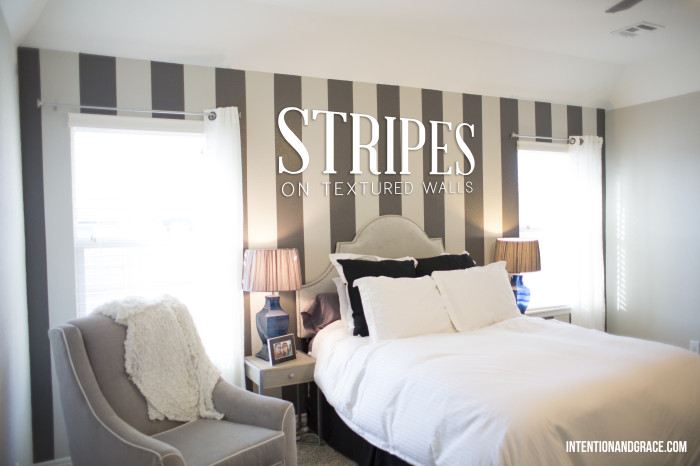
Now, if you know me at all, you know that I LOVE stripes. I wear them weekly, we have them all over our home, and they often appear in my designs. But ever since our house was completed last summer I have been dying to have some as an accent wall in our home. But with all of our walls being textured, it seemed like a very big, time consuming, tedious problem. Although I do have a generally steady hand, and perfectionist eye, I was not about to hand paint or touch up stripes on an entire wall. So I started doing some digging, and came across this amazing how-to.
So excited I could hardly contain it I grabbed a gallon of paint that weekend and the recommended tape in the post and got to work.
But did it work? Yes!
Well, eventually…
It all looked so easy, and the instructions were great, but after following all of the steps perfectly, I peeled off my tape with great expectations to see tons of bleeds all down the line. Bummer!
So with the help of my genius husband and a bit of trial and error here are a few notes I would add in case any of you are hoping to tackle a similar project.
First of all, I did really like the tape they recommended. It seemed slightly thinner than the regular blue or green tape and allowed me to press it down a bit easier, but overall I don’t think it is a deal breaker. By the time the process is complete you could probably get away with using just about any tape.
So, what caused mine to bleed and hers to look fabulous? Possibly difference in our wall textures, but most likely I think it was my assumption of how much paint was needed in the foam brush step (#4). I did everything just as she described, but boy were there gaps under my tape. Even with the finger pressing the tape did not adhere to the textured wall very well and sponging on the paint in what I considered a normal even coat offered no help. In order to really fill the gaps we followed steps 4-5, repeating this process 2-3 times per stripe, until the barrier of base paint color was extremely thick and completely filled any gap that you could see remained under the tape.
Once this step was done, I thought “Great! Hard part over, now I can just roll on my accent color and peel the tape!” Wrong.
In order to get really crisp lines I had to do the same technique with the foam brush as before, only this time covering over what I had just done with the accent color (dark gray). This time using a much lighter more even coating and constantly pulling outward from the stripe. I found that rolling the paint on opened up some of those gaps and it still bled through in some spots. We think the key here is really the outward motion of applying the paint away from the stripe, never pushing paint towards the tape line, but always moving it away from the line.
Finally, after several hours of measuring, taping, and dabbing on paint, I peeled the tape off while the paint was still wet and my lines were truly perfect!
I’m not saying all this to scare you away. I completed this project in 2 days, and it probably took about 10 or so hours to complete with all the trial and error, but every day when I walk into my bedroom and see our wall I am filled with joy and a smile on my face. It was all totally worth it.
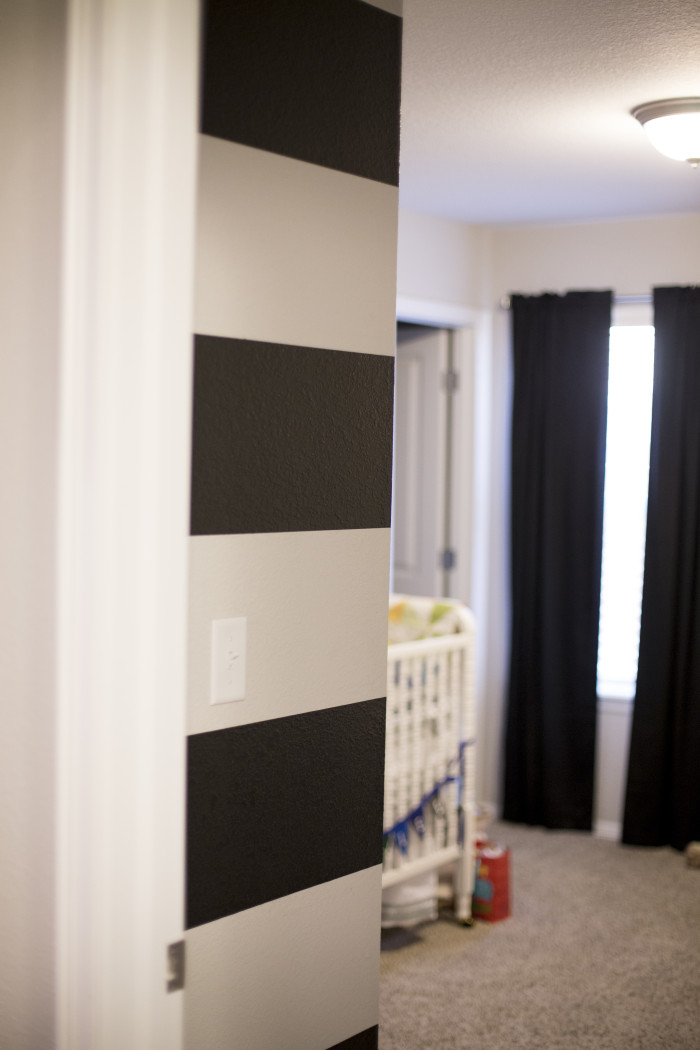
And a couple weeks later I tried again on a much smaller wall with horizontal stripes in my sons room, and they came out perfectly crisp and things went much, much faster. I completed his wall in only a couple hours time following the above process and as I pass it every day I just love the accent.
We have since used this process for all painting, including trimming around our house, making all of our lines completely crisp and sharp, and it really is quicker and more efficient than getting out those pesky trim brushes and praying your hand is perfectly steady while you trim along the baseboards and ceiling.
Dec. 23, 2013

I first saw these amazing cardboard deer busts when I was working on my sons Woodland themed bedroom last winter. But coming in at $45, they were a little steep for me, especially for several pieces of cardboard. But finally I found this amazing DIY with much fewer pieces, AND it utilized foam core, rather than cardboard, which I thought seemed a little cleaner looking, and would be easier to cut.
I wasn’t a huge fan of the shape of the antlers, and wanted something a bit more streamlined and simplistic for my home, so I made my own Deer Head Template modeling after this one. I wanted to use the same size foam core through out, so I adjusted the slit sizes, and added a crest for the body to mount on.
Then it was time to get to work.
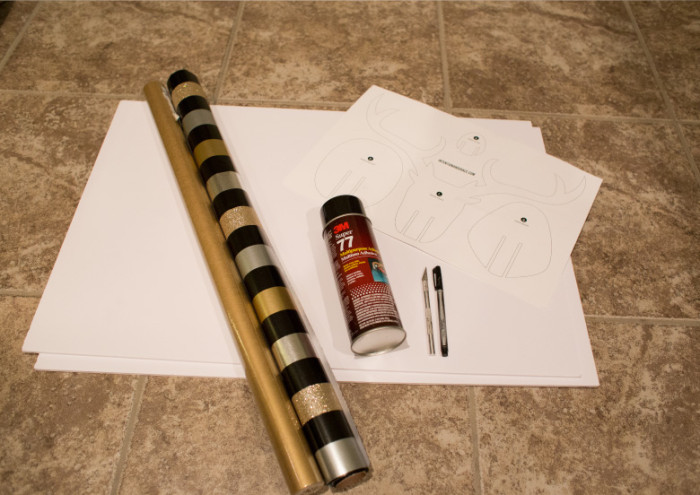
You will need two pieces of foam core, a can of spray mount (spray glue), a pen or scorer, an xacto knife, some wrapping paper or other material you want to cover your deer with, and the Template.
*Please note that my template is made to be printed on 12×18″ paper, which can be done very cheaply at places like office max, office depot, etc. Or you could select tile printing on your personal printer and assemble at home. :)
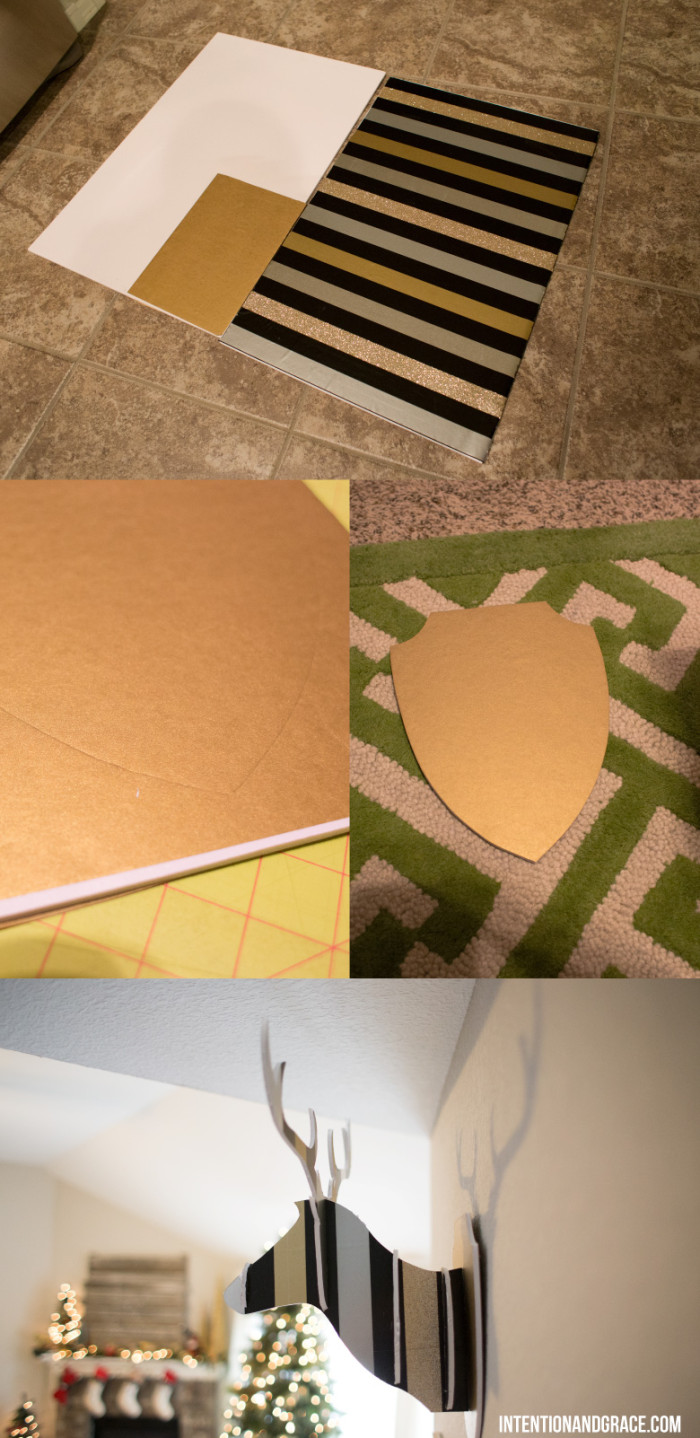
To start take your foam boards, wrapping paper and spray mount outside. I did mine in the garage since it is freezing outside right now. Spray your board down and press paper onto both sides. I only did a corner of my accent paper because I knew I would only need this for one piece.
Once your paper is attached to your board, you can begin tracing your template onto them. I found it best to lay it all out first to make sure they all fit like I wanted, keeping both neck pieces laid out similarly since they would mirror one another. If you have directional paper like I did, it is also important to make sure the pieces are all laid out with the paper going the same direction.
For tracing, you can use a pen if you like, but I found it more useful to use a scorer. You can find these at craft stores or online and they are my favorite for projects like these. But if you don’t have one handy, a mechanical pencil without the lead, or a long nail can do the trick for you as well. I preferred this method over the pen, because I anticipated that my trimming would not be exact and I didn’t want any pen marks to show.
Once you have all your pieces traced out, simply use an xacto knife to cut through them all. This will take some time. It took me around 30-40 minutes on my first one, but I eventually got much quicker at it. There are a few key points to remember: Always have a sharp blade and keep the blade vertical as you cut.
If you have not used an xacto before, its nothing to be afraid of. You just need to take it slow and steady and you should have no problem with this. The foam core is very smooth to cut through making it a fairly easy project. Its only the timing of it all that can be a bit tedious.
Once all of your pieces are cut out, its time to assemble them and hang!
Although I am using ours as Christmas decor, these cute little guys can be used all over the house. I found these two that I am loving! I think they would be so cool in a child’s room, above a fireplace, or as an accent in an office space.
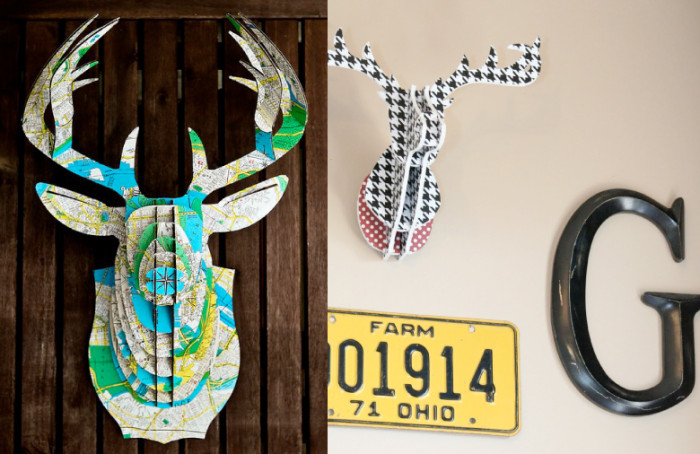
MAP | Houndstooth
Dec. 18, 2013
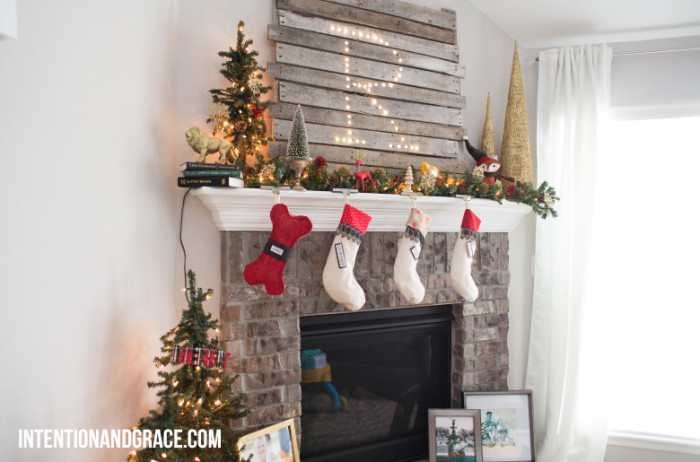
The other night, my husband showed up at the house with pallets sardined in his car and I had no idea where this was going to go. He said it was a surprise for me and went outside for about ten minutes. Hearing the machine tools going, I couldn’t help but wonder what this beat up pallet was going to become…a shelf? a wine rack? a bench or coffee table? Who knew…
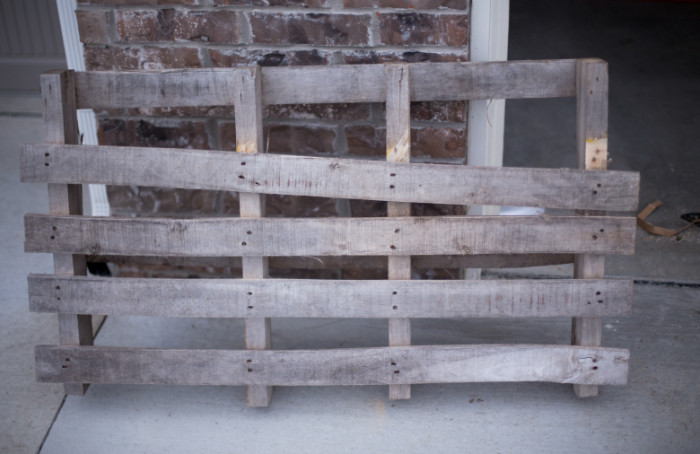
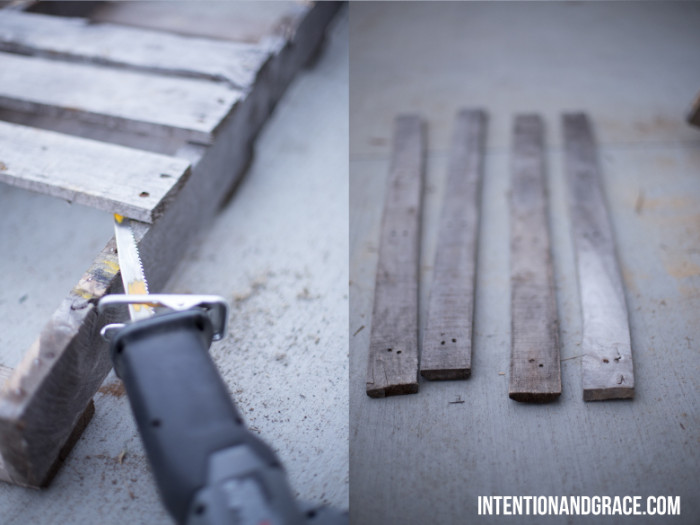
This is what he was doing while I was inside wondering: 1. He wanted to keep the rustic integrity of the wood by keeping the original nails, so he used a jig saw to saw the pieces off their base cutting the nails right in half. He was then left with several planks to work with.
2.He then laid them out on the ground face down, and used two extra pieces to support the structure on either side. By only using two of these it made it incredibly light, yet sturdy. He simply screwed the pieces together on each plank and voila! He had a solid piece to set up on our mantel.

At this point I thought, oh cute! I can hang a wreath from that, or some ornaments, but he wasn’t done…
3. He had a strand of 50 lights, so he used 50 pieces of tape to mark out what he wanted on the pallet to make sure it was spaced correctly and would appear clearly as a letter once it was complete.
4. He then used a spade bit with a diameter the same size as the bulbs that he was going to use on the pallet. Scoring them on the front first, so they didn’t split the wood, and then turning the pallet to the backside to finish the whole all the way through. He made 50 clean cuts in about 10 minutes.
5. After that, the fun part, feed the bulbs through the holes following the shape from one end to the other and plug them in!
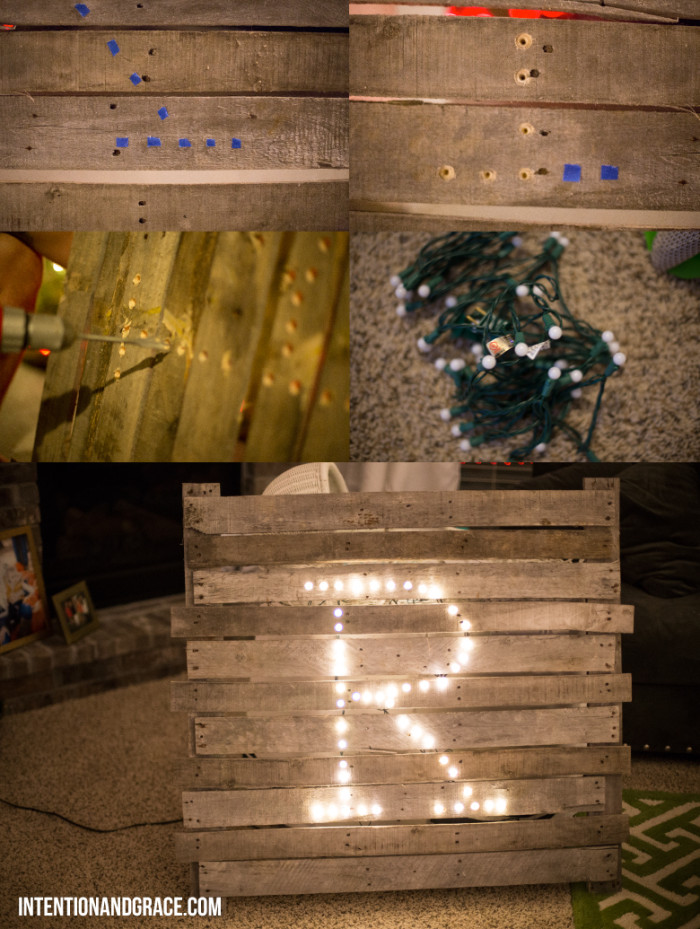
We intended to staple the cord down on the back side, but were out of staples for our stapler, and we were too excited to wait, so we went ahead and hung it on the mantel. You can’t even see the cords behind the sign and I love the way it looks. It lights up our mantel and fits in with our rustic little theme this year. It was such a simple project, and could be used all year long as a headboard, or accent in a bedroom or any other room.
Thanks babe for being such a crafty and handy man! I love it!
Dec. 17, 2013
I’ve seen these amazing garlands all over lately, like at Anthropologie and West Elm, but they came in colors I didn’t love for my home, and were much pricier than I wanted to spend on such a small accent. So I decided to make my own and it was so simple. All you need are 2cm felted balls (or larger if you prefer), a needle and some thread or bakers twine. I got my twine in the dollar bin at Target, how great and addictive is that section by the way?! Simply thread the needle, and string on the beads by puncturing them right through the center. If your kids are old enough to handle a needle, this would be a fun family craft as well.
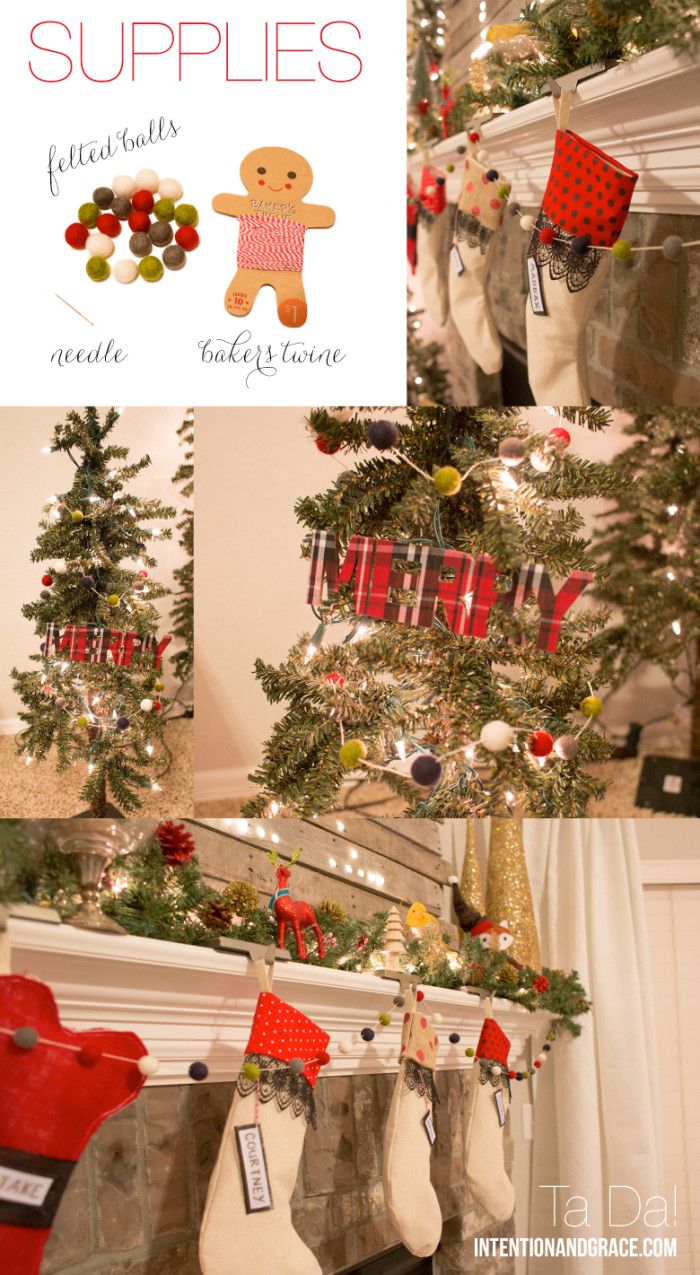
This project only took about 10 minutes to do and I love the small amount of holiday cheer it brings to our decor. I bought 100 because I had no idea how many I was going to want/need, but this strand for my mantel only took about 30 to complete. Depending on how spaced out or close together you want yours, you can order fewer or more.
I found mine on Etsy because it allowed me to mix and match colors and buy in bulk as I wanted, but they came from Poland and took about 2 weeks to arrive. So if you want some a bit quicker, they also have great options on amazon:


