Jul. 1, 2014
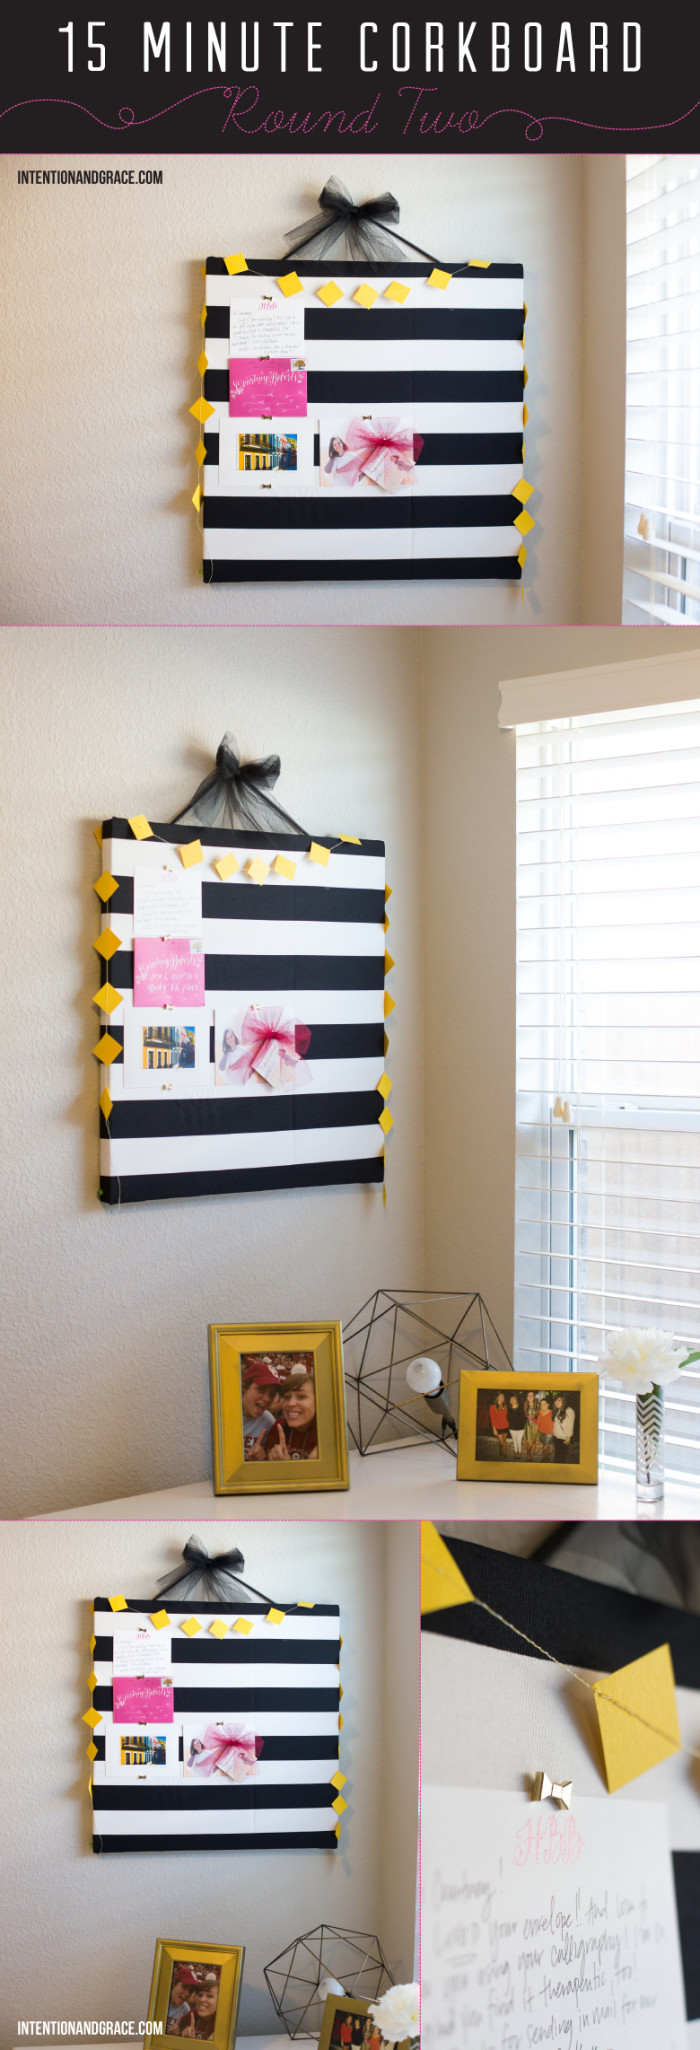
Several months ago I posted this $10 corkboard that I made to organize our mail, fun invites, post cards, and Christmas cards we receive throughout the year. We still have it hanging in our kitchen and it has held up perfectly. So when I began to finally get around to organizing my craft room, I wanted some place to put notes and post cards that inspired me as a little inspiration board. I had some extra foam insulation board from Lowes in the closet and this amazing striped fabric from IKEA left over from other projects around the house. So I pulled out the glue gun and got to work, and ten minutes later, I had this fun thing hung on the wall. My mom had gotten me these adorable Kate Spade push pins for Christmas and I LOVE how they look with the bold stripes making my lil space a bit more sweet and girly.
If any of you need a cute lil corkboard or bulletin board for around your house that costs little to nothing but can make a statement in your home and match your decor to a tee, I highly recommend this method! I am so glad I tried it several months ago.
May. 21, 2014
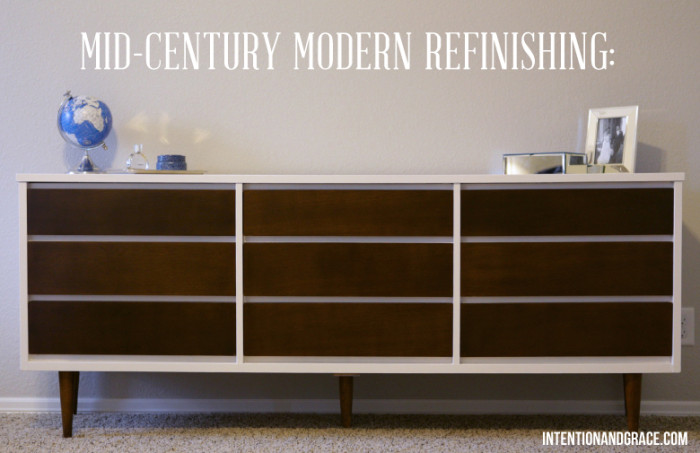
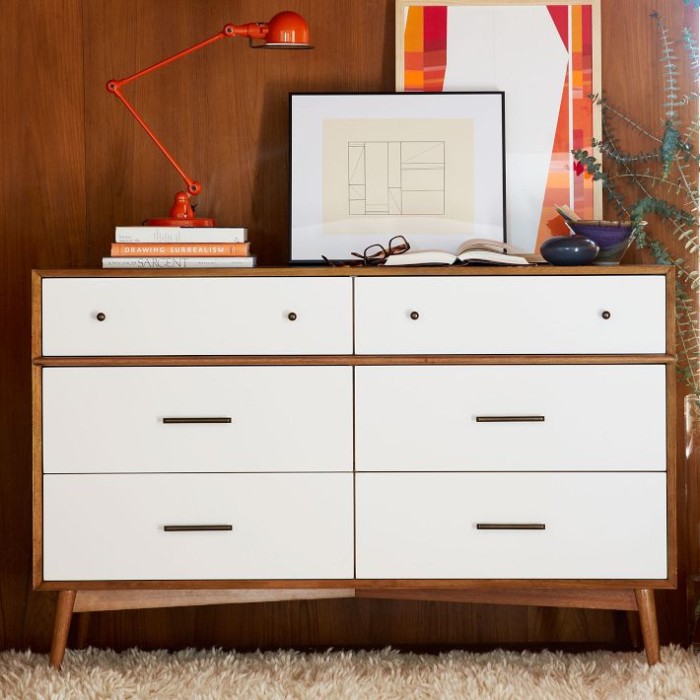
My husbands taste is very clean and modern, while I have a bit more vintage inspired style, so we felt mid-century modern was the perfect style for us to land on. We have very little storage in our closet aside from hanging space, making it difficult to keep things like bathing suits, socks, etc organized and orderly. After searching for months for the perfect dressers around town, we decided we would need to go another route to find what we were looking for.
I started searching the web for mid-century modern furniture from places like Ikea, West Elm, Crate and Barrel, etc. and all the pretty dressers I fell in love with were much more than I was willing to part with. Etsy even had some gems to be found, but still nothing under $400 each, and I wasn’t ready to drop nearly $1000+ on a box to hold my socks…
src
src
src
So, we scoured Craigslist for weeks waiting on the perfect dressers to come up, which were unfinished (cost effective) and in our budget. Patience is the key to Craigslist, and after several misses, we found these beauties and snagged them up for under $200, total. What a blessing!
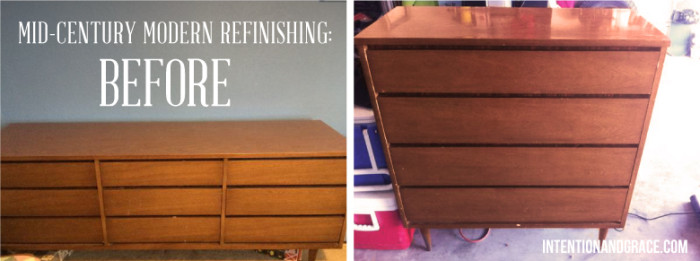
They were honey colored with some minor scuffs, but other than that in perfect condition and I knew they would be perfect for what we were wanting for our master bedroom. The only issue, and partially how we got them so cheap, was they were not all real wood, but covered with laminate making them difficult to sand and stain as we normally would with real wood furniture.
After scouring the web for inspiration, we chose to go with a style like shown above, mixing white with the dark wood that is found elsewhere in our home. The white portions would be simple, we simply built a little spray booth inside our garage and primed then sprayed them white with a high gloss oil base paint. They came out beautifully and the finish is so firm and durable!
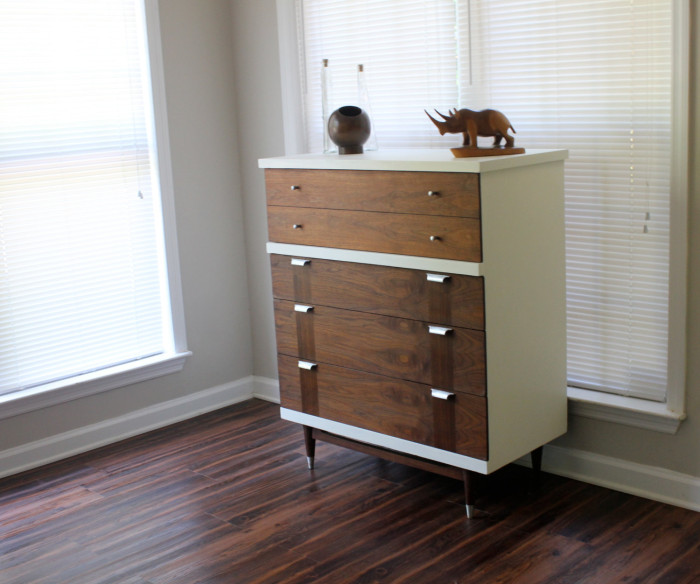
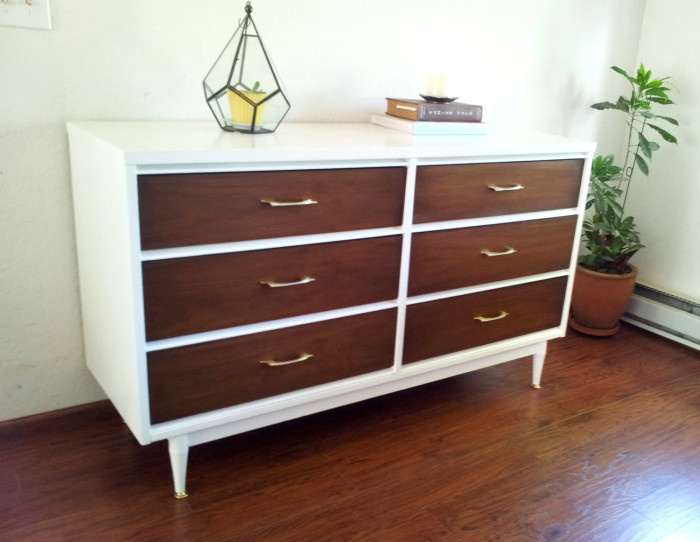
The drawers were a bit more challenging, since we couldn’t sand them down we had to find a product that would allow us to stain over what is currently there, yet be translucent enough to still see the wood grain of the laminate. Then we found this stuff on amazon! After searching the MinWax website to see what shade we needed, we decided on Tudor, the dark brown shade with subtle gray tones, to finish the drawers with. We tested one drawer by simply painting it on with a foam brush and after a couple of coats it looked fantastic and just as we had hoped. Because we had so many drawers we sprayed the rest to save some time, and let it all dry for about a week so the white sections could completely harden before moving it back inside our home.
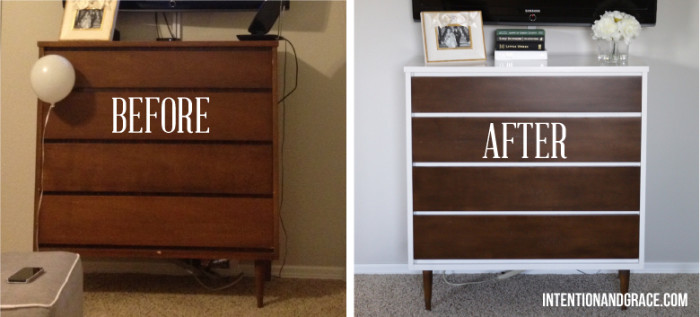
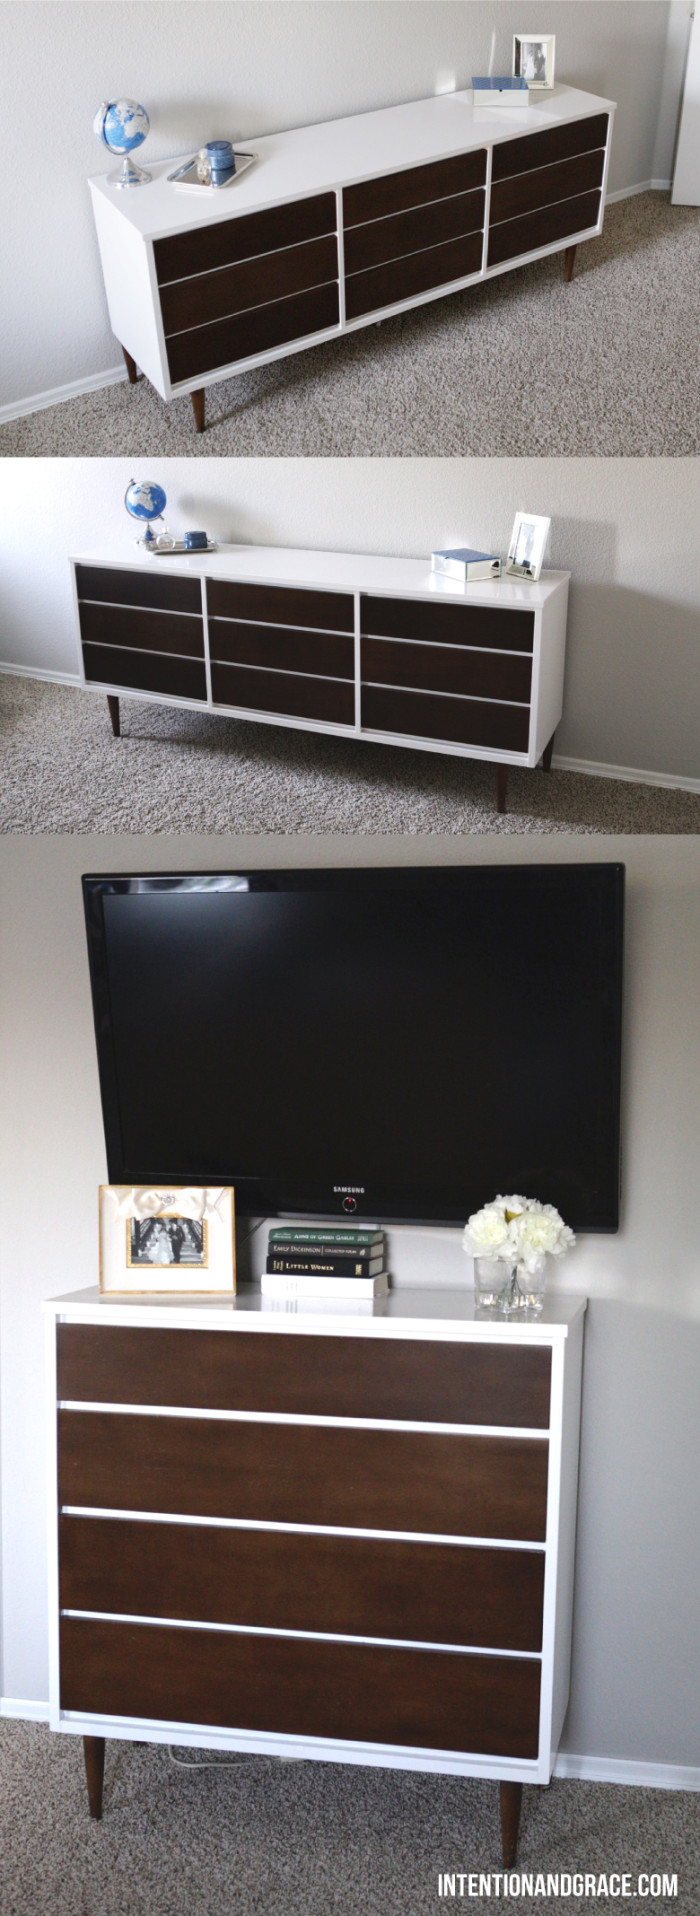
We are completely floored by how great they turned out, especially for not even being real wood. No one would be able to tell and I think they look just as great as the expensive options on the web.
Apr. 8, 2014
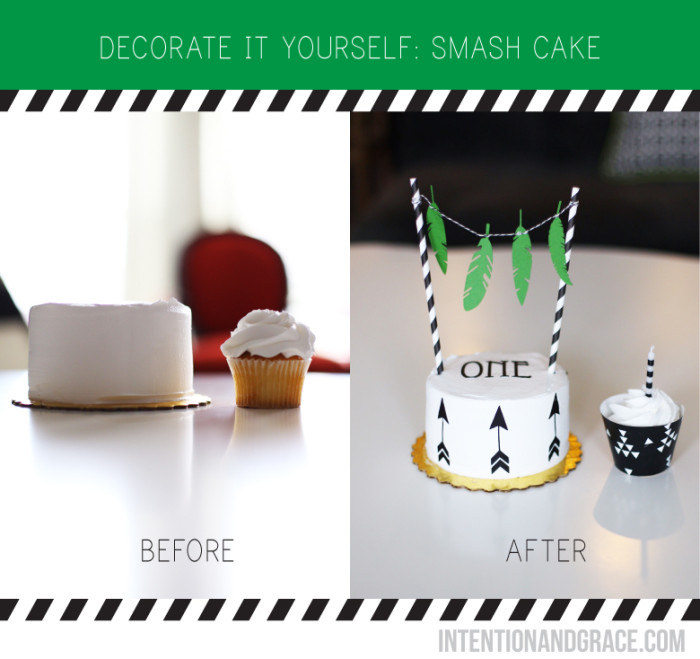
Continuing my post from Friday today I have our cake DIY. This simple Decorate it Yourself can be done on any size or shape cake to take it from plain to fab in just a few minutes.
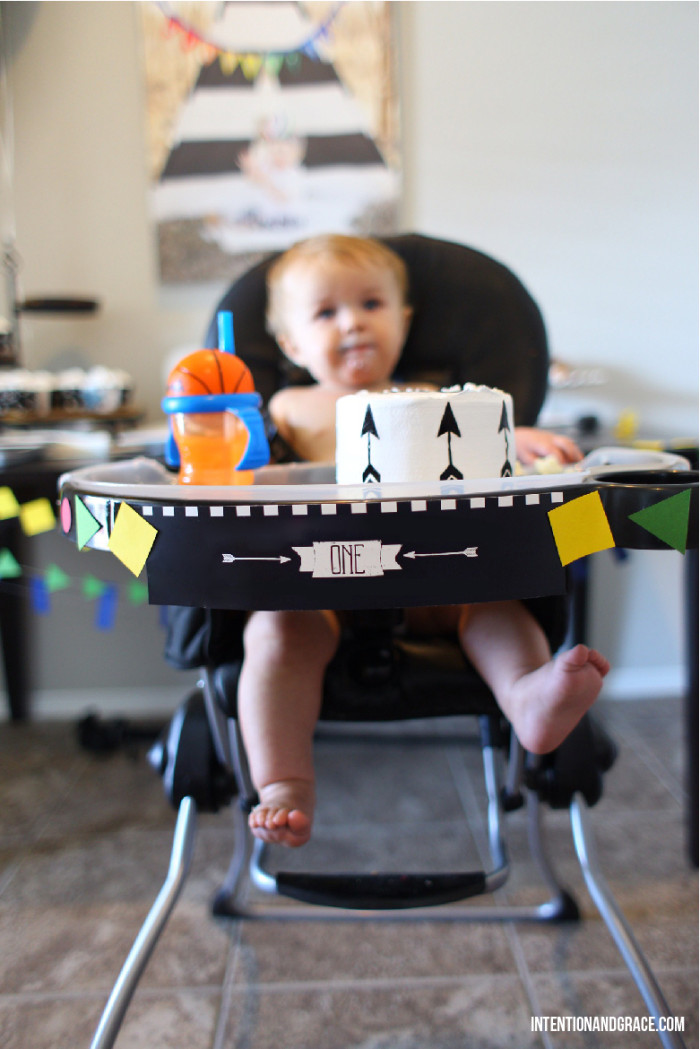
Our son turned one at the end of March and although I knew I would not have time to bake his first birthday cake, I did find the simplest way to have a custom decorated cake for only $10.
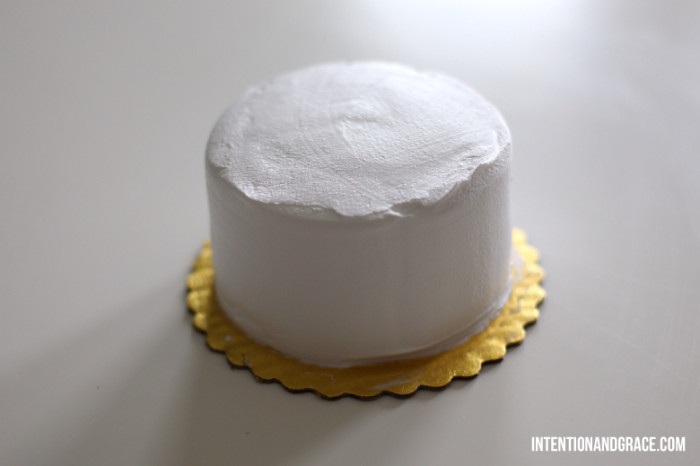
This cake was purchased from our favorite local bakery and cost a whopping $5! I told the baker I wanted one layer of white cake and one of chocolate with whip cream frosting and no decoration including border icing. We also got a couple dozen cupcakes in simple white floral frosting for guests to enjoy. I had originally planned on getting a sheet of fondant from our local craft store, but when I saw that one sheet was over $10 I was immediately reluctant. Fortunately, hanging right below the fondant was black sugar paper for only $2.40 with my 40% off Hobby Lobby coupon from the HobLob app. I was a bit concerned this would turn out looking cheap, turn my child’s mouth and teeth purple or be impossible for him to eat, but it turned out to be much nicer than I could have imagined and I loved working with it.
The edible paper came with a plastic backing on it, making it extremely easy to work with. I had originally planned on simply cutting triangle shapes to create a geometric pattern on the cake similar to this beauty. But when I saw how easy the material was to work with I decided to use my Silhouette Cutter to cut custom shapes out instead. If you too have a Silhouette cutter I set mine to the heavy card stock setting and it cut just fine. But for those of you who don’t have a Silhouette, using a simple ruler and pizza cutter could add some adorable stripes or a grab a simple shape die cut to punch out some shapes that fit your theme. Martha Stewart makes several, especially adorable border die cutters for a bit more fancy or girly cake theme. It’s that simple! You can have a custom cake in minutes for only a few bucks.
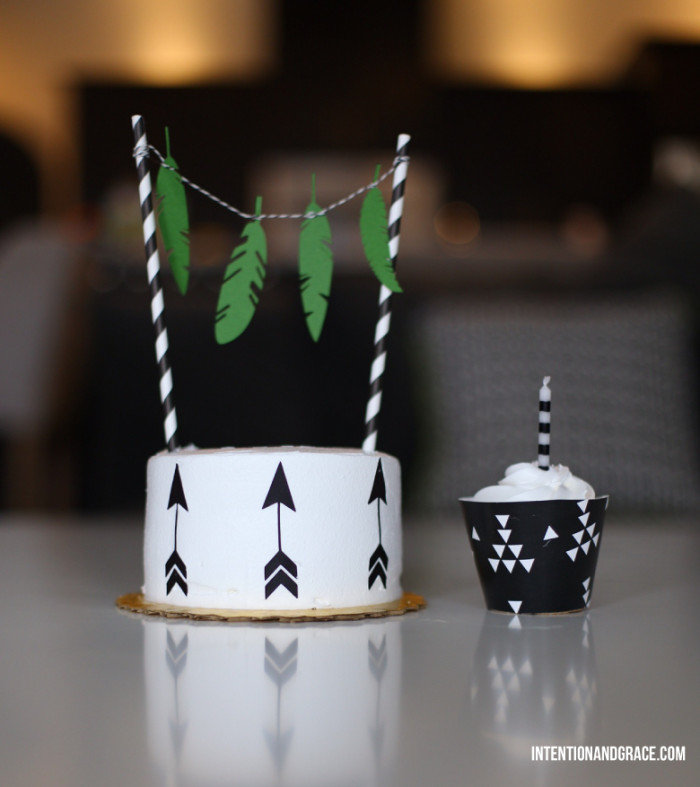
For the cake topper, I simply tied some twine around two straws that I got in a pack of 12 in the dollar section at Michaels with some die cuts from the scrapbook section.
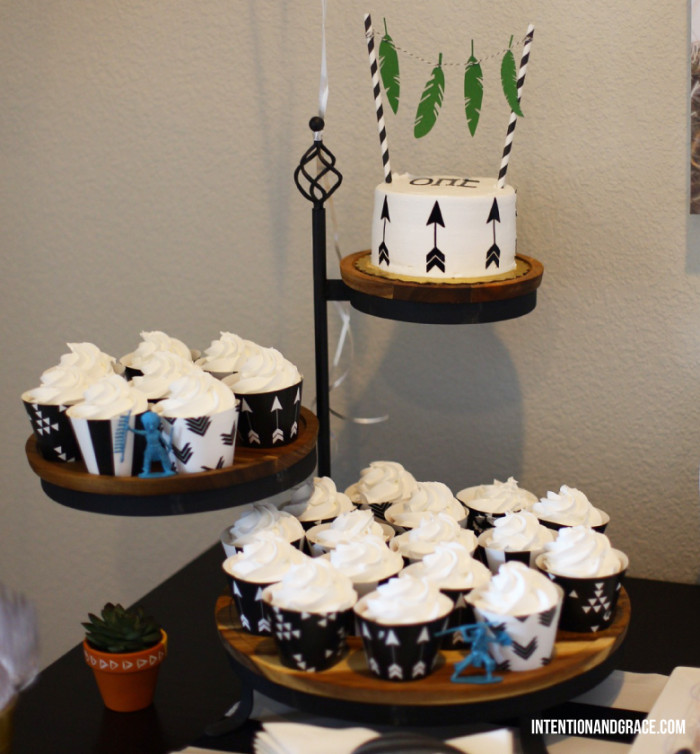
And the cupcake wrappers were simple as could be also! I used this template and some printed card stock to make mine. Or you could pick out your favorite scrapbook card stocks to match your theme and cut or if you simply search “Cupcake Wrapper Printable” on Pinterest, hundreds of designs come up that you could print, cut and use.
I love how everything turned out and it was so special for me that I could have a part in making Maddax his first cake. Even if he won’t remember it. :)
Apr. 4, 2014
Update: To purchase aspects of this theme, please visit my Etsy Shop!
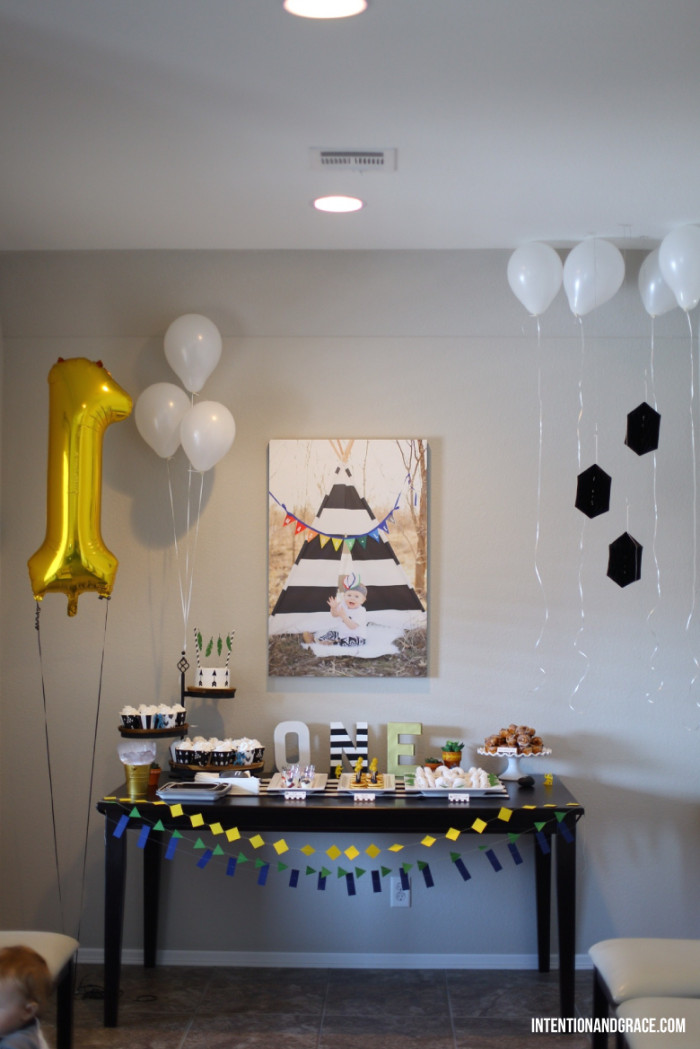
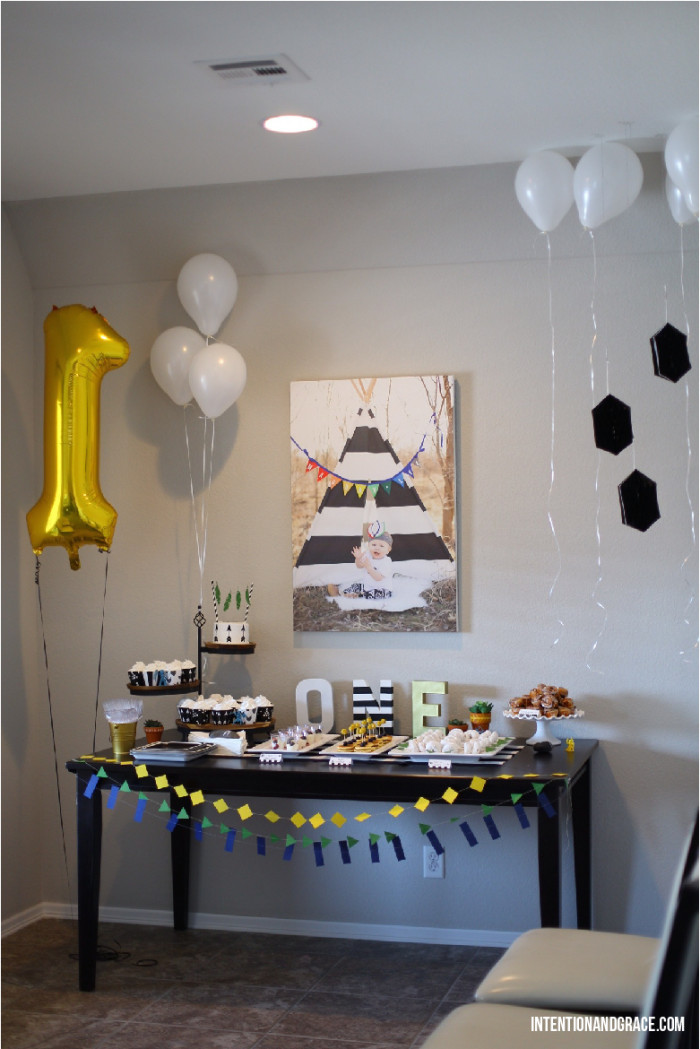
Our son turned one last Saturday and I wanted to share some photos from his Powwow themed first birthday party. I can not believe how fast one year can go! I know it is said all the time, but until you have a child of your own it is impossible to fully understand. I used to think first birthday parties were generally overdone considering the kids won’t remember them. But as the time neared to begin planning, I had so much love for this little guy that my craftiness and party-planning spirit was just bursting at the seams. So did I over do it? Maybe. But for me, it was so worth it.
To start our decor off we flipped our dining table around and pushed it against a wall to display the food in a festive and open way. This gave our guests a bit more room to grab a bite and chit chat when they arrived.
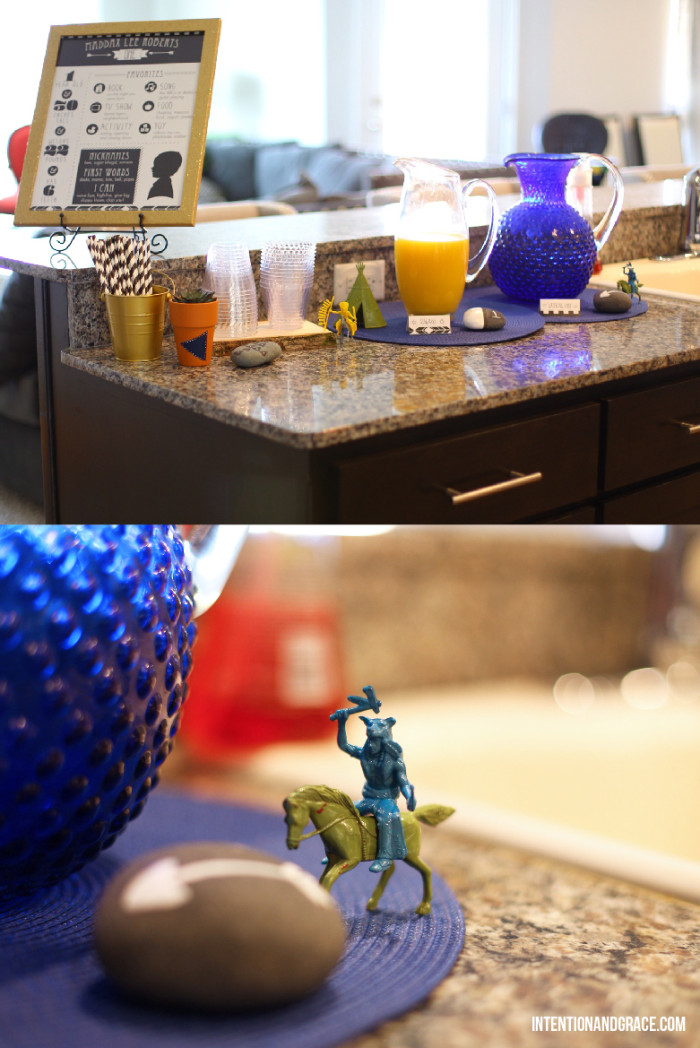
“Sun-rays” (orange juice) and water from the “Watering Hole” were served with some hors d’oeuvres style breakfast items.
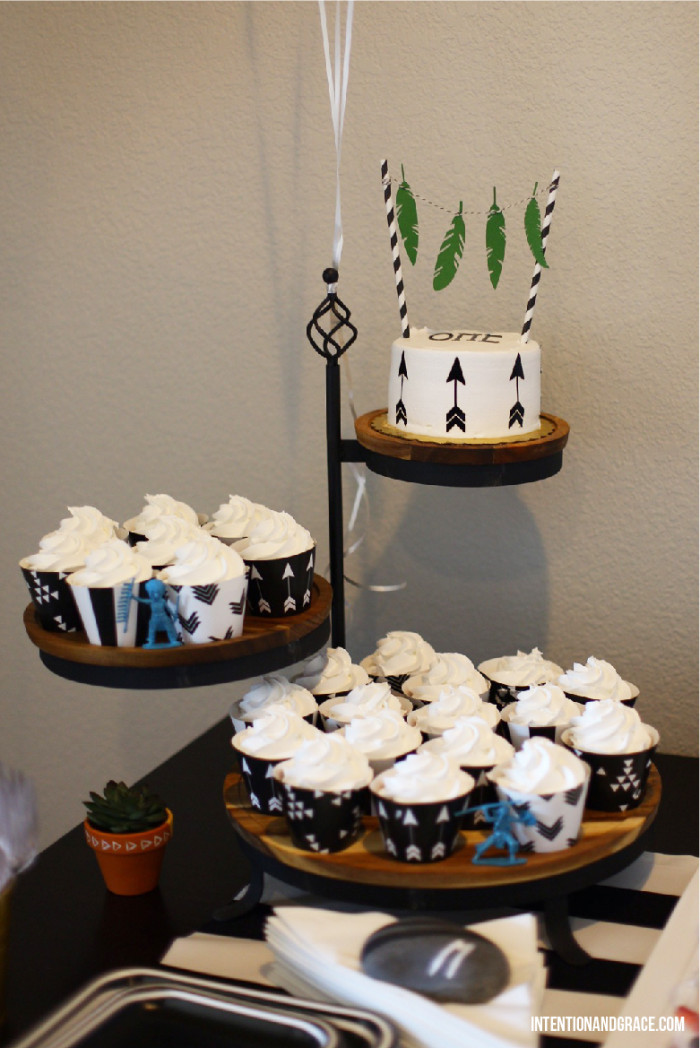
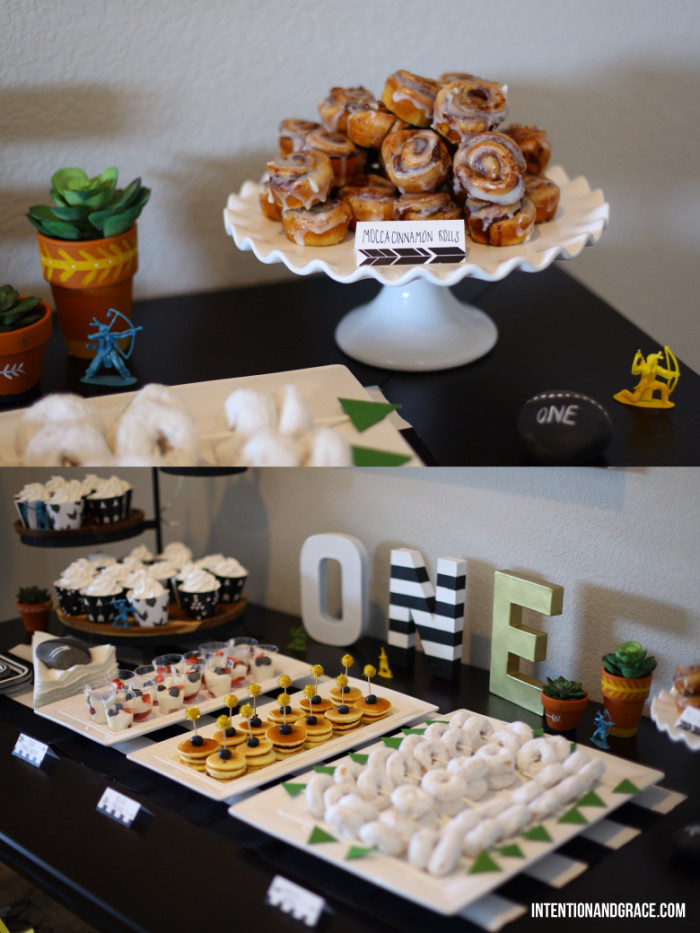
Maddax loves breakfast food so I knew I wanted to have a brunch style spread while also keeping it simple and easy, so we themed the spread around that using bite sized minis that the kids could also enjoy nibbling on. There were Mocca-Cinnamon Rolls, Yogurt Straight Shooters, Powwow Pancakes, and Powdered Arrows served along side some yummy cupcakes, juice and water. There was very little prep time for me so I could focus on making the presentation a bit more fun and I love how it all turned out!
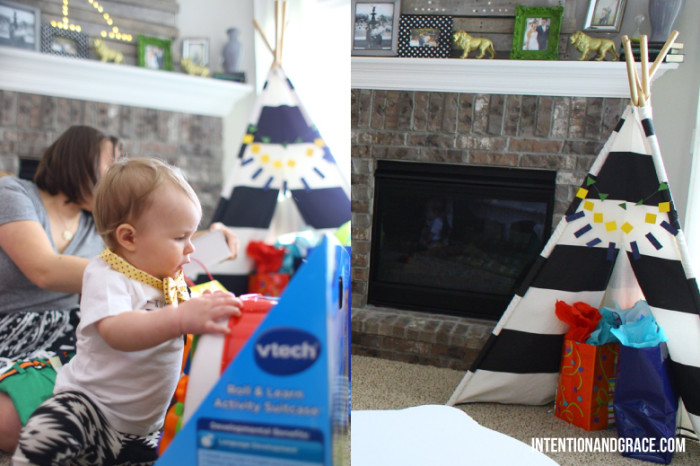
We pulled out our beautiful striped teepee from this kiddos bedroom and utilized it as the designated gift area until it was time to open presents.
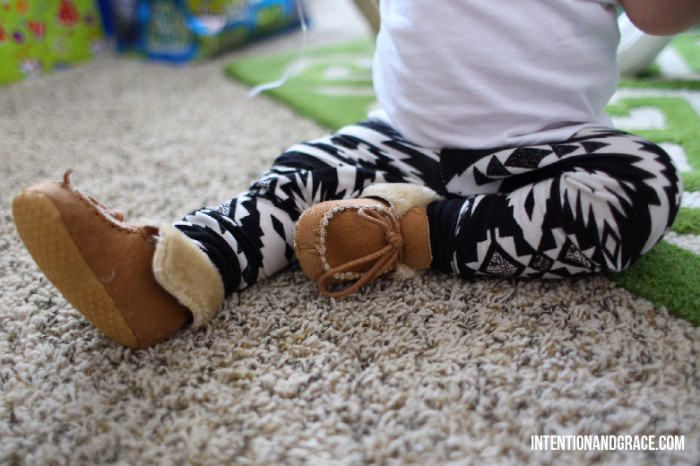
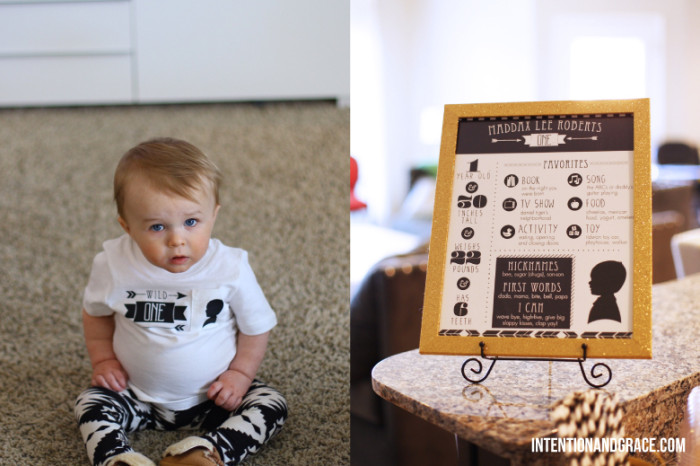
I got the most amazing leggings on Etsy and some Moccs on GroopDealz last fall that fit his birthday theme perfectly. For his shirt I used my Silhouette Cameo cutter (love!) to create a custom design and ironed it onto a white pocked t-shirt from Target. His little silhouette just fills me with joy.
We also framed a little infographic full of all things Maddax. His age, height, weight, and number of teeth. Favorite books, TV show, activity, song, food and toy. As well as his current nicknames, first words and some of the things he learned to do this year.
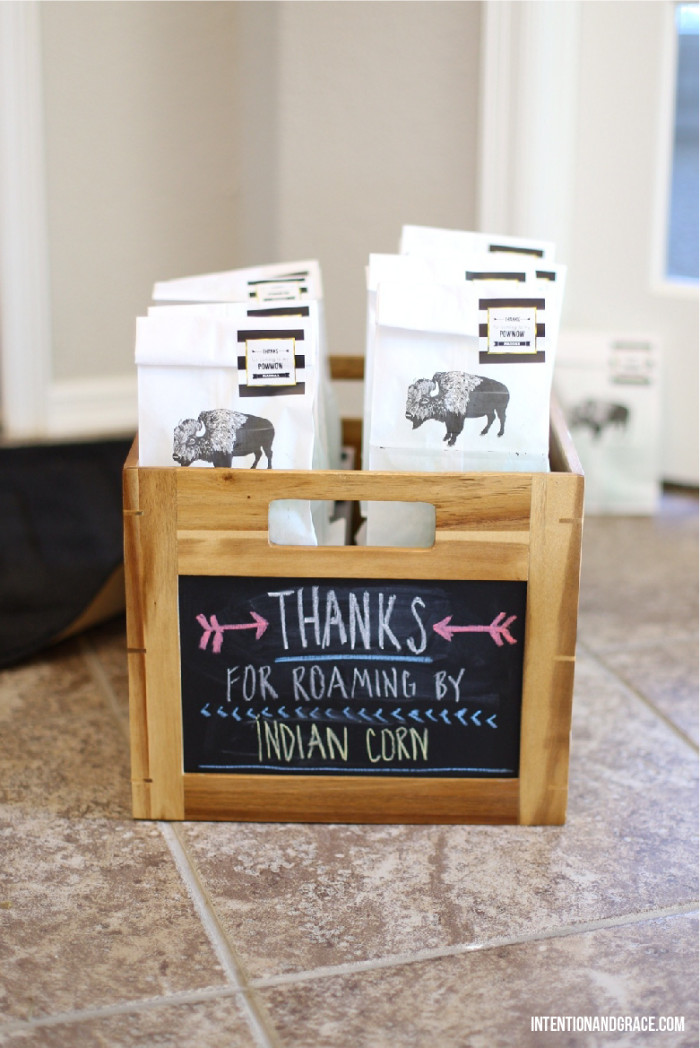
On the way out there were little goodie bags with “Indian Corn” (flavored popcorn) for guests to grab as they left. These were simple white paper lunch bags that I ran through the printer and printed buffalos on and sealed with some cute little stickers I got on sale for $5 online.
Our sweet little family was just overjoyed to celebrate the big O-N-E with so many of our loved ones. Thanks to all our friends and family for their love and support as we took on our first year of parenthood. We couldn’t feel more blessed or loved.

Apr. 2, 2014
Easter is just around the corner and has always been one of our families most celebrated holidays. Every year I can not wait to dye easter eggs and transform our home into a spring like atmosphere with tulips and bright colors all around. We are always trying to find new fun ways to decorate eggs, and these are just a few of my favorite ideas around the web this week:
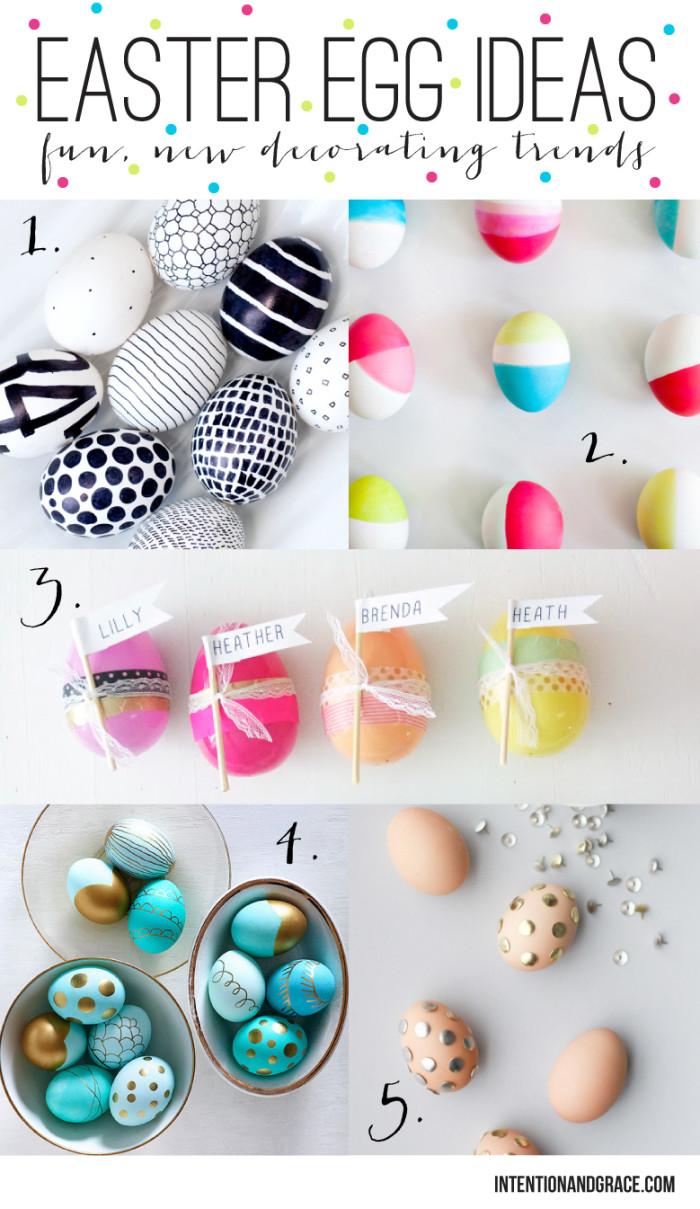
1. These adorable easter eggs from Obviously Sweet are so carefree and cute! And they don’t even require dying! Just grab a sharpie pen and doodle away.
2. Neon is so in right now! I’ve been seeing it everywhere lately and I love the super bright pop of color these awesome easter eggs from Oh Joy can bring to a room, while still keeping it clean and simple. The white gives the neon breathing room and simplicity, just my style.
3. With several rolls of washi tape hanging around our home, I jumped on an opportunity to use them on easter eggs. These plastic easter eggs from Oh My Little Dears wrapped with washi and ribbon are so cute for Sunday brunch place cards. They would also be a very easy project with the kids, no dye involved. ;)
4. Gold! We all know I love it, and these easter eggs from Better Homes had my heart at first glance. Simply dye some eggs a solid color or even leave them white for a very simple approach and grab a metallic sharpie pen. If you’re feeling adventurous you could even tape off a design or two and use it as a stencil.
5. I just couldn’t leave out these easter eggs from Paper & Stitch, they are genius! In no time you can take your hard boiled eggs from plain to fab with just a hand full of tacks!

