Jul. 25, 2014
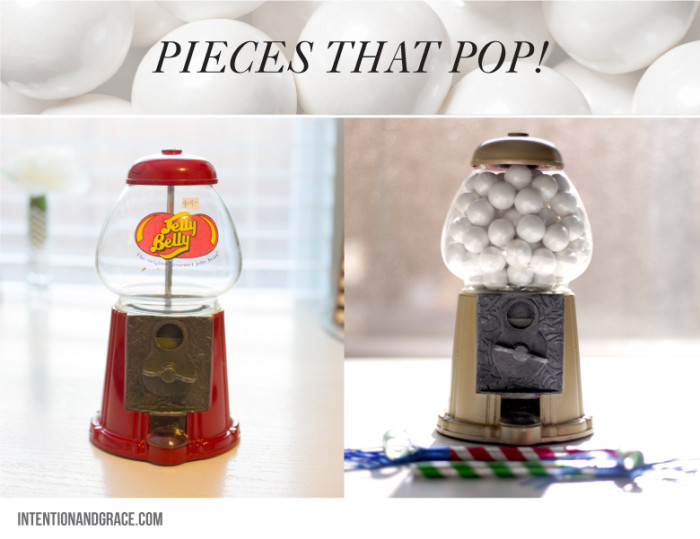
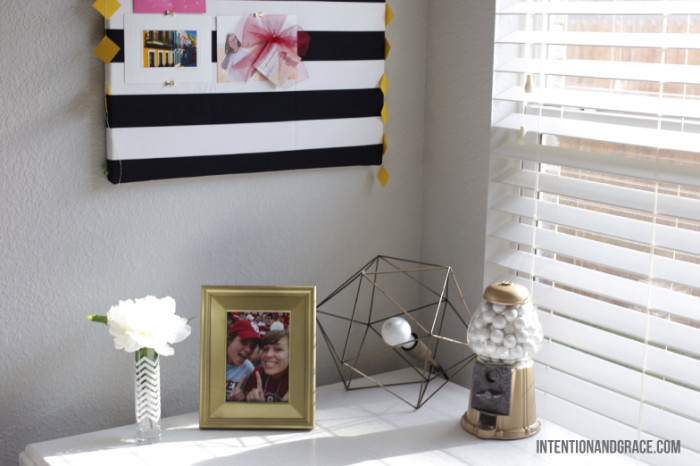
While heading to pick up lunch one day with some friends we impulsively stopped by an estate sale on the way (I find them so hard to refuse). Lucky me, it was the last day of the sale and everything was half off sticker price. I snagged up this adorable Jelly Belly machine for only $10. I was beyond excited since I have always wanted one but could never seem to find one in my price range.
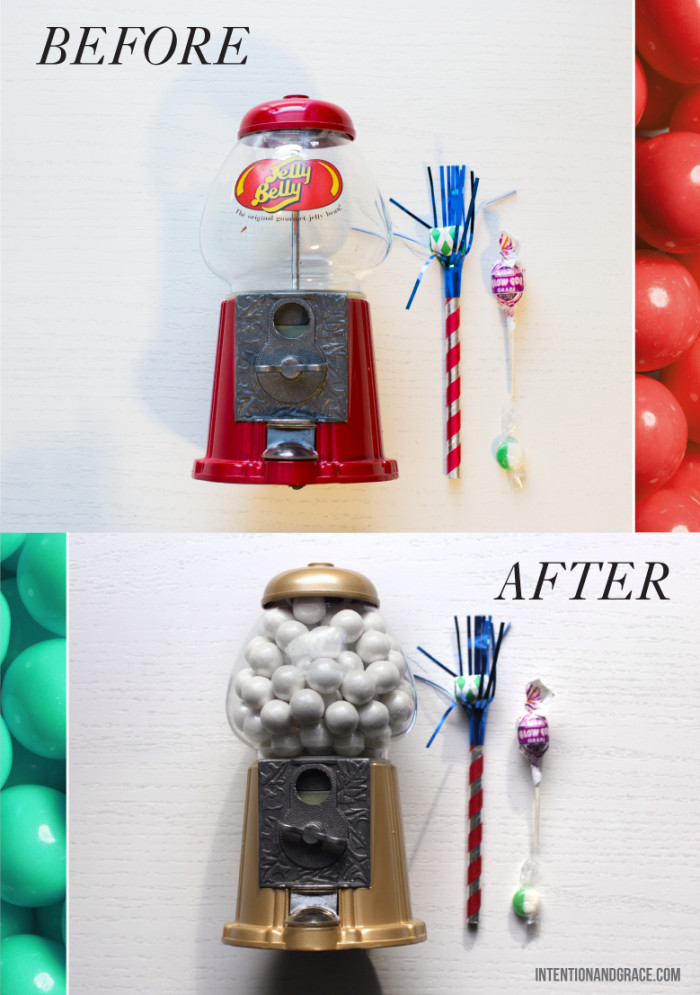
It was so simple to take a part, all of the pieces detached leaving me with the red base alone and red cap on top, so no taping was even necessary. Which is a good thing, because I hate taping and I’m pretty half hearted about it which usually gets me into some sort of trouble.
After a couple coats of gold spray paint I left this bad boy to dry on the porch while I ran to Target to get some of their amazing pearlescent gum balls I saw in the party section the week before. If you have a fun party to plan, you should check them out. They come in several colors and are super sweet to fill a glass vase or jar with as decor.
I think for the time being this lil redo is going to hang out on my work space because it just brightens my day when I see it and I love how it turned out!
Jul. 14, 2014

I’m generally not one for mixing patterns, but this stripe and floral trend I’ve been seeing pop up this spring and summer has really got me on board. As you’ve all surely noticed stripes are everywhere in my life, so freshening them up with some beautiful floral prints is high on my summer bucket list. Which style is your favorite? I mean, how about that cake, right?!
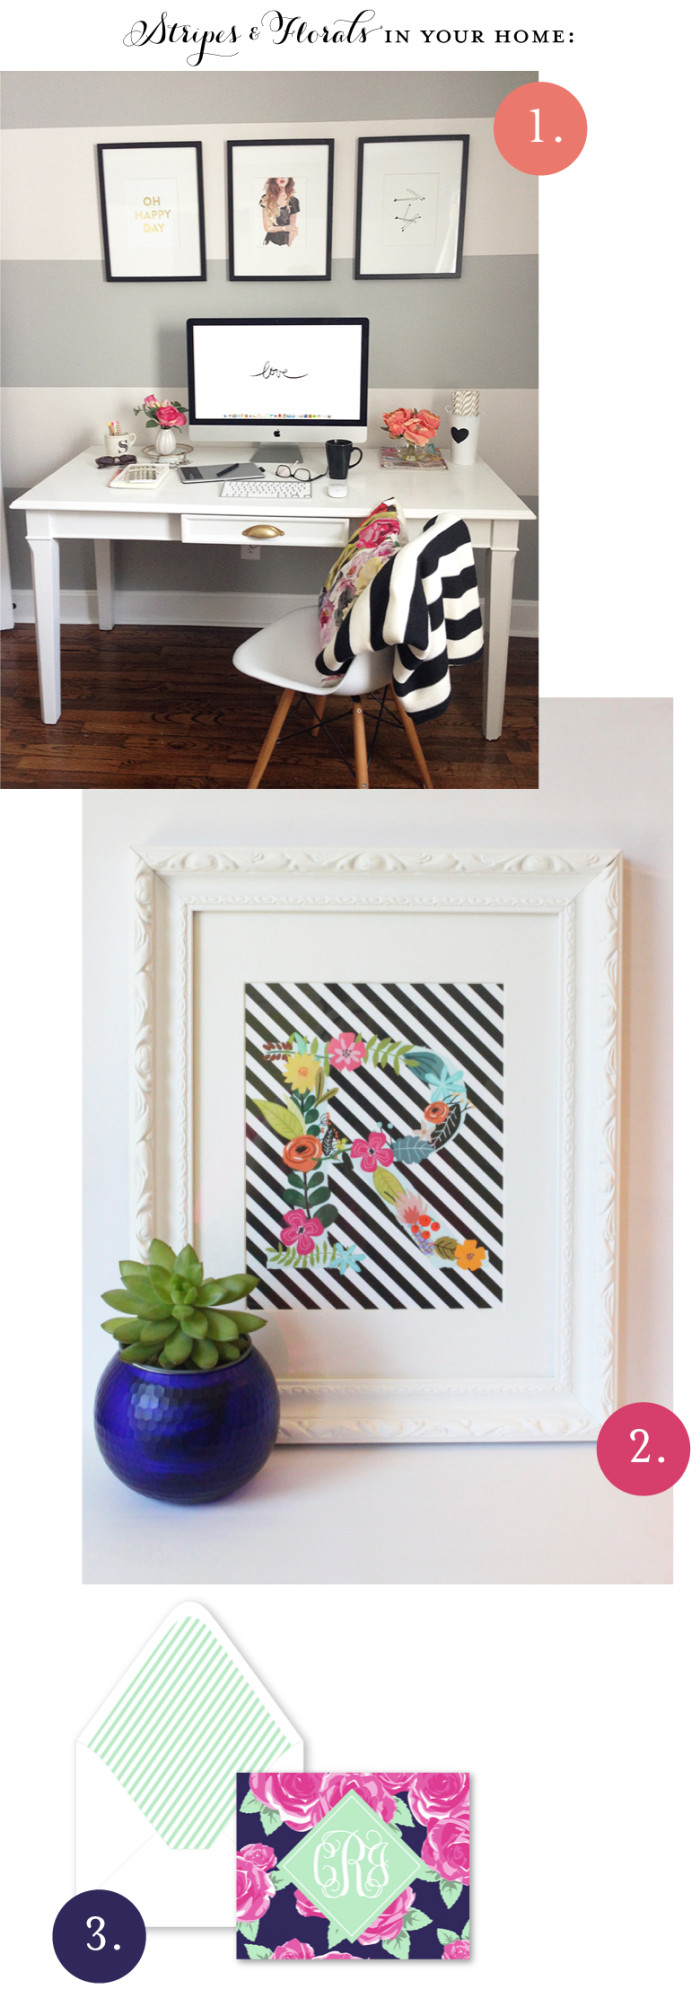
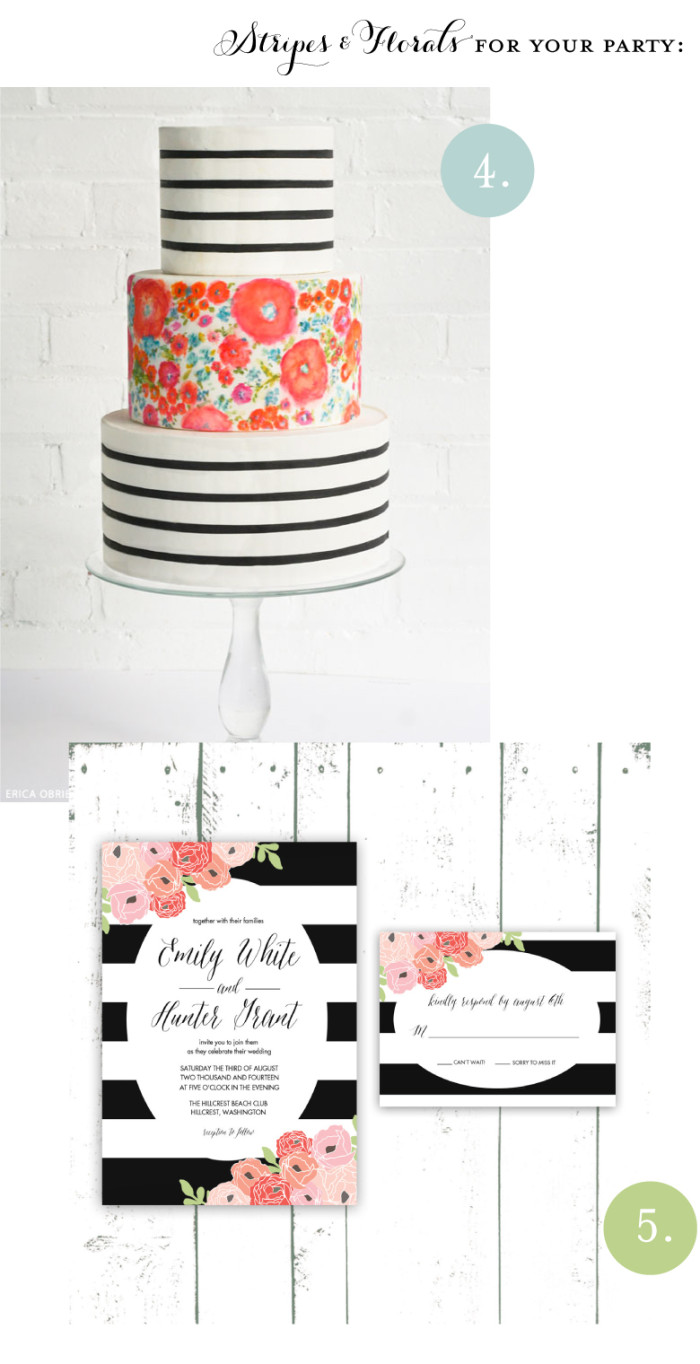

ONE | TWO | THREE | FOUR | FIVE | SIX | SEVEN | EIGHT | NINE | TEN
Flowers: src | src
Jul. 9, 2014
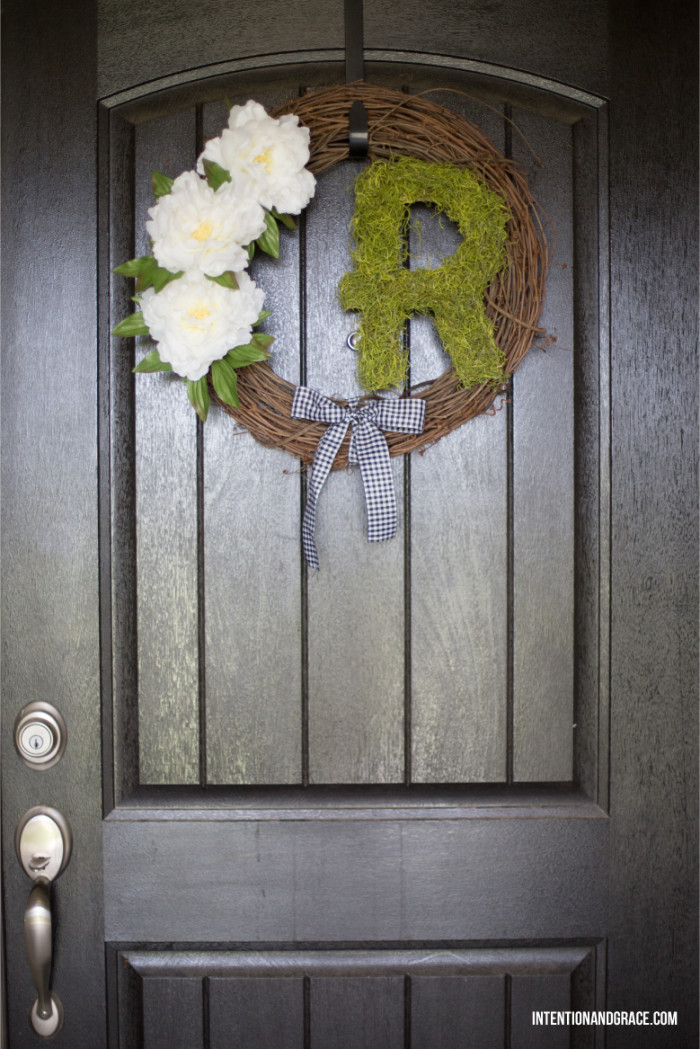
I am so overly picky when it comes to the wreaths we put on our home, and for no good reason. I just can’t seem to find one I love enough to look at day after day or I fall deeply in love with the absolute coolest wreath but it’s $100 and will probably die within the month…but I just love how sweet and welcoming wreaths can be to our guests.
Our last wreath often got in the way of the peep hole and swung too and fro each time we shut the door, so I wanted something a bit more sturdy that would stay in place when the wind picked up as it generally does in Oklahoma. On a whim (as it usually happens for me) I ran into Old Time Pottery here in Tulsa and found lots of goodies to make this wreath happen. All of which you could find at your local craft store like Hobby Lobby or Michaels.
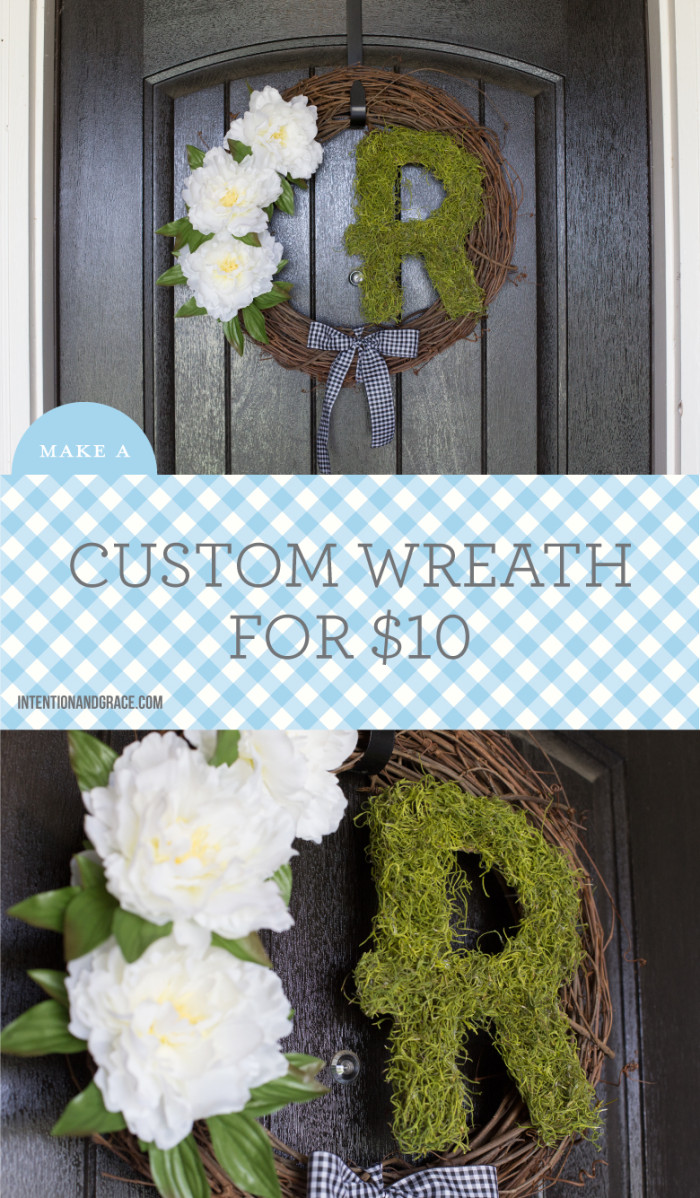
My materials:
One wicker wreath – $5
One bushel of fake white flowers – $3
One bag of moss – $2
Cardboard – Free
Ribbon – I had some on hand, so Free.
Hot Glue Gun
Scissors or Xacto Knife
I found a piece of cardboard large enough to cut an R out on and traced out the shape I desired, then grabbed an Xacto knife and cut it out. Once my hot glue gun was hot I covered the letter one section at a time with glue and carefully placed the moss over the letter wrapping it around the edges. If there were bare spots I went over with a second layer of glue and moss to until no cardboard was showing. Then I simply glued it and the three flowers to the wicker frame and tied some ribbon at the base. The whole project probably took me 30-45 minutes total and I love how it freshened up the front of our home.
Share your home made wreath with me! I would love to see all your great ideas too.

Jul. 1, 2014
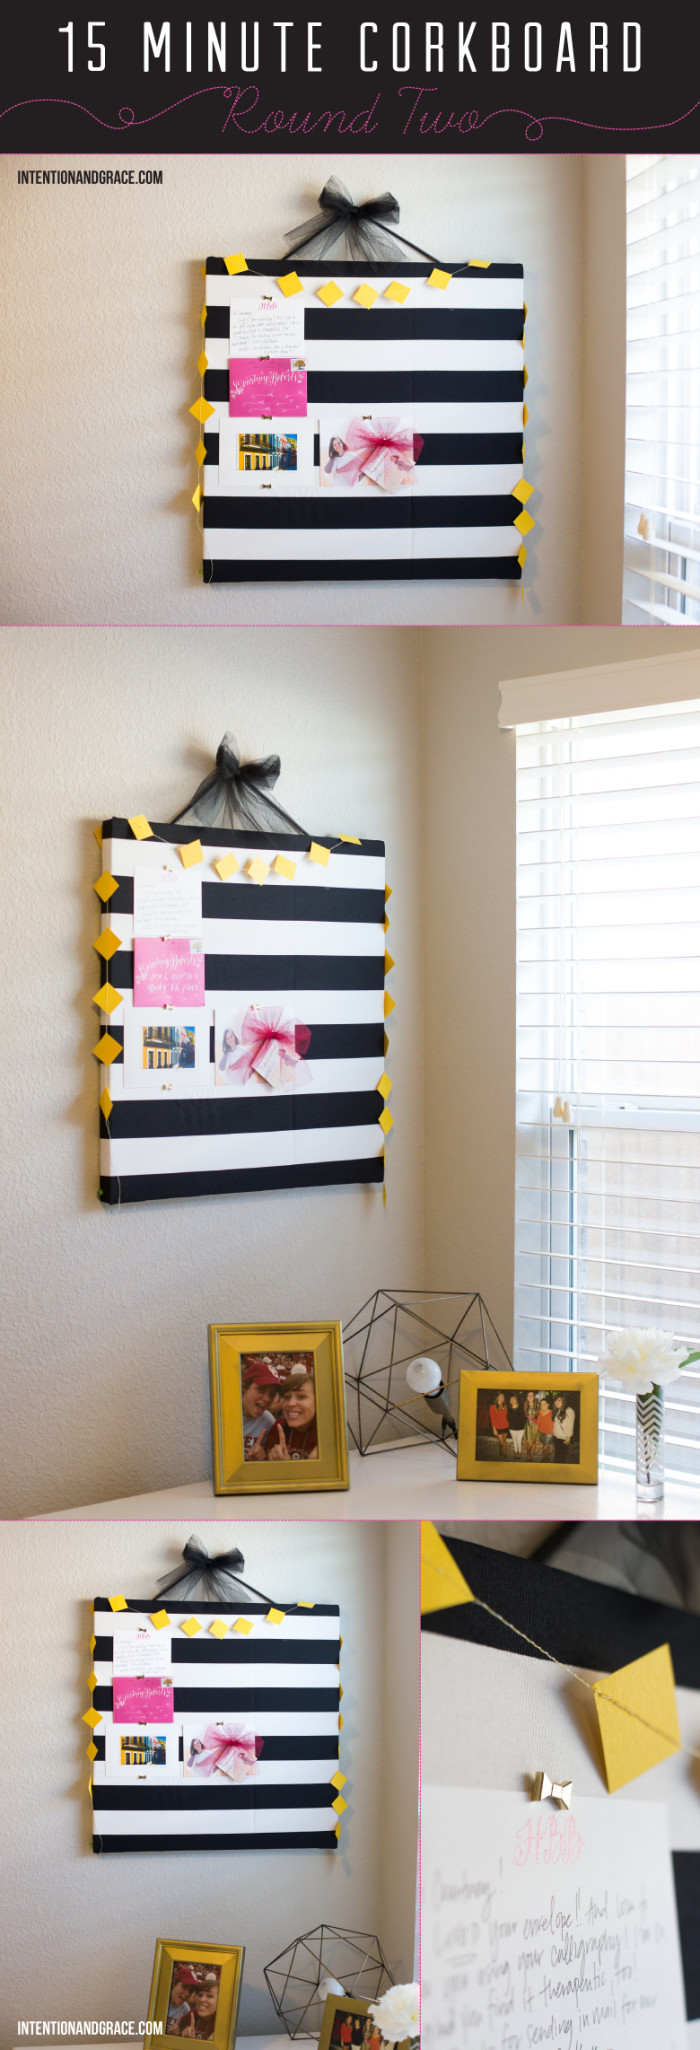
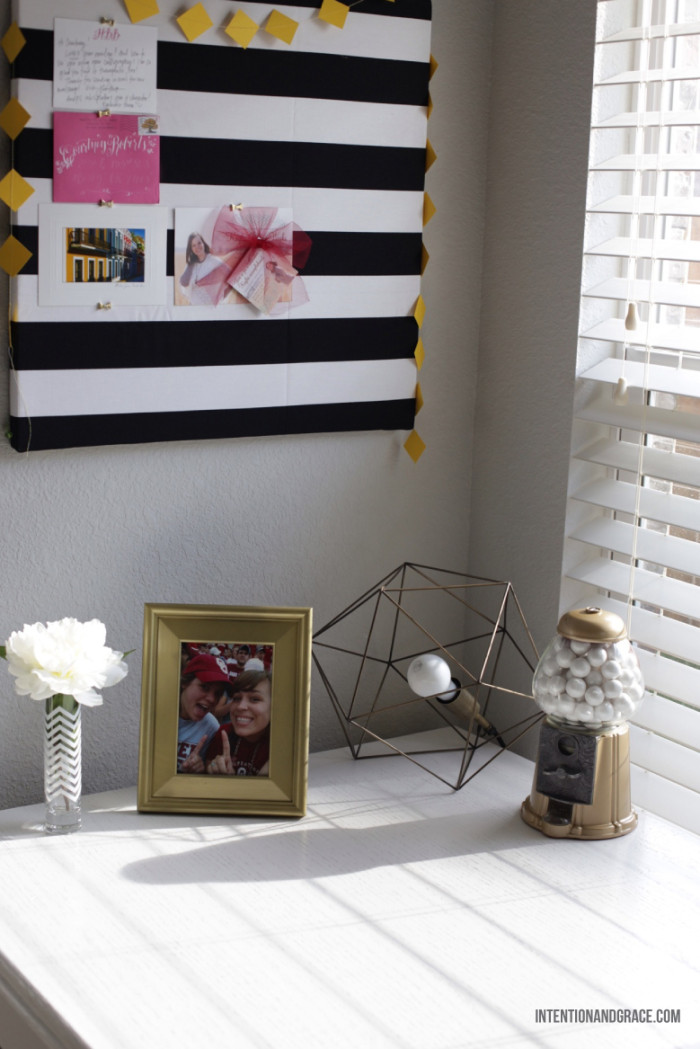
Several months ago I posted this $10 corkboard that I made to organize our mail, fun invites, post cards, and Christmas cards we receive throughout the year. We still have it hanging in our kitchen and it has held up perfectly. So when I began to finally get around to organizing my craft room, I wanted some place to put notes and post cards that inspired me as a little inspiration board. I had some extra foam insulation board from Lowes in the closet and this amazing striped fabric from IKEA left over from other projects around the house. So I pulled out the glue gun and got to work, and ten minutes later, I had this fun thing hung on the wall. My mom had gotten me these adorable Kate Spade push pins for Christmas and I LOVE how they look with the bold stripes making my lil space a bit more sweet and girly.
If any of you need a cute lil corkboard or bulletin board for around your house that costs little to nothing but can make a statement in your home and match your decor to a tee, I highly recommend this method! I am so glad I tried it several months ago.
May. 21, 2014
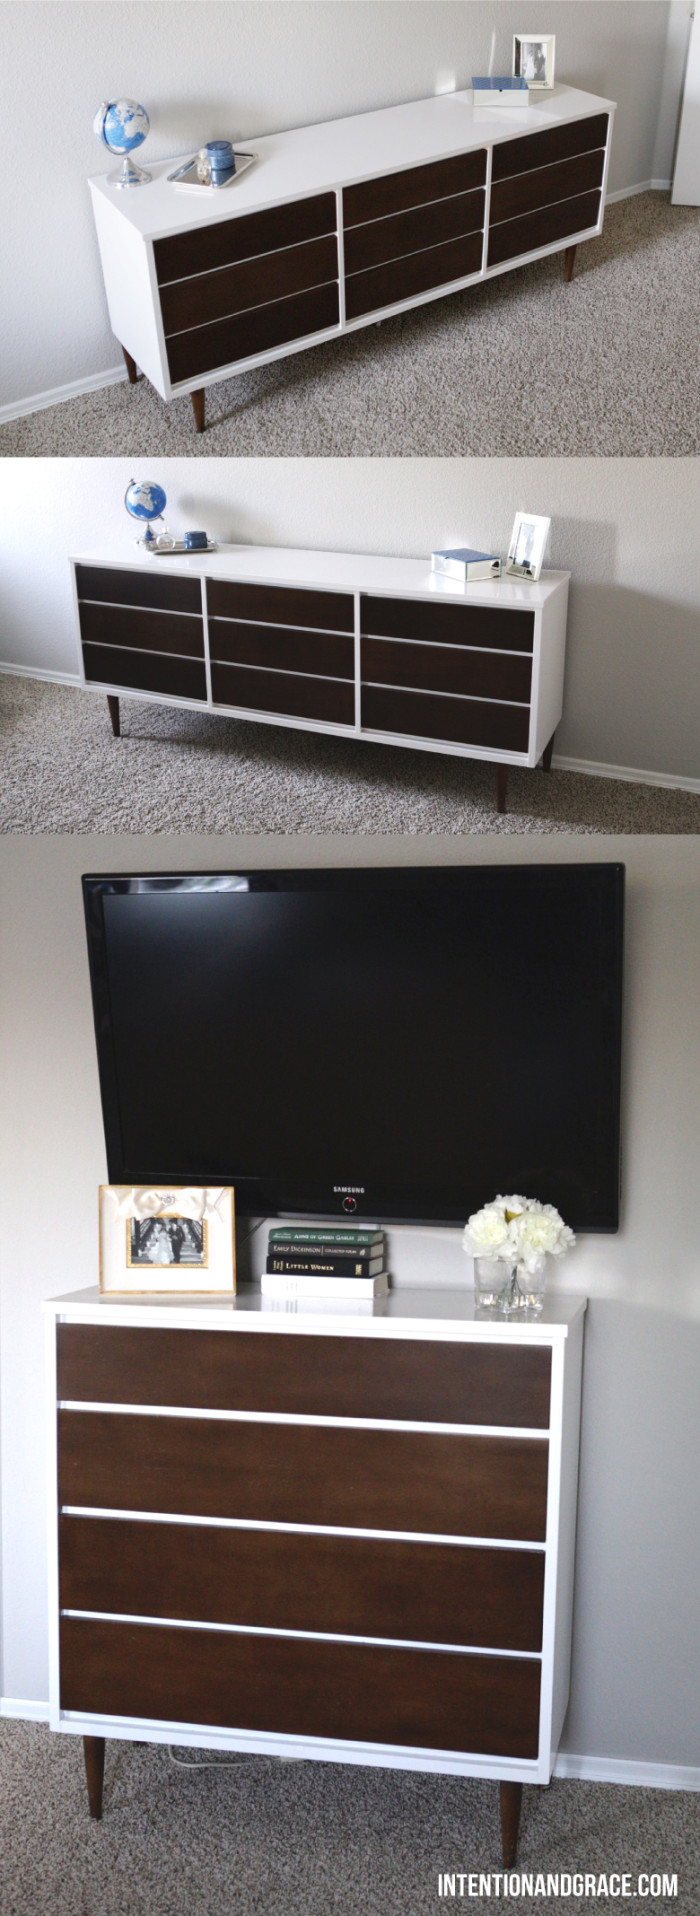
My husbands taste is very clean and modern, while I have a bit more vintage inspired style, so we felt mid-century modern was the perfect style for us to land on. We have very little storage in our closet aside from hanging space, making it difficult to keep things like bathing suits, socks, etc organized and orderly. After searching for months for the perfect dressers around town, we decided we would need to go another route to find what we were looking for.
I started searching the web for mid-century modern furniture from places like Ikea, West Elm, Crate and Barrel, etc. and all the pretty dressers I fell in love with were much more than I was willing to part with. Etsy even had some gems to be found, but still nothing under $400 each, and I wasn’t ready to drop nearly $1000+ on a box to hold my socks…
src
src
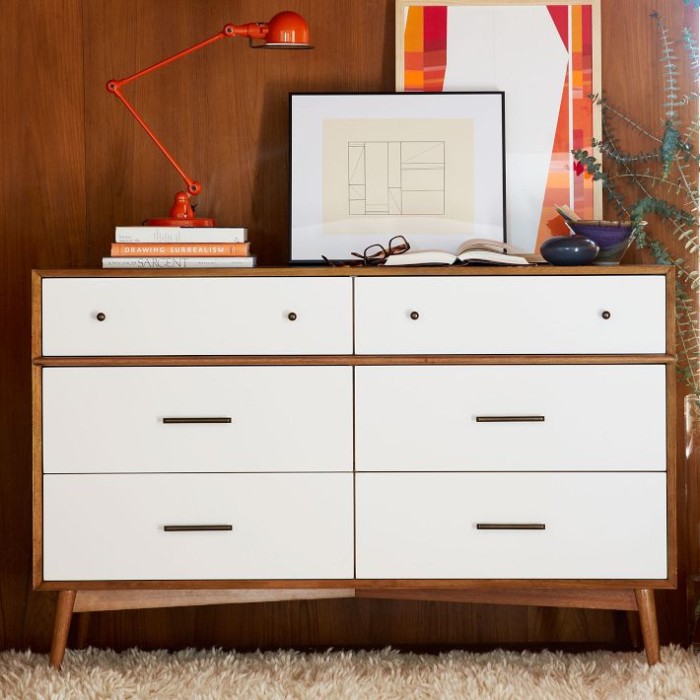
src
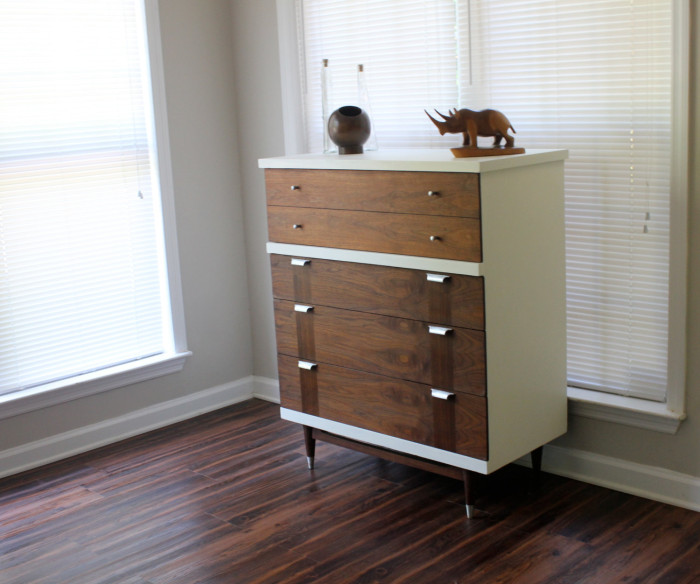
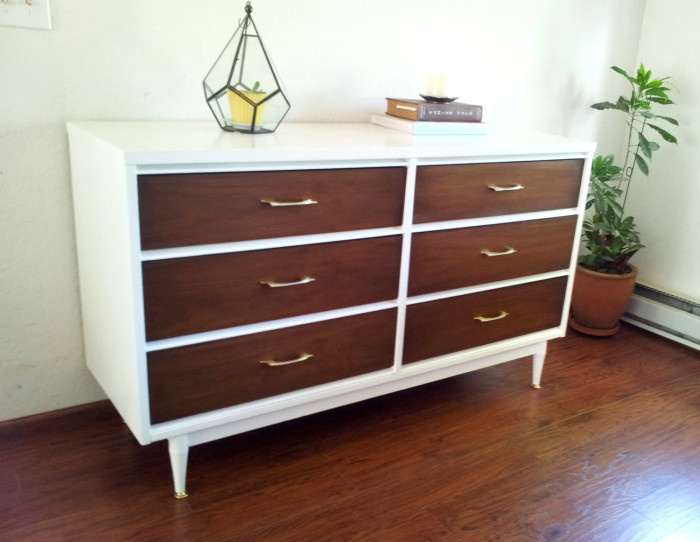
So, we scoured Craigslist for weeks waiting on the perfect dressers to come up, which were unfinished (cost effective) and in our budget. Patience is the key to Craigslist, and after several misses, we found these beauties and snagged them up for under $200, total. What a blessing!
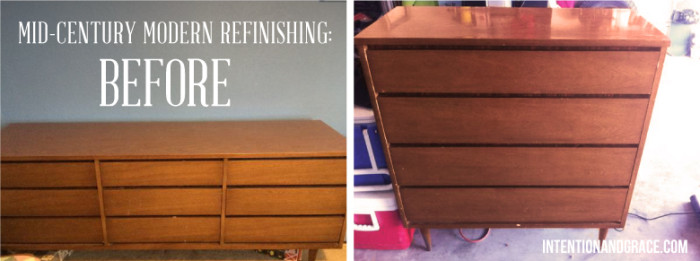
They were honey colored with some minor scuffs, but other than that in perfect condition and I knew they would be perfect for what we were wanting for our master bedroom. The only issue, and partially how we got them so cheap, was they were not all real wood, but covered with laminate making them difficult to sand and stain as we normally would with real wood furniture.
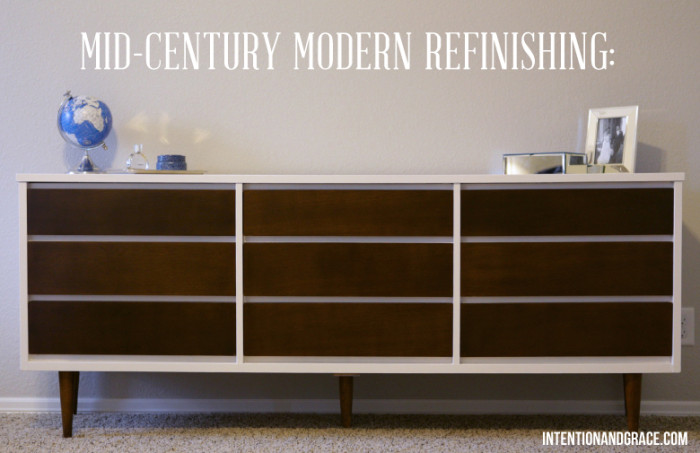
After scouring the web for inspiration, we chose to go with a style like shown above, mixing white with the dark wood that is found elsewhere in our home. The white portions would be simple, we simply built a little spray booth inside our garage and primed then sprayed them white with a high gloss oil base paint. They came out beautifully and the finish is so firm and durable!
The drawers were a bit more challenging, since we couldn’t sand them down we had to find a product that would allow us to stain over what is currently there, yet be translucent enough to still see the wood grain of the laminate. Then we found this stuff on amazon! After searching the MinWax website to see what shade we needed, we decided on Tudor, the dark brown shade with subtle gray tones, to finish the drawers with. We tested one drawer by simply painting it on with a foam brush and after a couple of coats it looked fantastic and just as we had hoped. Because we had so many drawers we sprayed the rest to save some time, and let it all dry for about a week so the white sections could completely harden before moving it back inside our home.
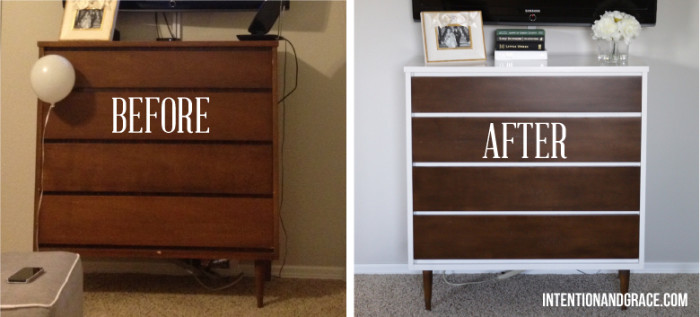
We are completely floored by how great they turned out, especially for not even being real wood. No one would be able to tell and I think they look just as great as the expensive options on the web.