Dec. 23, 2013

I first saw these amazing cardboard deer busts when I was working on my sons Woodland themed bedroom last winter. But coming in at $45, they were a little steep for me, especially for several pieces of cardboard. But finally I found this amazing DIY with much fewer pieces, AND it utilized foam core, rather than cardboard, which I thought seemed a little cleaner looking, and would be easier to cut.
I wasn’t a huge fan of the shape of the antlers, and wanted something a bit more streamlined and simplistic for my home, so I made my own Deer Head Template modeling after this one. I wanted to use the same size foam core through out, so I adjusted the slit sizes, and added a crest for the body to mount on.
Then it was time to get to work.
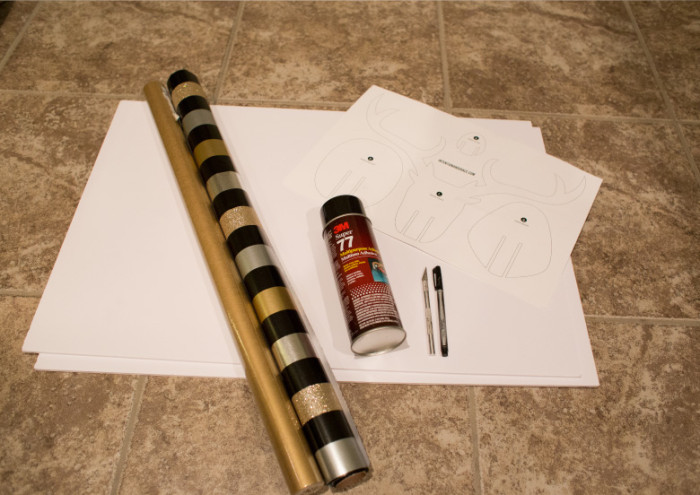
You will need two pieces of foam core, a can of spray mount (spray glue), a pen or scorer, an xacto knife, some wrapping paper or other material you want to cover your deer with, and the Template.
*Please note that my template is made to be printed on 12×18″ paper, which can be done very cheaply at places like office max, office depot, etc. Or you could select tile printing on your personal printer and assemble at home. :)
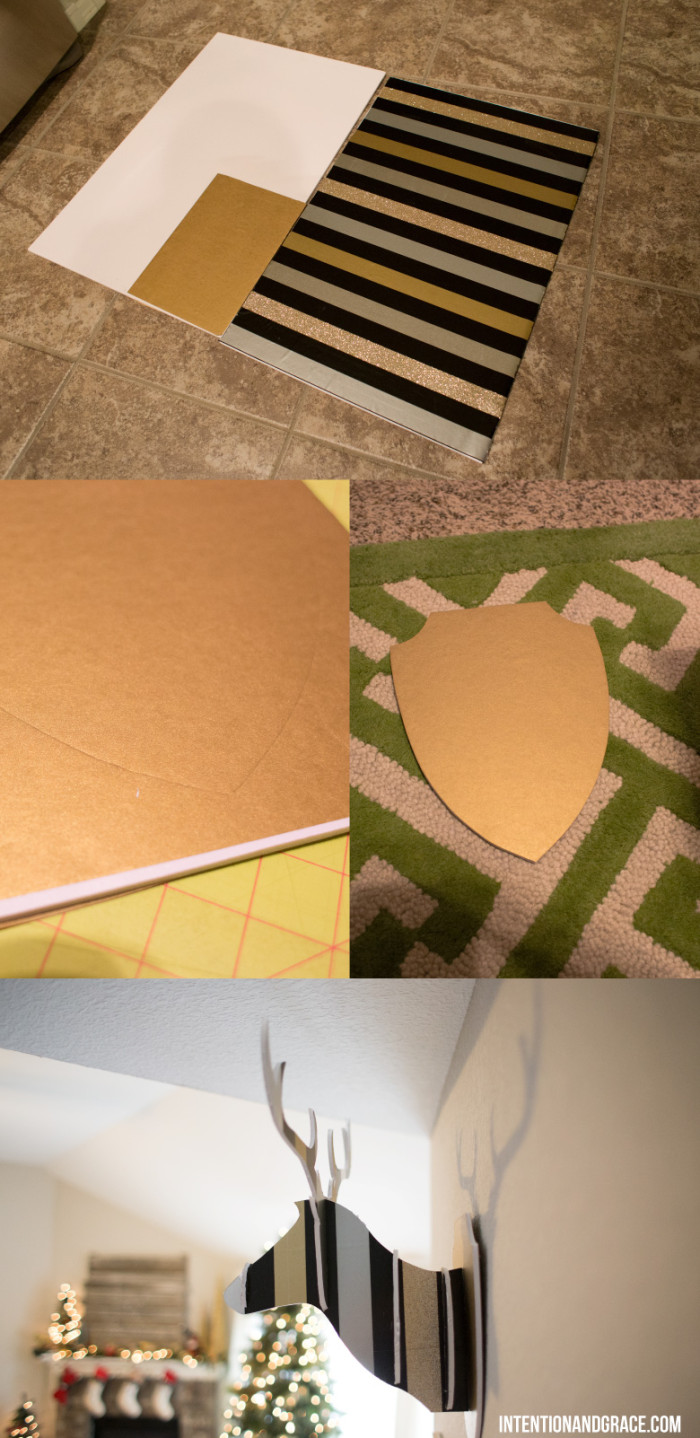
To start take your foam boards, wrapping paper and spray mount outside. I did mine in the garage since it is freezing outside right now. Spray your board down and press paper onto both sides. I only did a corner of my accent paper because I knew I would only need this for one piece.
Once your paper is attached to your board, you can begin tracing your template onto them. I found it best to lay it all out first to make sure they all fit like I wanted, keeping both neck pieces laid out similarly since they would mirror one another. If you have directional paper like I did, it is also important to make sure the pieces are all laid out with the paper going the same direction.
For tracing, you can use a pen if you like, but I found it more useful to use a scorer. You can find these at craft stores or online and they are my favorite for projects like these. But if you don’t have one handy, a mechanical pencil without the lead, or a long nail can do the trick for you as well. I preferred this method over the pen, because I anticipated that my trimming would not be exact and I didn’t want any pen marks to show.
Once you have all your pieces traced out, simply use an xacto knife to cut through them all. This will take some time. It took me around 30-40 minutes on my first one, but I eventually got much quicker at it. There are a few key points to remember: Always have a sharp blade and keep the blade vertical as you cut.
If you have not used an xacto before, its nothing to be afraid of. You just need to take it slow and steady and you should have no problem with this. The foam core is very smooth to cut through making it a fairly easy project. Its only the timing of it all that can be a bit tedious.
Once all of your pieces are cut out, its time to assemble them and hang!
Although I am using ours as Christmas decor, these cute little guys can be used all over the house. I found these two that I am loving! I think they would be so cool in a child’s room, above a fireplace, or as an accent in an office space.
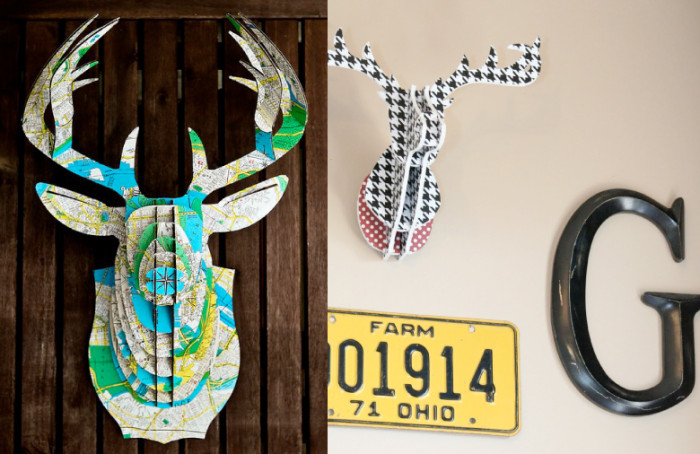
MAP | Houndstooth
Dec. 18, 2013
The other night, my husband showed up at the house with pallets sardined in his car and I had no idea where this was going to go. He said it was a surprise for me and went outside for about ten minutes. Hearing the machine tools going, I couldn’t help but wonder what this beat up pallet was going to become…a shelf? a wine rack? a bench or coffee table? Who knew…
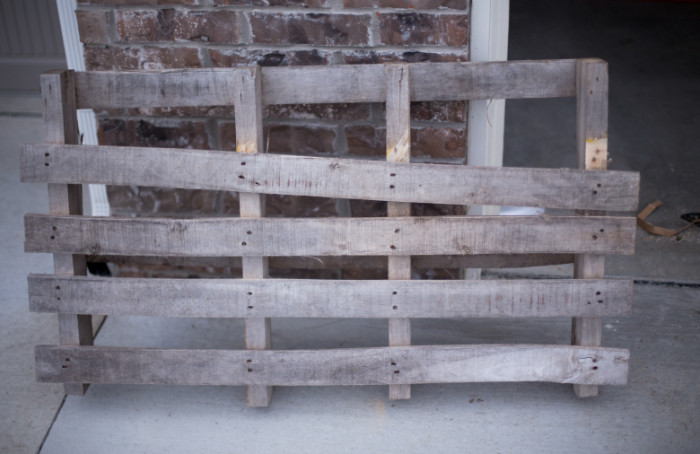
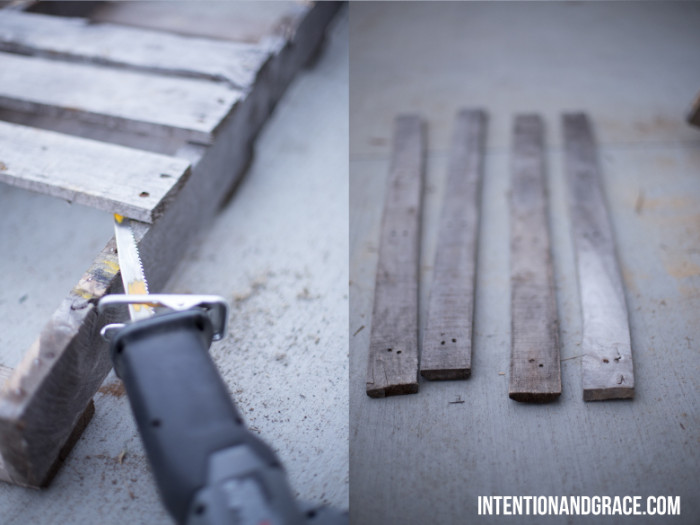
This is what he was doing while I was inside wondering: 1. He wanted to keep the rustic integrity of the wood by keeping the original nails, so he used a jig saw to saw the pieces off their base cutting the nails right in half. He was then left with several planks to work with.
2.He then laid them out on the ground face down, and used two extra pieces to support the structure on either side. By only using two of these it made it incredibly light, yet sturdy. He simply screwed the pieces together on each plank and voila! He had a solid piece to set up on our mantel.

At this point I thought, oh cute! I can hang a wreath from that, or some ornaments, but he wasn’t done…
3. He had a strand of 50 lights, so he used 50 pieces of tape to mark out what he wanted on the pallet to make sure it was spaced correctly and would appear clearly as a letter once it was complete.
4. He then used a spade bit with a diameter the same size as the bulbs that he was going to use on the pallet. Scoring them on the front first, so they didn’t split the wood, and then turning the pallet to the backside to finish the whole all the way through. He made 50 clean cuts in about 10 minutes.
5. After that, the fun part, feed the bulbs through the holes following the shape from one end to the other and plug them in!
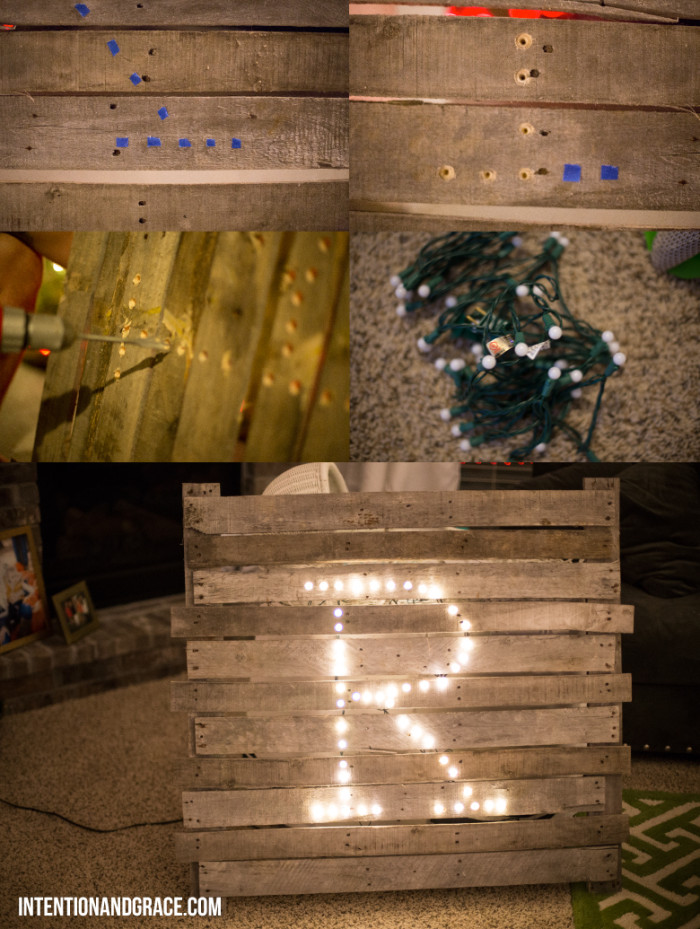
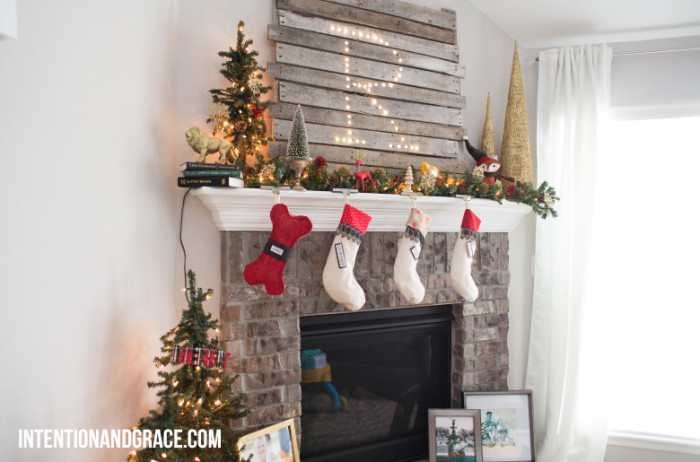
We intended to staple the cord down on the back side, but were out of staples for our stapler, and we were too excited to wait, so we went ahead and hung it on the mantel. You can’t even see the cords behind the sign and I love the way it looks. It lights up our mantel and fits in with our rustic little theme this year. It was such a simple project, and could be used all year long as a headboard, or accent in a bedroom or any other room.
Thanks babe for being such a crafty and handy man! I love it!
Dec. 17, 2013
I’ve seen these amazing garlands all over lately, like at Anthropologie and West Elm, but they came in colors I didn’t love for my home, and were much pricier than I wanted to spend on such a small accent. So I decided to make my own and it was so simple. All you need are 2cm felted balls (or larger if you prefer), a needle and some thread or bakers twine. I got my twine in the dollar bin at Target, how great and addictive is that section by the way?! Simply thread the needle, and string on the beads by puncturing them right through the center. If your kids are old enough to handle a needle, this would be a fun family craft as well.
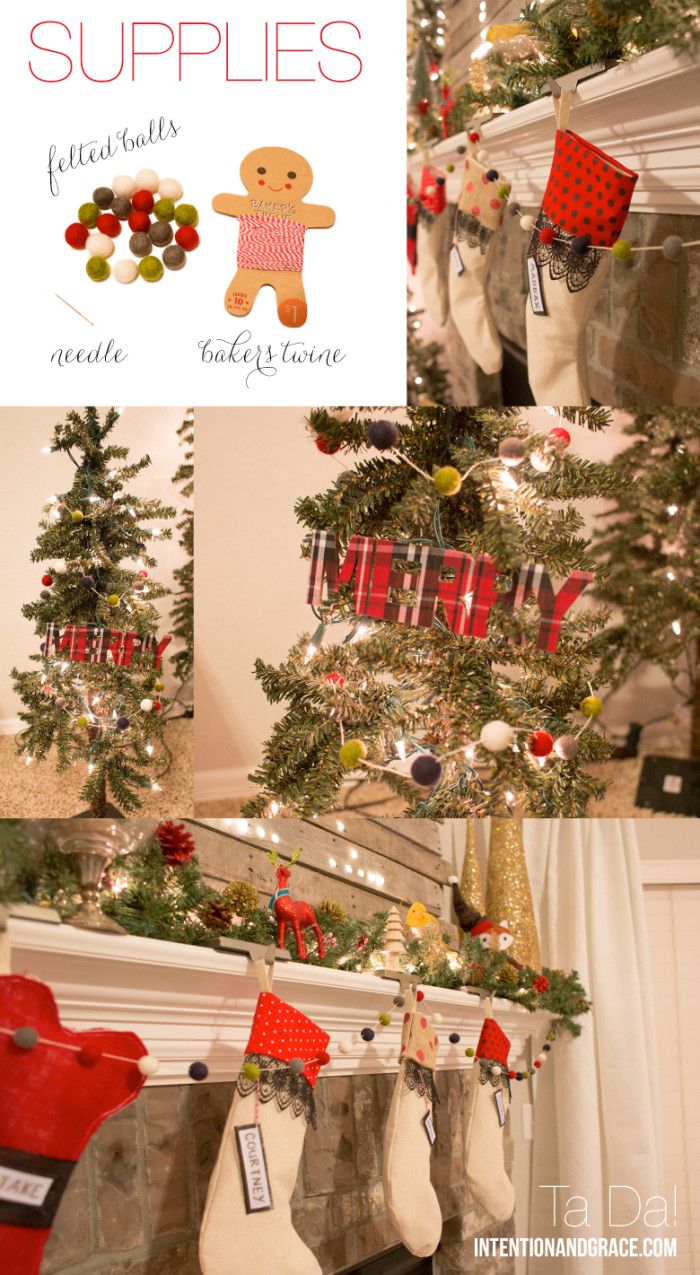
This project only took about 10 minutes to do and I love the small amount of holiday cheer it brings to our decor. I bought 100 because I had no idea how many I was going to want/need, but this strand for my mantel only took about 30 to complete. Depending on how spaced out or close together you want yours, you can order fewer or more.
I found mine on Etsy because it allowed me to mix and match colors and buy in bulk as I wanted, but they came from Poland and took about 2 weeks to arrive. So if you want some a bit quicker, they also have great options on amazon:


Dec. 15, 2013
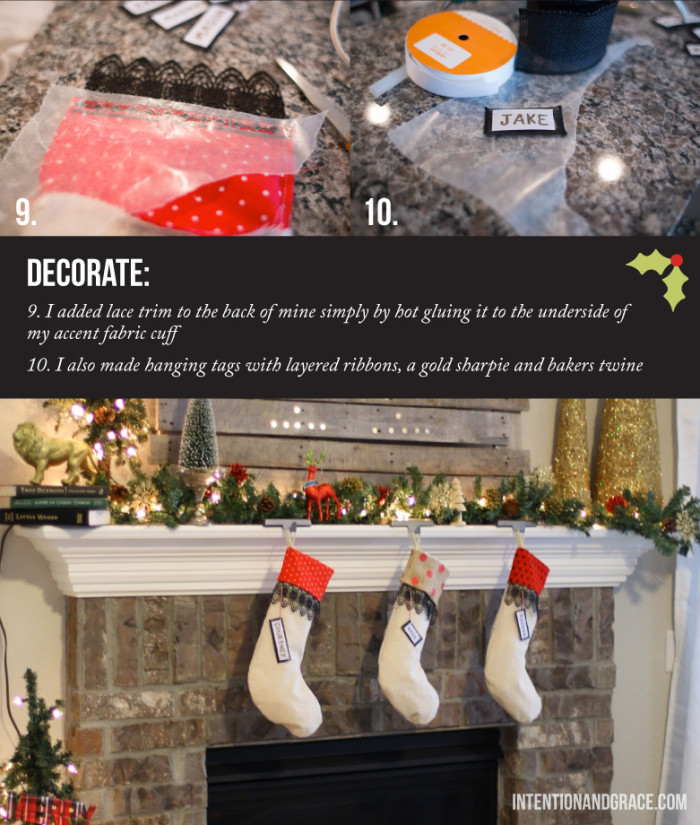
Since this is our first year with an actual mantel, I decided to spice things up a bit and make my own stockings. Partially because I really enjoy sewing and crafting, but mostly because all of the stockings I liked were $30+ each and I didn’t want to spend that much money. I made all three of these for under $30, and have enough fabric left over for at least 3 more. :)
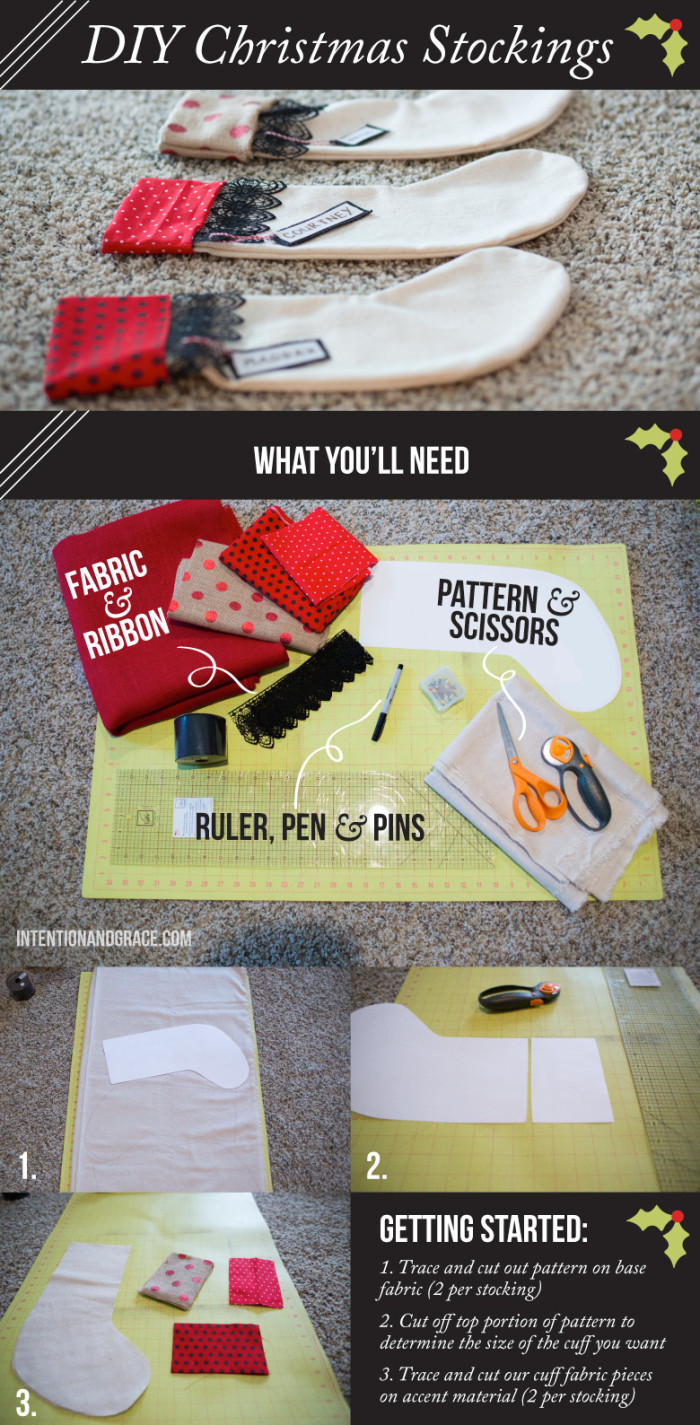
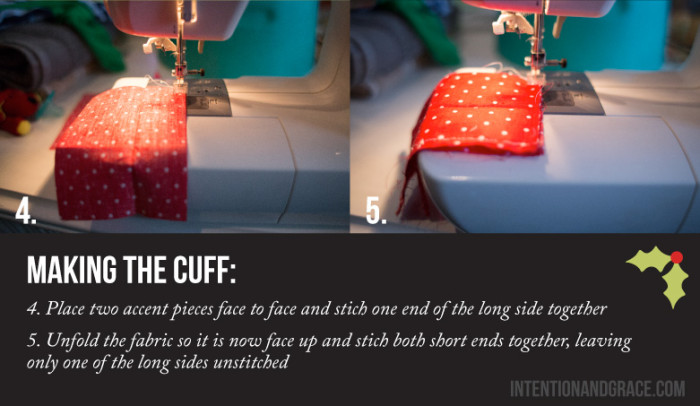
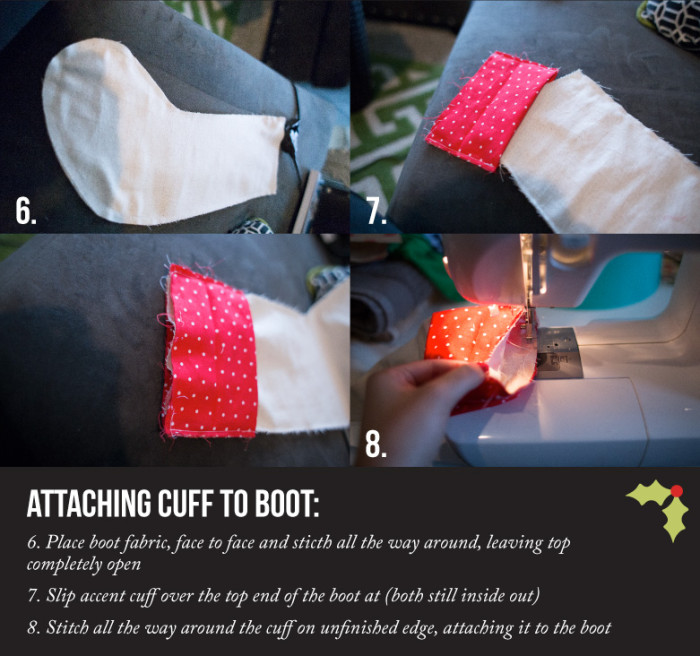
I will admit these were a bit more challenging than I had initially anticipated, but I love how they turned out and they are something I can feel proud of all season long.
To make your own, download the pattern here
You may also notice I kept my lil lion guys around for the holidays as well, you can see how they were made HERE. Merry Christmas.
Dec. 12, 2013
I really really don’t like clutter, so when I saw we were having quite a problem with no where to put invitations, bills, coupons etc. in our new house I knew something needed to be done. They were slowly taking over our beautiful new counter tops and our fridge is stainless and not magnetized so we were unable to utilize that space, which I actually kind of like because it keeps things looking clean and orderly.
So, I found this super amazing fabric courtesy of my lovely neighbor, Jenny and immediately knew I had to use it in my home somewhere.
While shopping around Lowes for something to attach it to I came across these pre-cut insulation boards for about $6 a piece. They are about 2′ x 2′ squares which I knew would be the perfect size to fit on a spare wall in our kitchen/living room area.
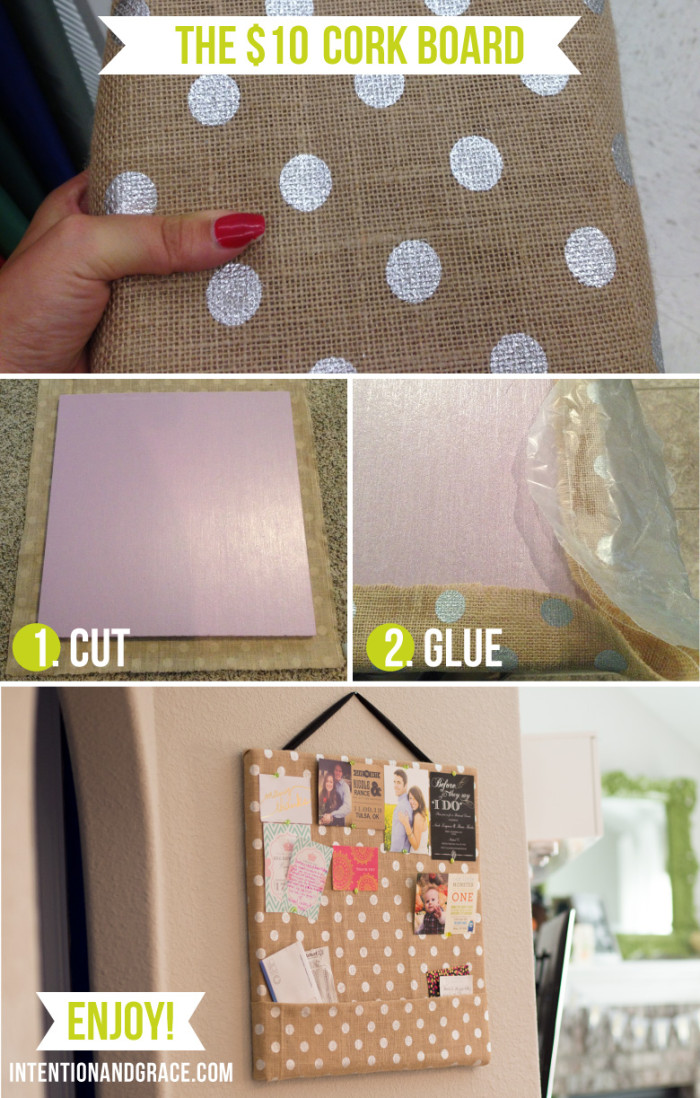
They were so easy to make!
1.) Lay your fabric out flat on the floor, and place the board on top. cut the fabric around the edges living enough to overlap on the back side of the boar about 1-2 inches.
2.) I then used hot glue to attach my fabric all the way around the board. Because I was using such a porous fabric as burlap. I wanted to make sure it was really well engrained so it would hold secure. I used wax paper to press down the hot glue, not only saving my fingers from a sticky hot mess, but making a smooth glue backing to hold the fabric tightly. The wax paper allows you to press down with a towel or other material as well, saving your from burning yourself, which I usually tend to do while using the hot glue gun for any project… I started by gluing the center of each side down, to make sure the fabric was stretched evenly and well across the board, then worked my way towards the corners.
The best part about this, is you could be as messy as you want on the back side, but as long as the fabric is pulled tightly across the front, no one will see. ;)
Once you have glued it all the way around, you can add a piece of ribbon to the top to hang, and you’re done!
I added a pocket on mine to slide bills into as they come. That way my husband could easily see when they have arrived, and they are always in a place that is easily accessible. To do so, I added another strip of fabric to the bottom, gluing all the way around same as before.
The final product has been hanging in our house for about two months now and I love it! We have taken things on and off regularly and had no problems at all. It is especially great this time of year as we receive Christmas cards, giving us a very easy place to hang them as they arrive, so we can enjoy them all season long. :)
Hope you enjoy!

