Dec. 4, 2015
Hi guys! I’m back with some updates as to what has been keeping us so busy these past several months. First up, our fireplace!
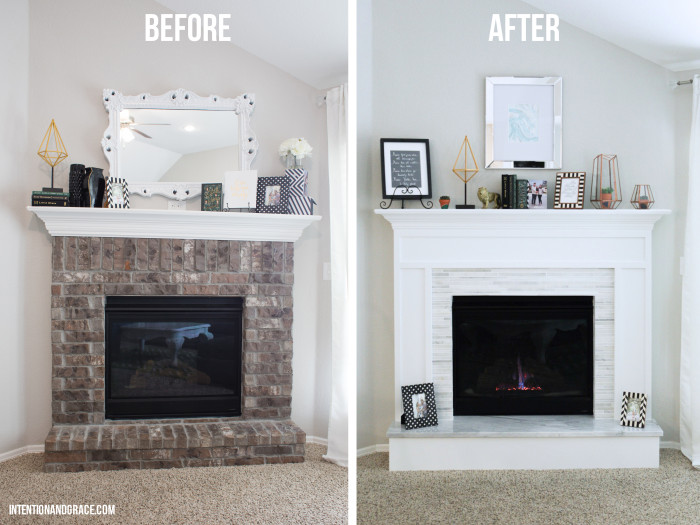
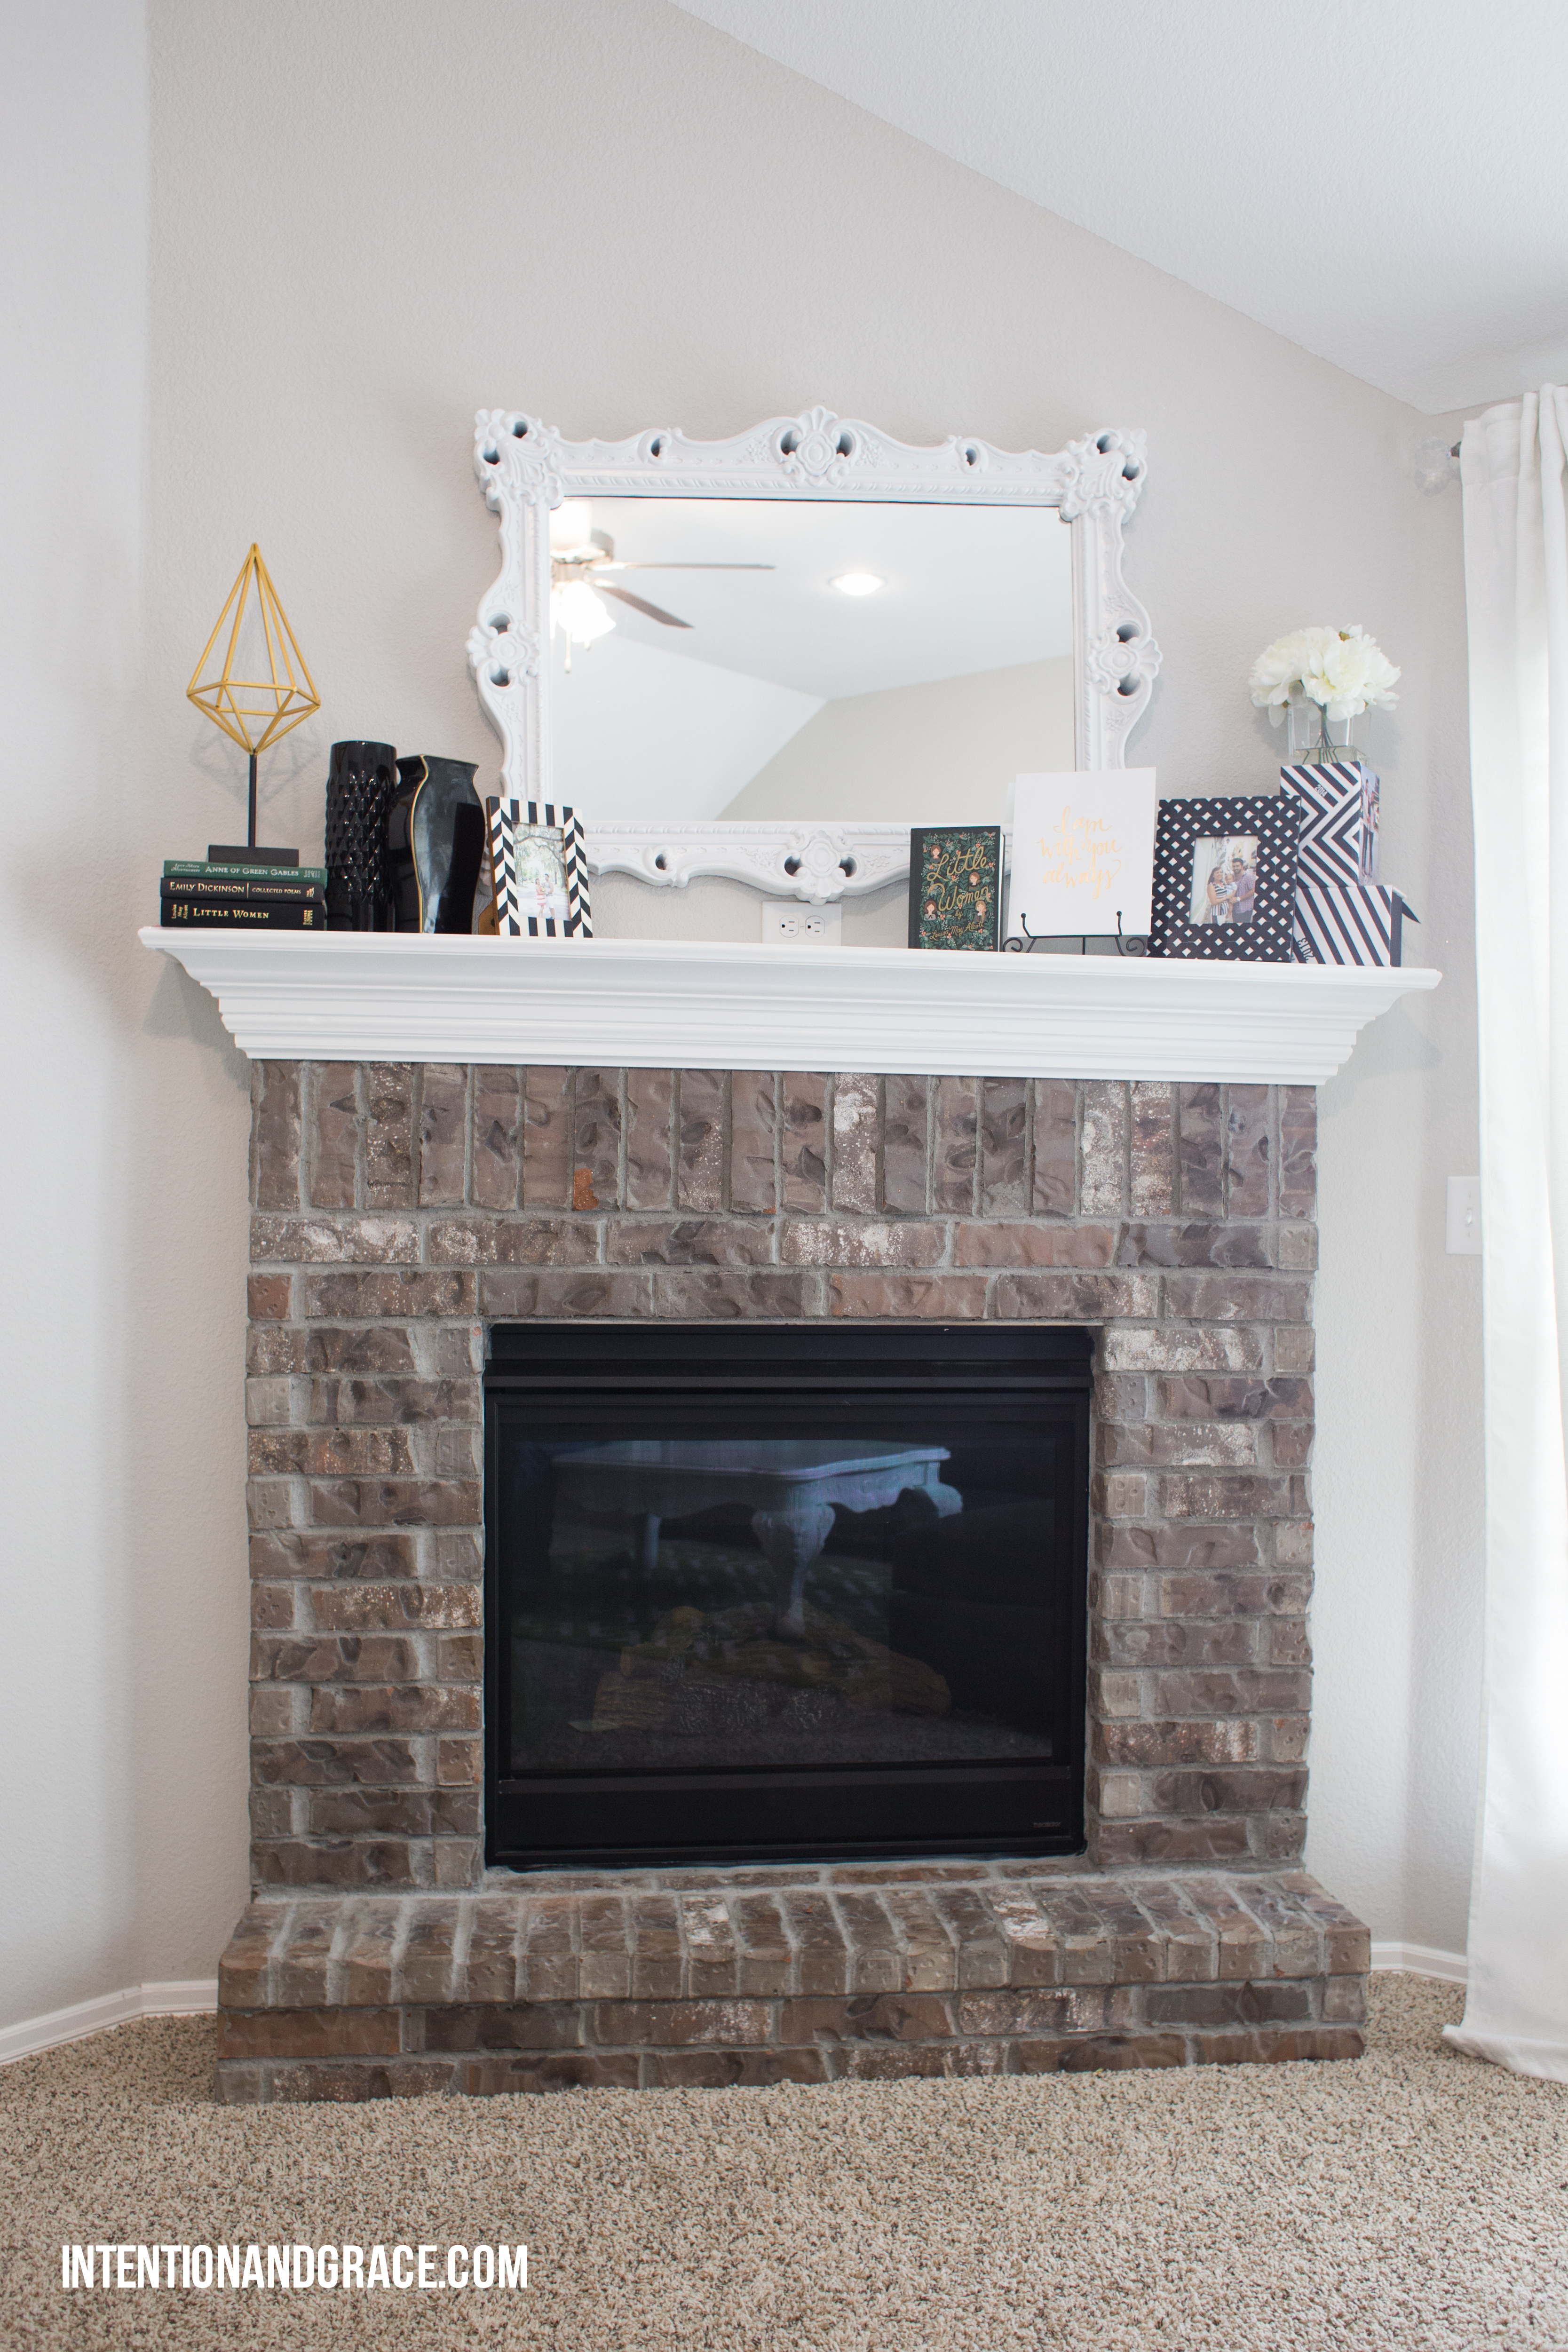
When we built our home a few years ago there were a few major items that either weren’t available from the builder like we had hoped, or were too pricey to consider at the time. One of those items was our fireplace.
We knew that we wanted a hearth, but the options provided were either full brick (that matched the outside of our house) with a hearth or a wood and tile mantel with no hearth. We had a pretty good vision for what we wanted, so we chose the option with the hearth and decided we would upgrade it ourselves at a later time.
Well this fall it finally happened, and I am so pleased with how it turned out. It may be my new happy spot in our house, especially now that its getting cold outside!
We had intended this to be a full DIY project so we began documenting our entire process, but in all honesty, it turned out to be a bit more complicated than we had initially planned so the documenting fell to the back burner.
I do have a few “working” images below, but didn’t feel comfortable providing a full DIY because of all the unexpected twists and turns we dealt with. If you’re thinking of taking on a project like this, free free to email or message me with any and all questions. It wasn’t a super hard process, just more of a “I wish I knew then what I know now” kind of thing.
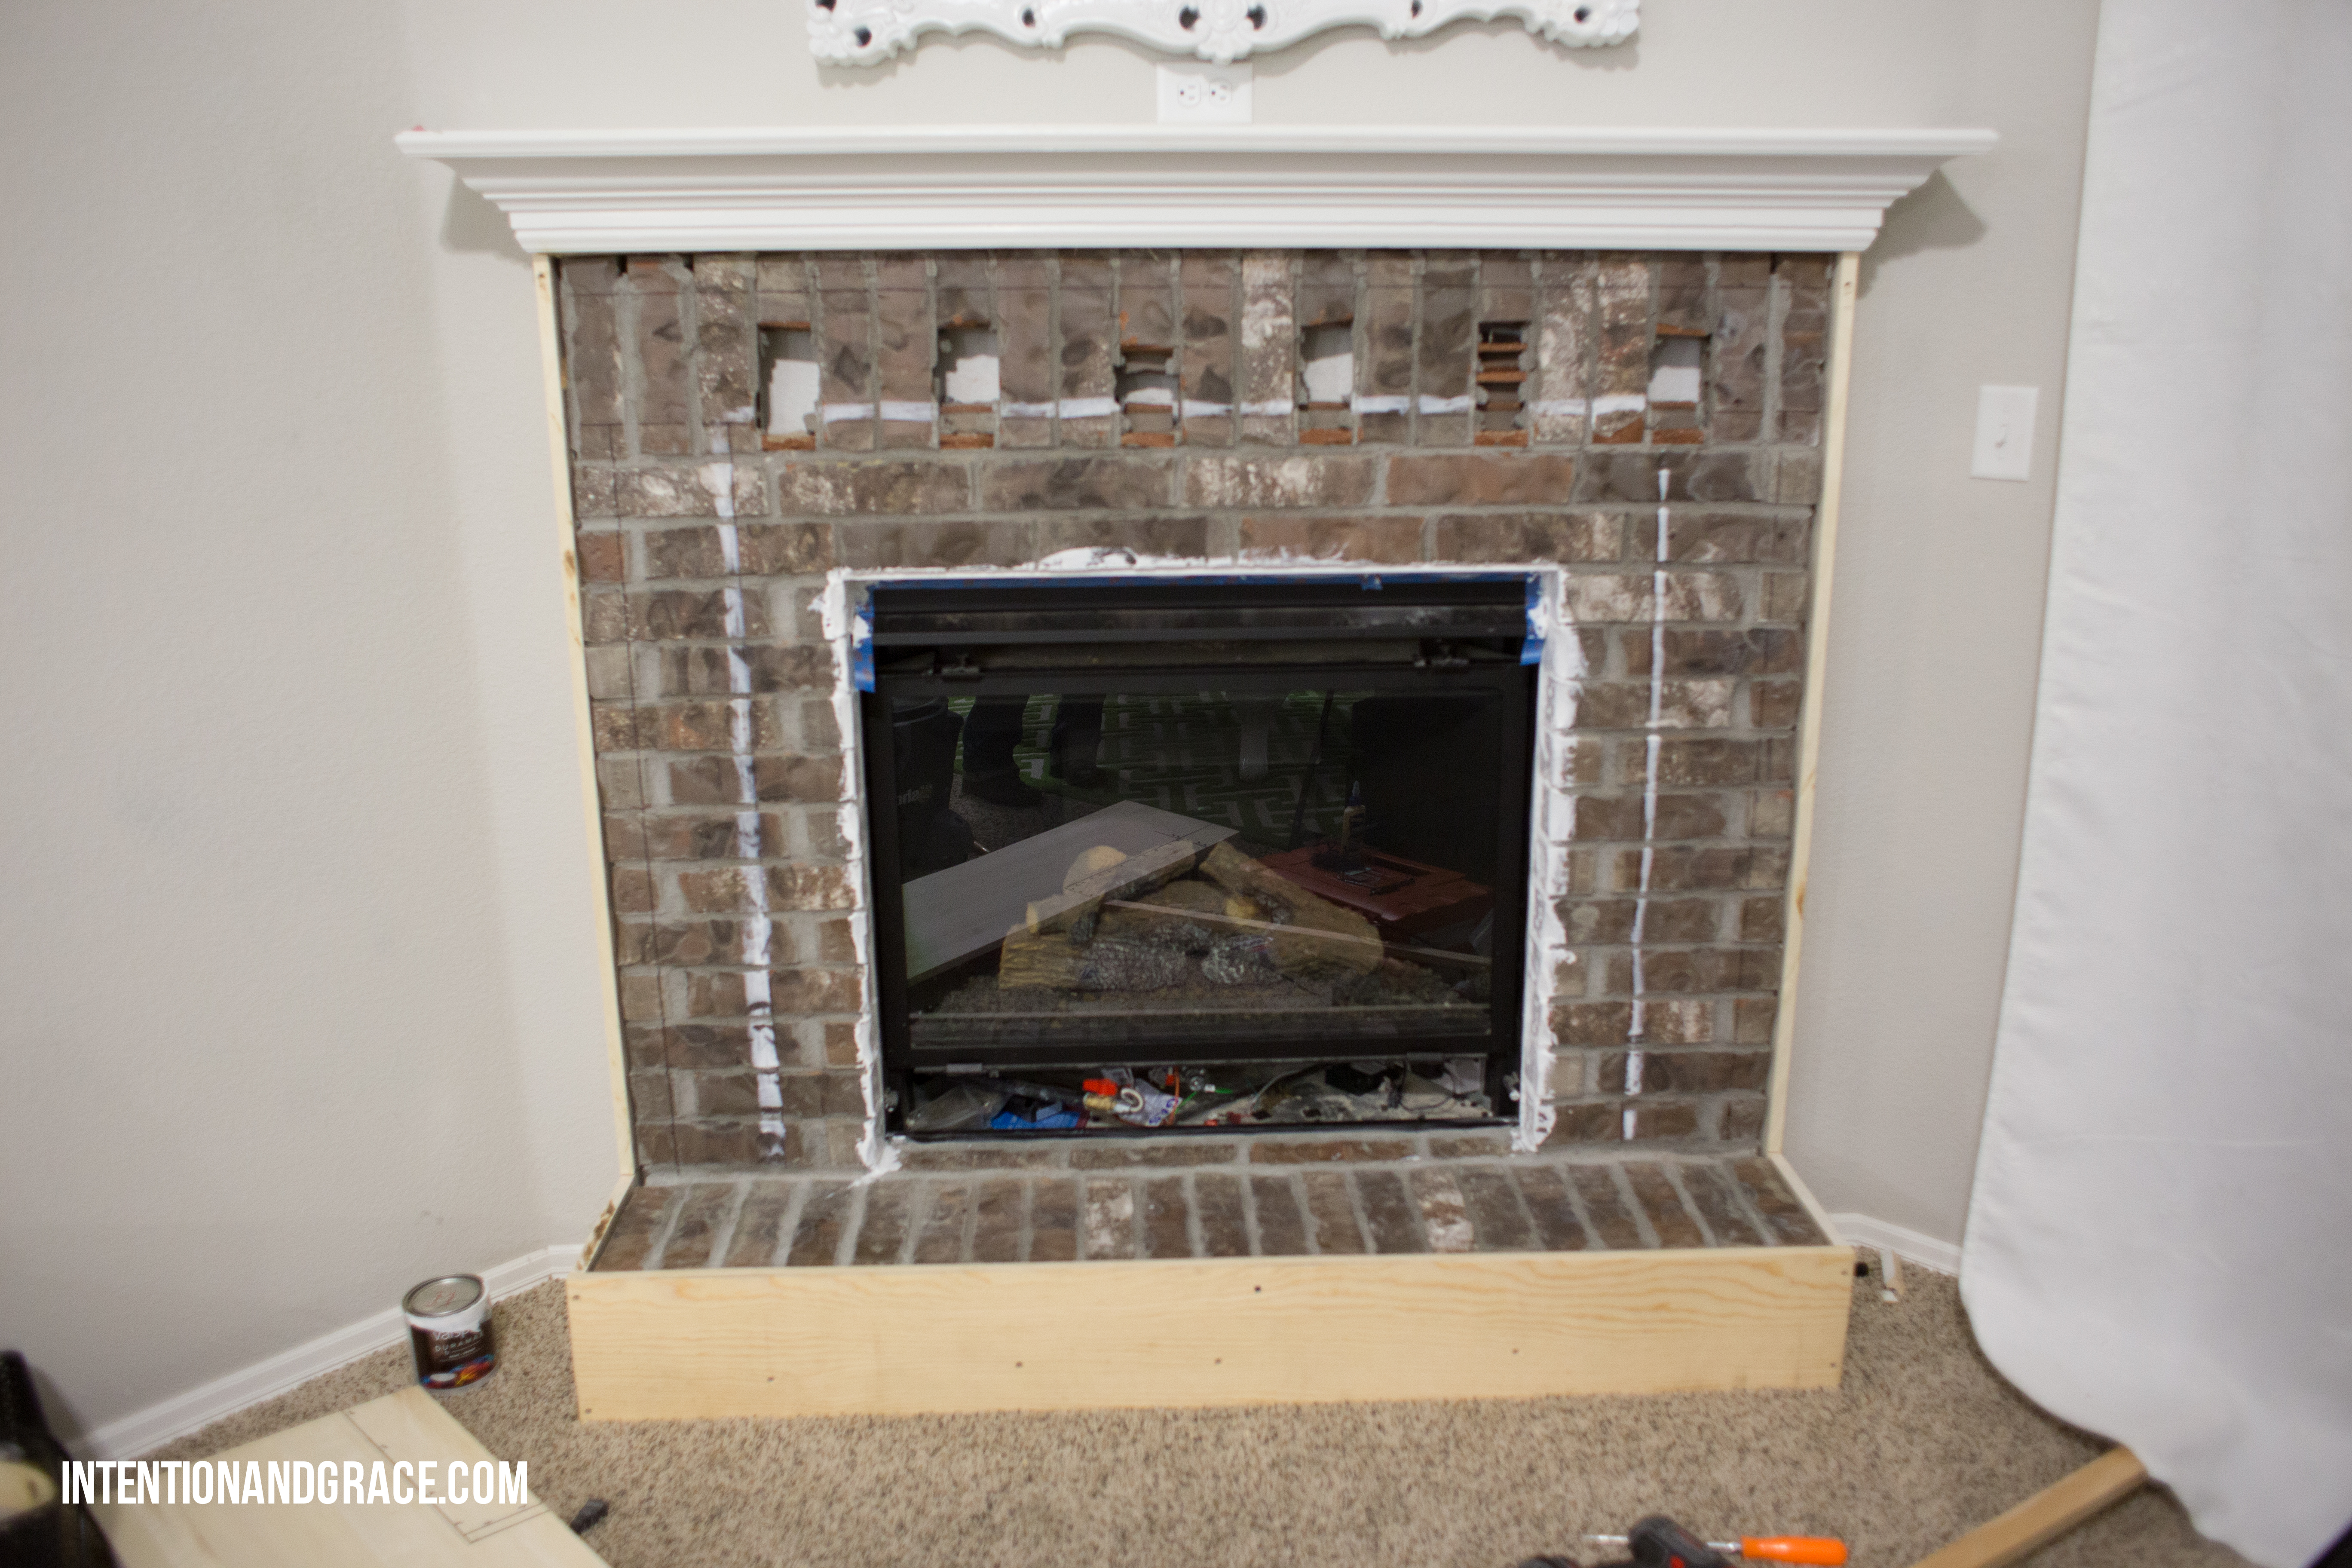
Before:

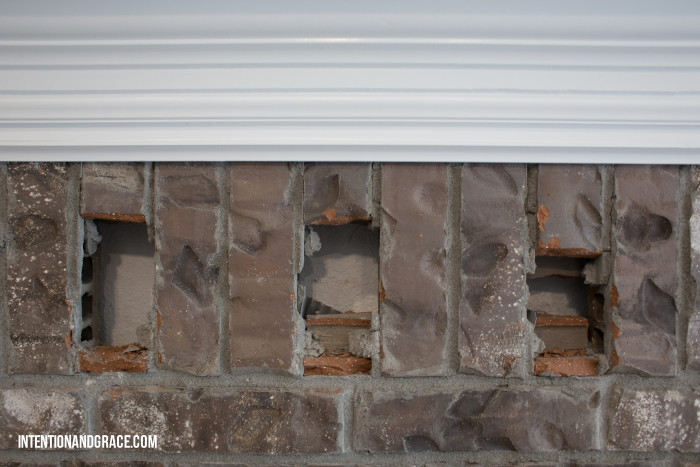
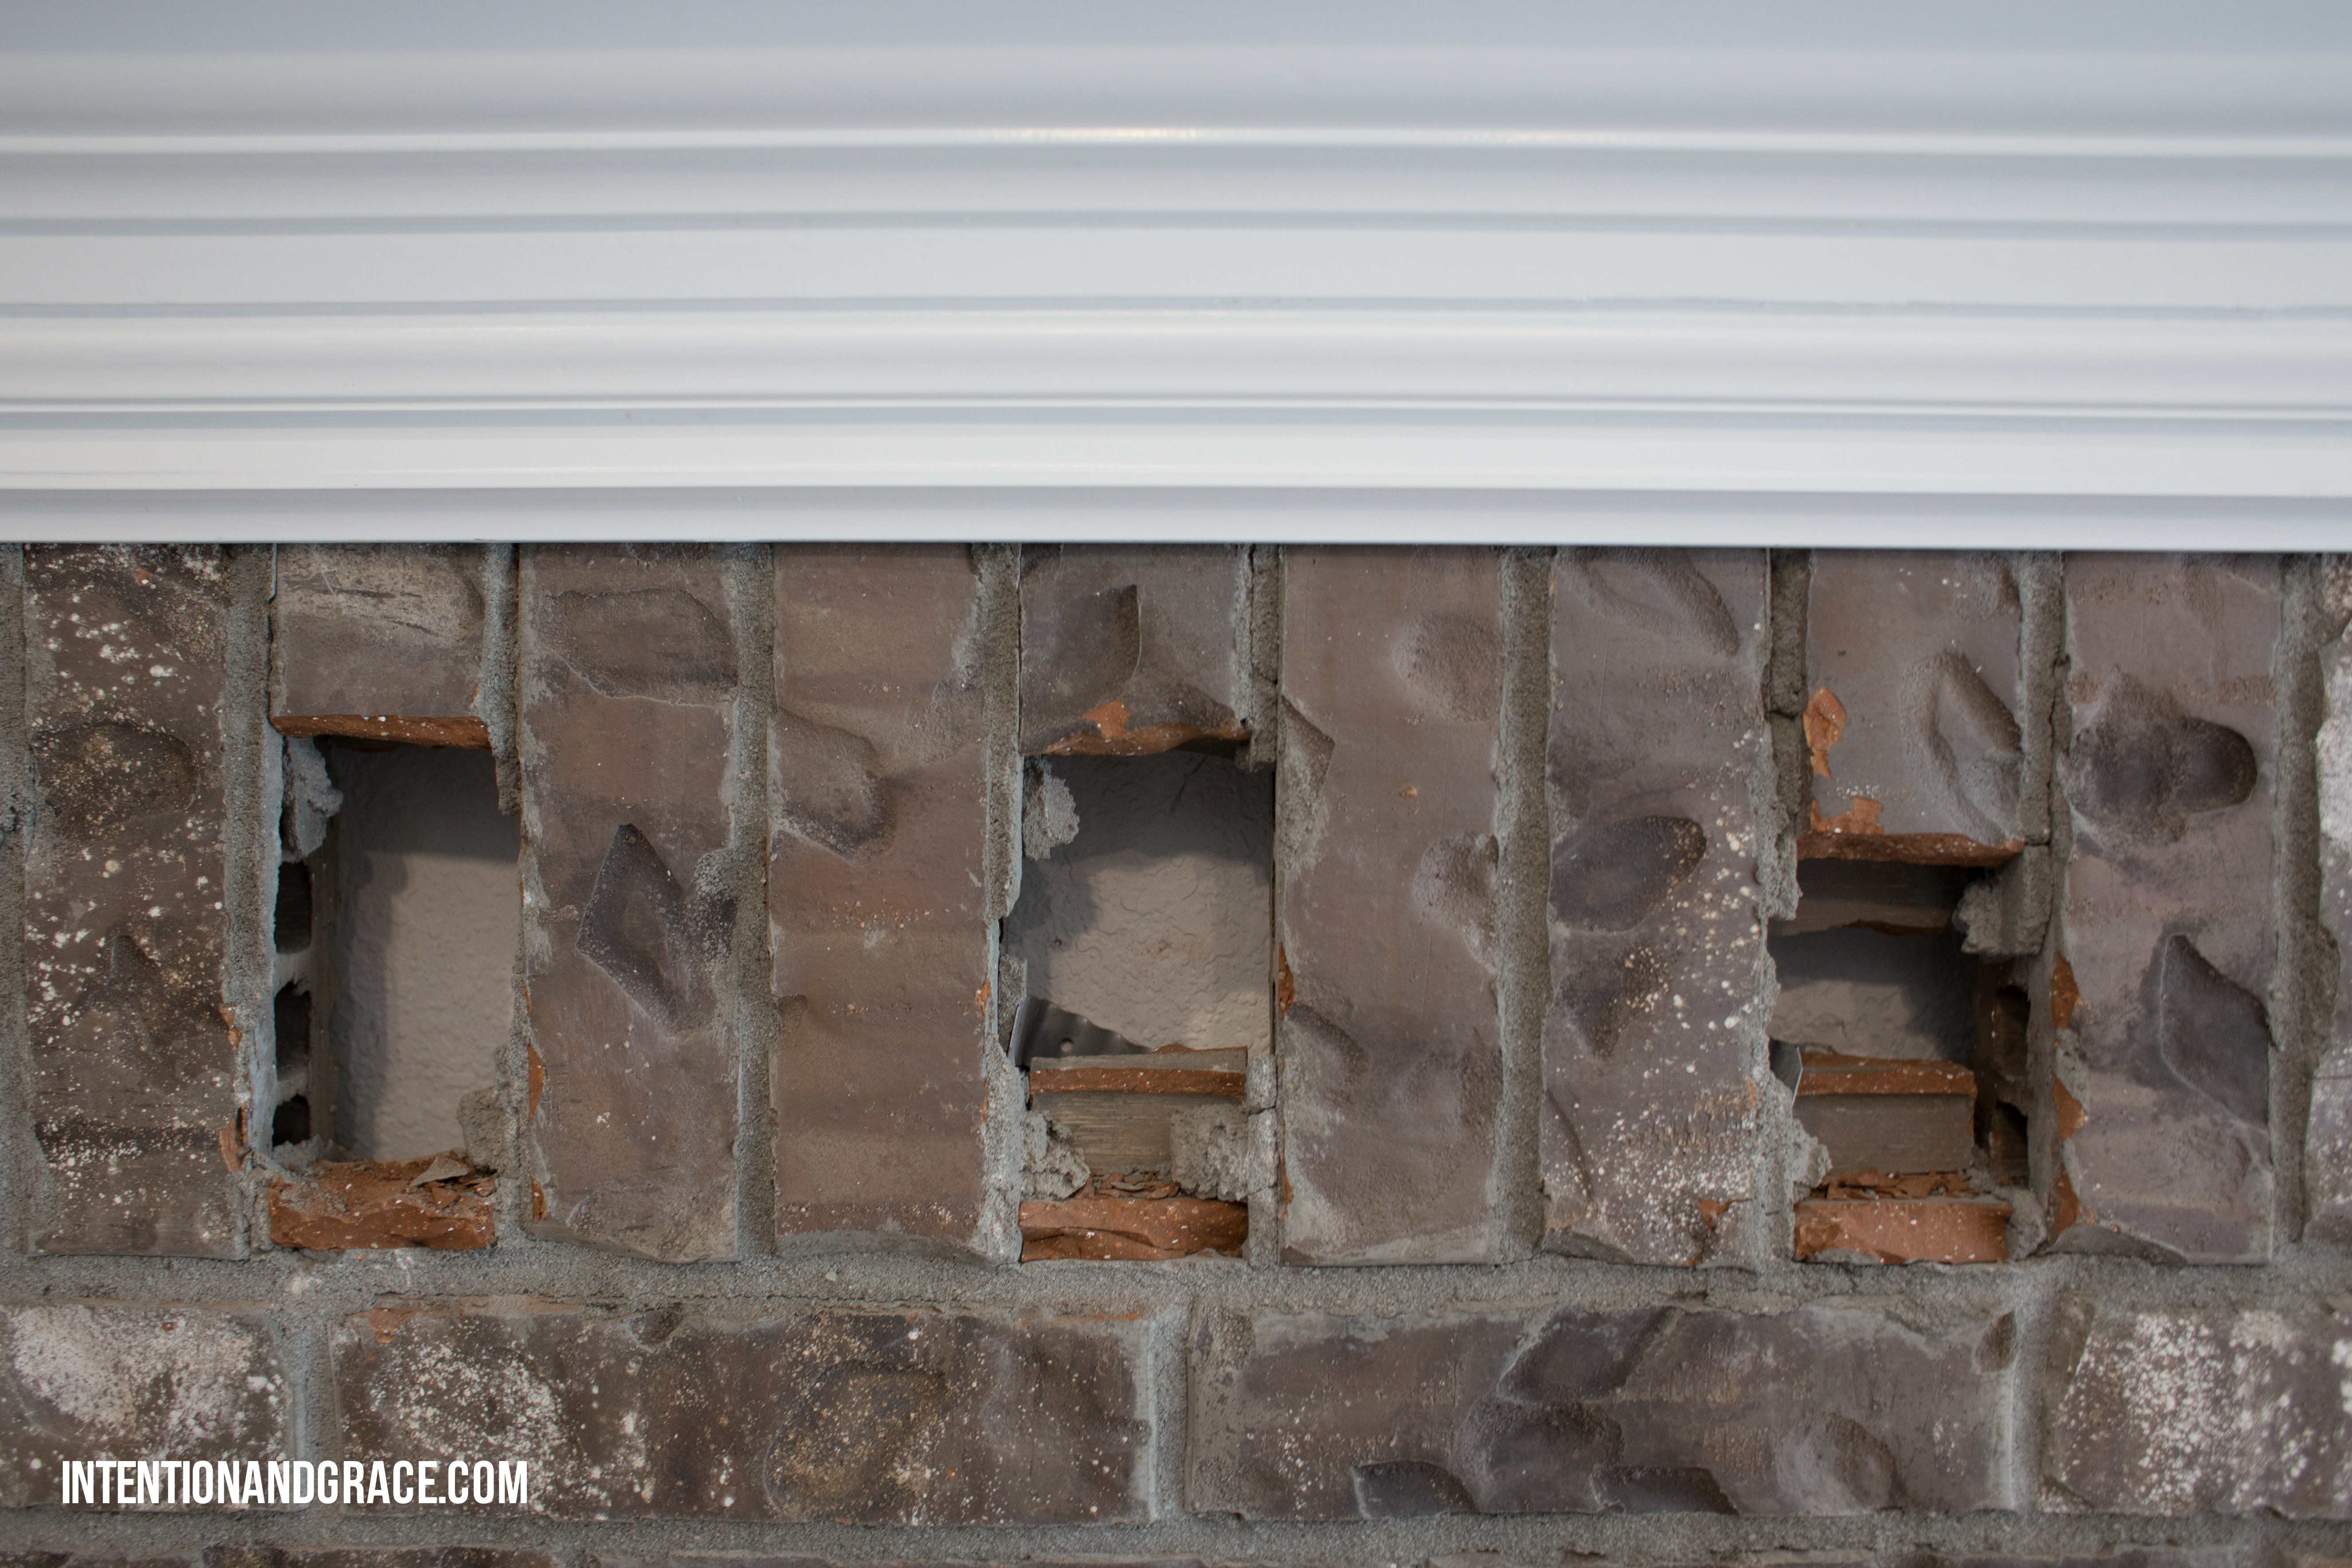
We chipped out the textured bricks that hung along the top row of our fireplace, so that all coverings could sit flush once we faced the fireplace with wood.
Then Nace measured everything out and marked it with paint to make sure it was proportioned how we imagined in our preliminary designs. And the framing of the fireplace began!
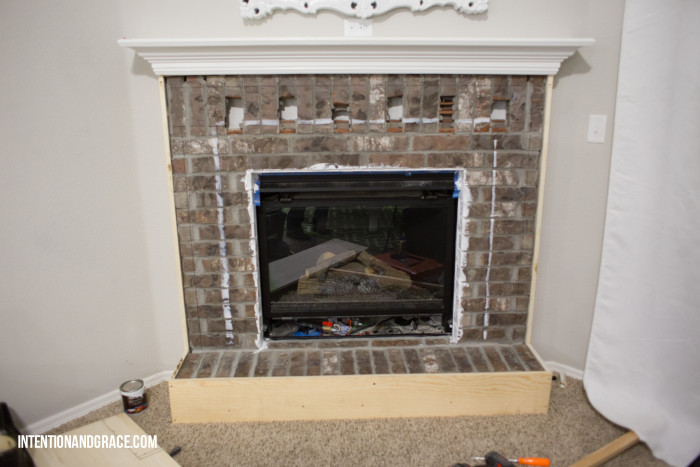
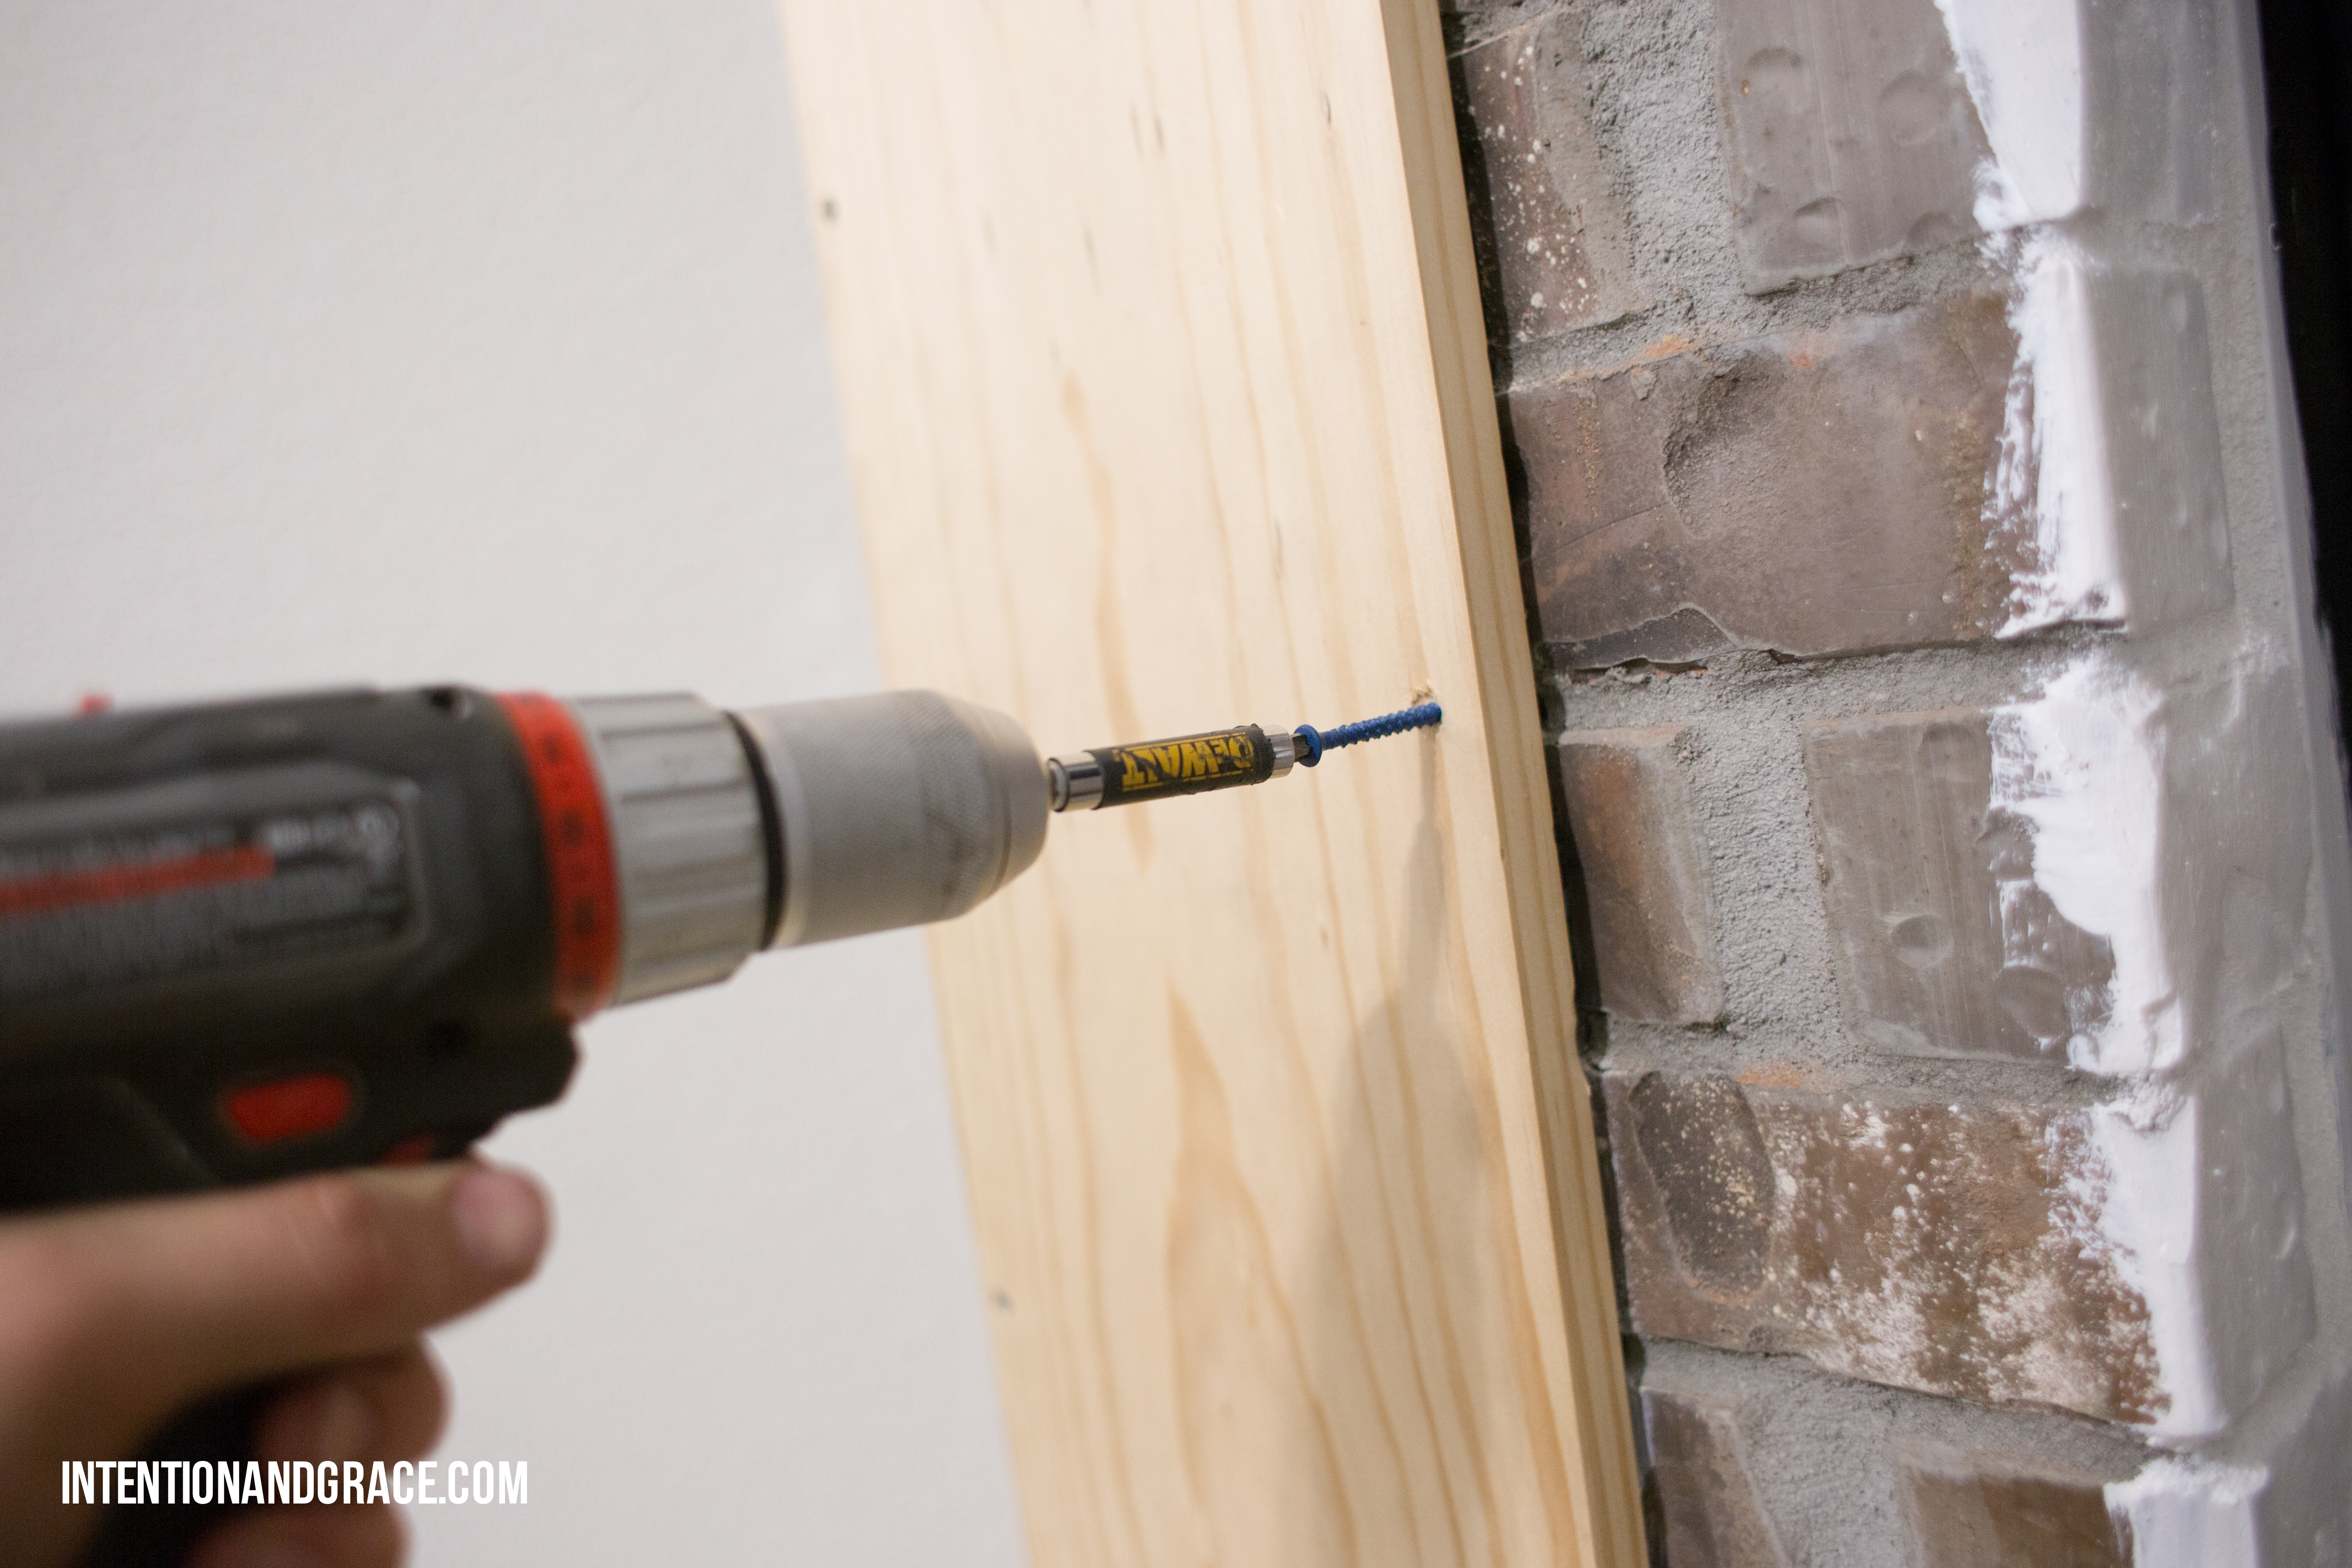
Using concrete screws, we attached the new frame directly to the brick.

Once everything was framed out as we hoped, the puttying and wood filling began.

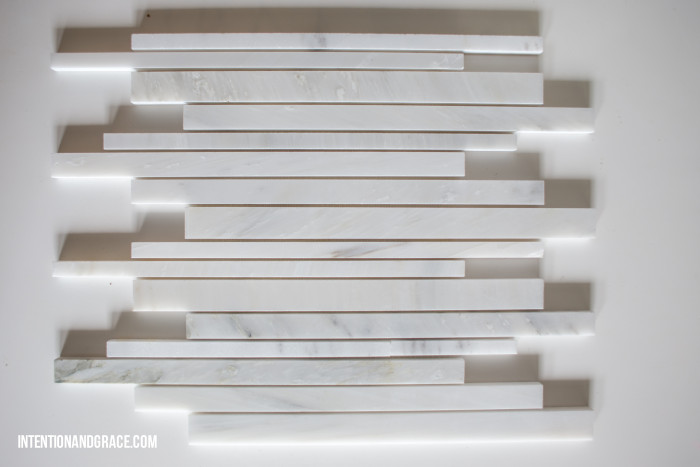
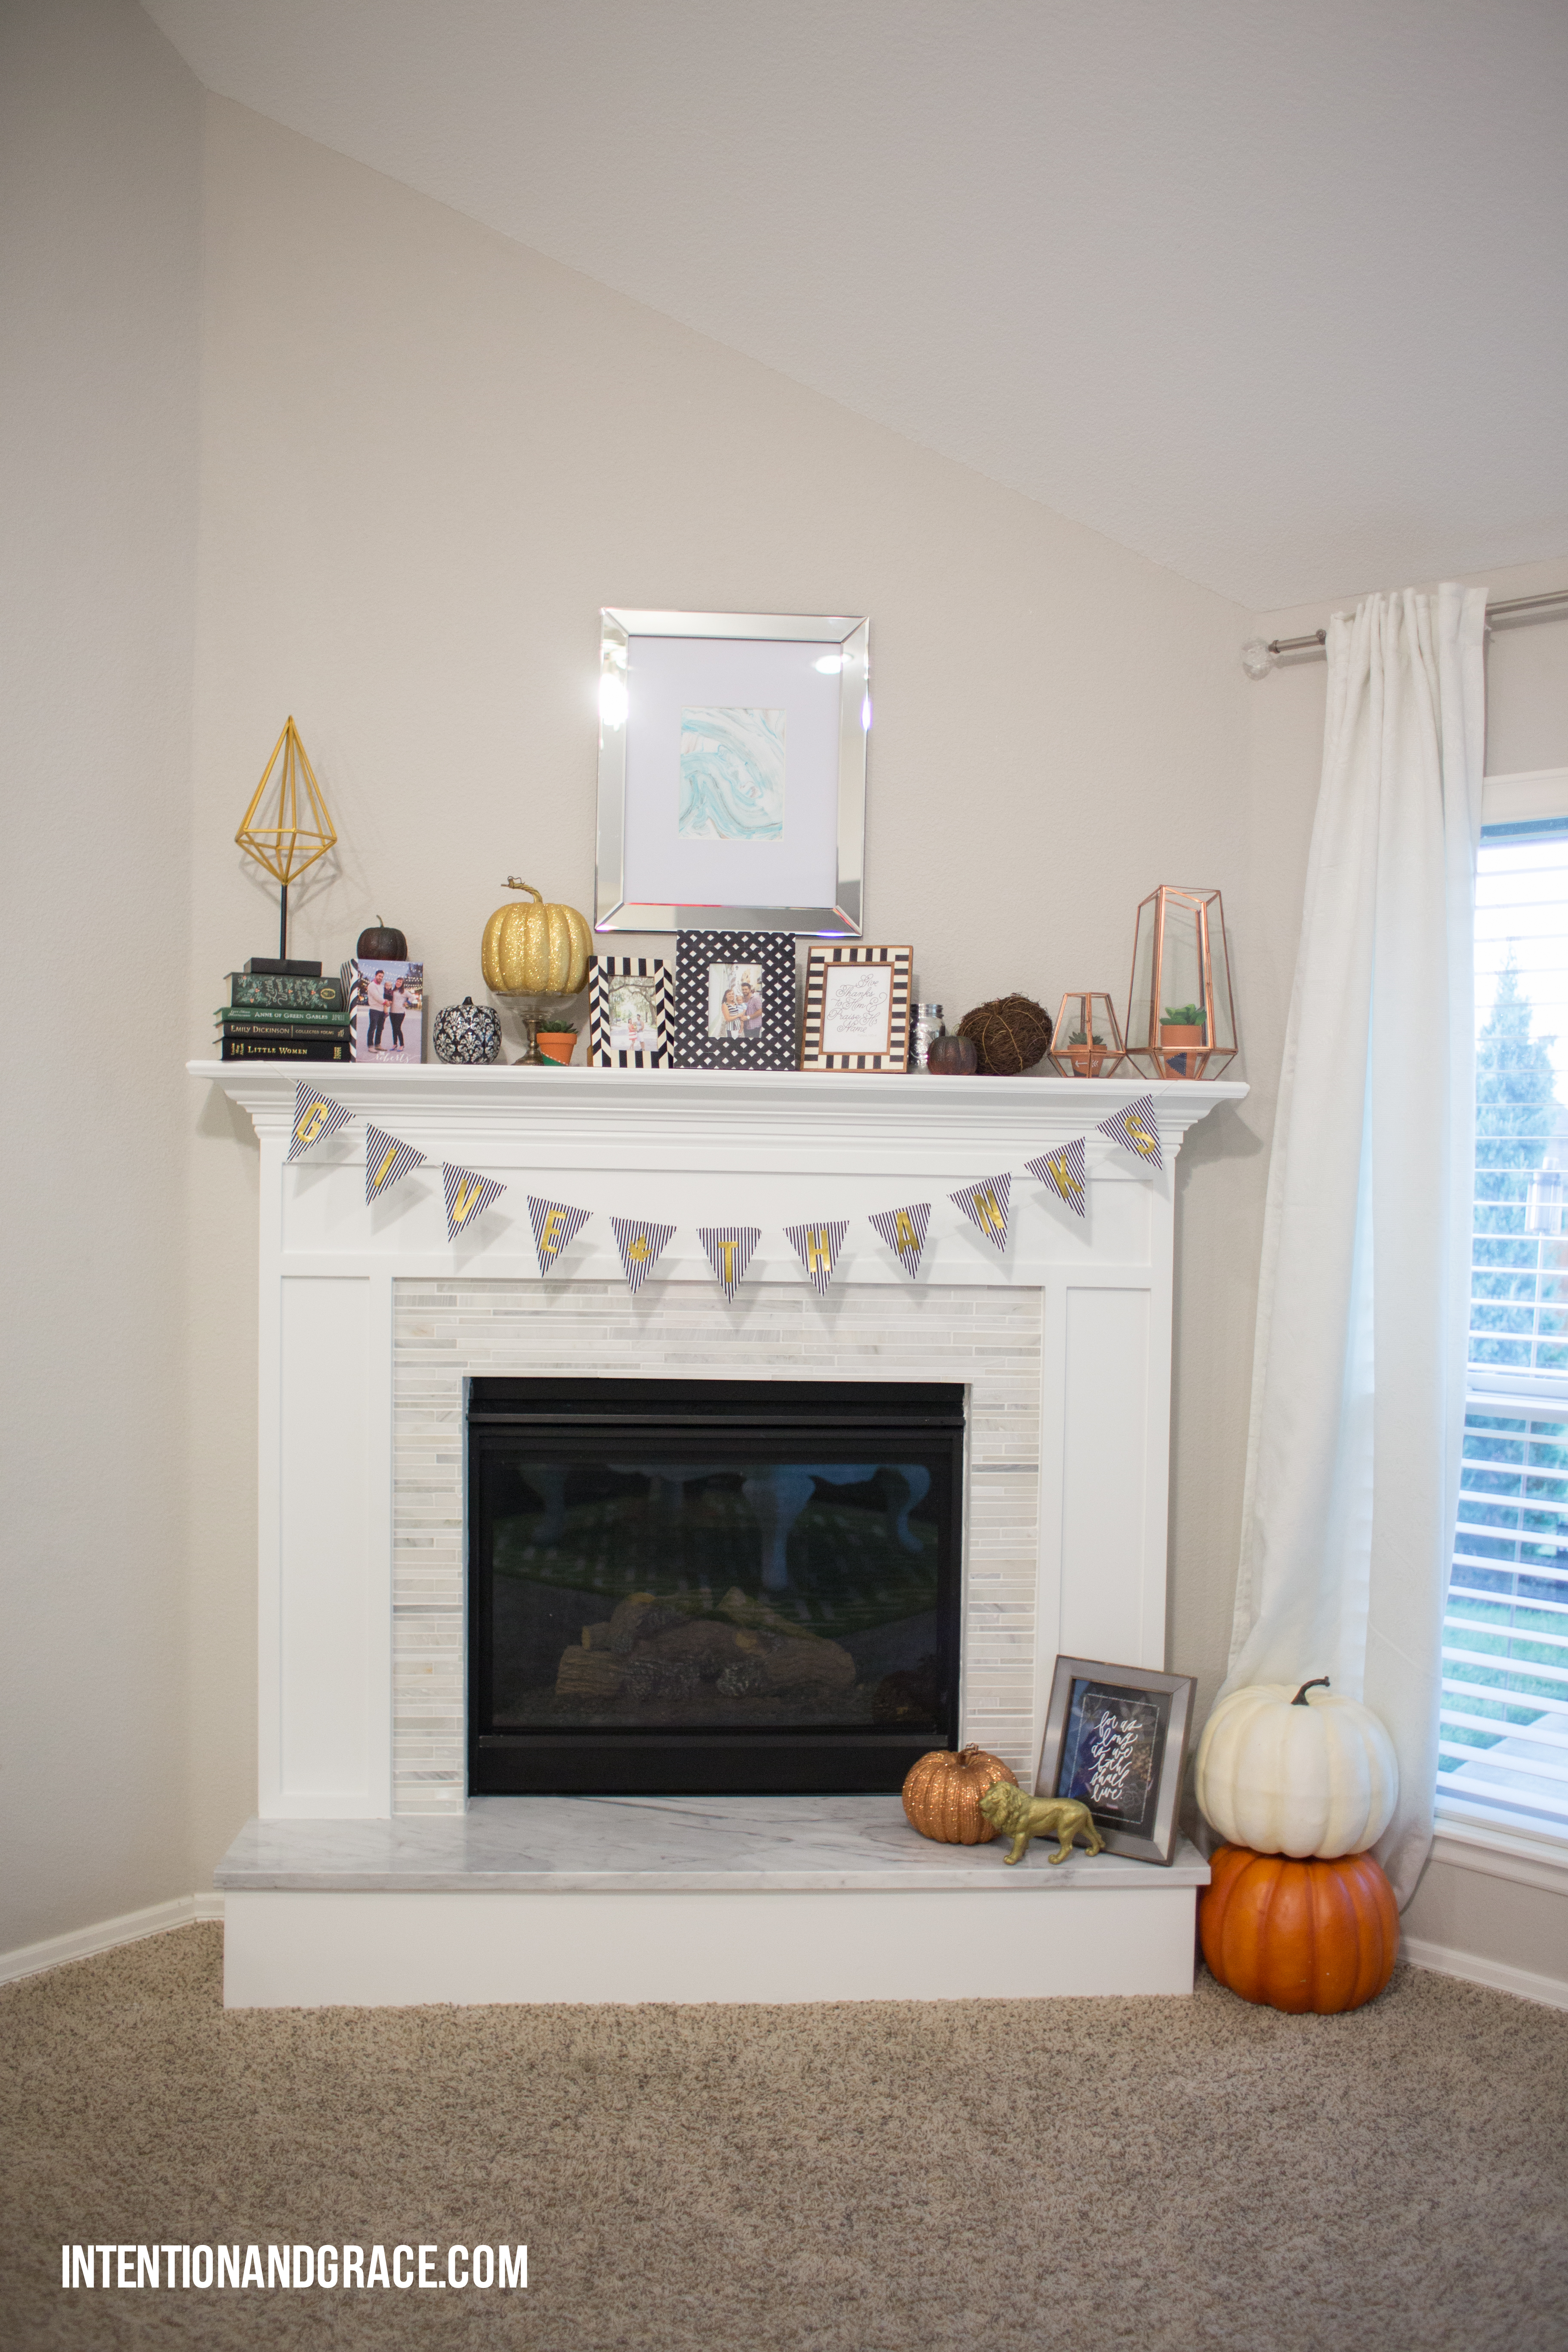
We also splurged a bit on some really beautiful marble tile from a local shop and faced the remaining inner area with tile and white grout. It was definitely the most tricky tile we have ever dealt with, but the finishing touch we were looking for!
After spraying the whole fireplace with a couple layers of paint, we added a matching marble hearth that we picked up super affordably from a local granite scrap yard. The material was free, we just had to pay to have it cut to size! A fraction of what ordering a new piece would have been. :)
Needless to say, we absolutely LOVE the turnout of our project!

Apr. 3, 2015
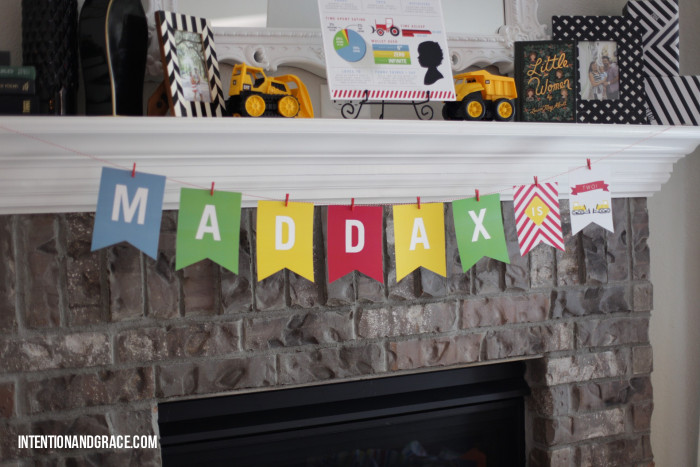
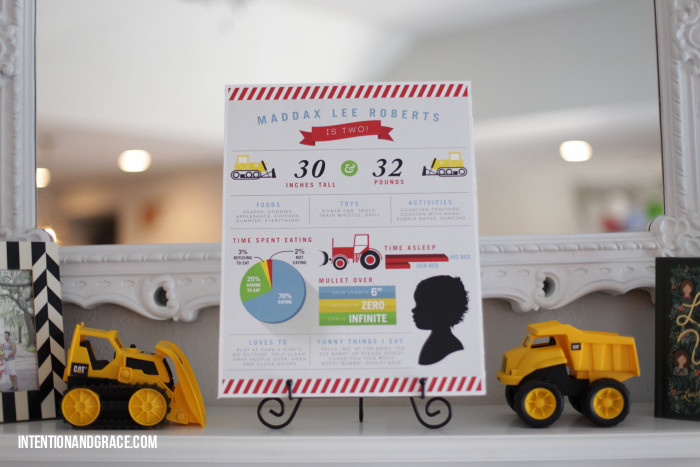
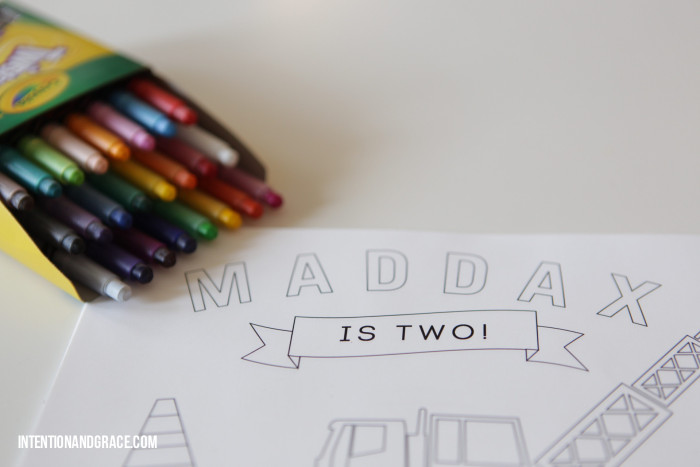
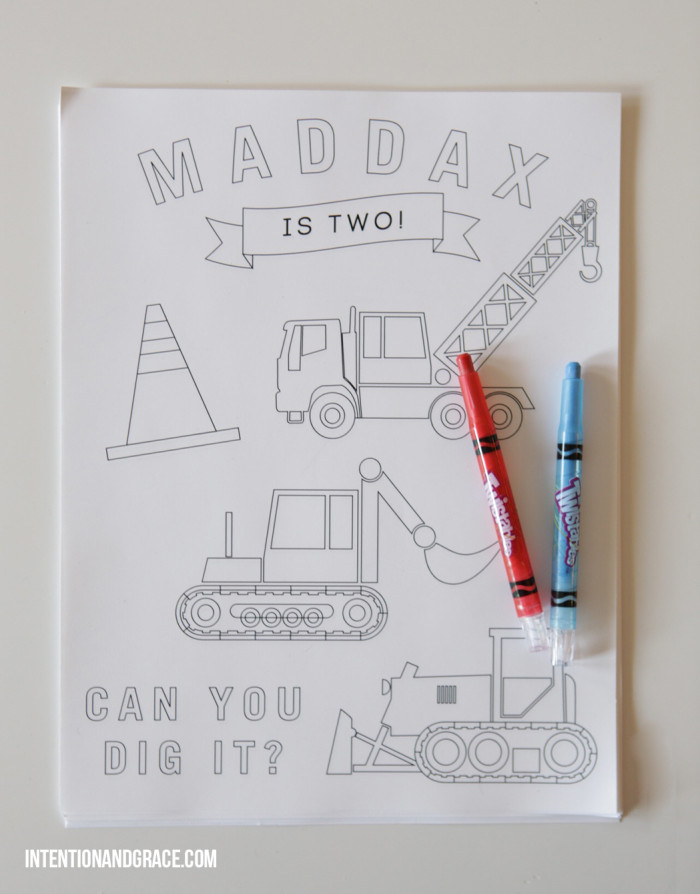
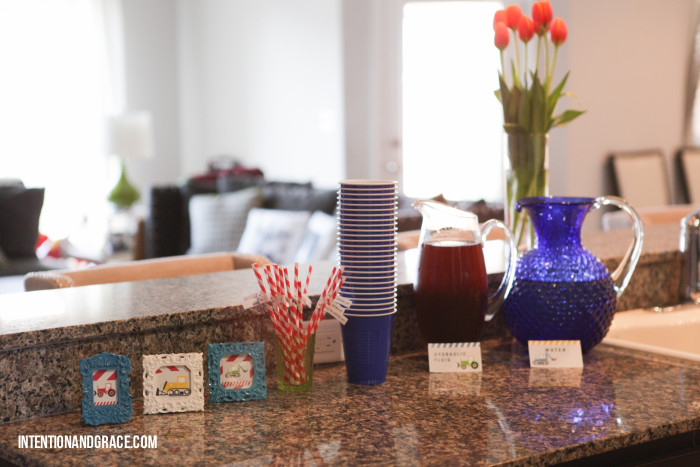
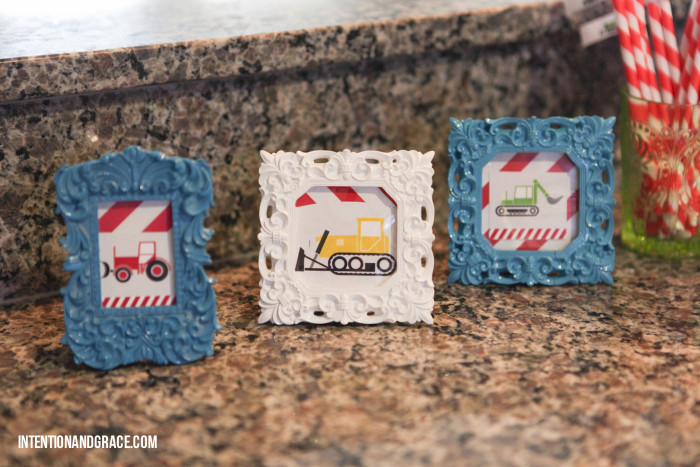
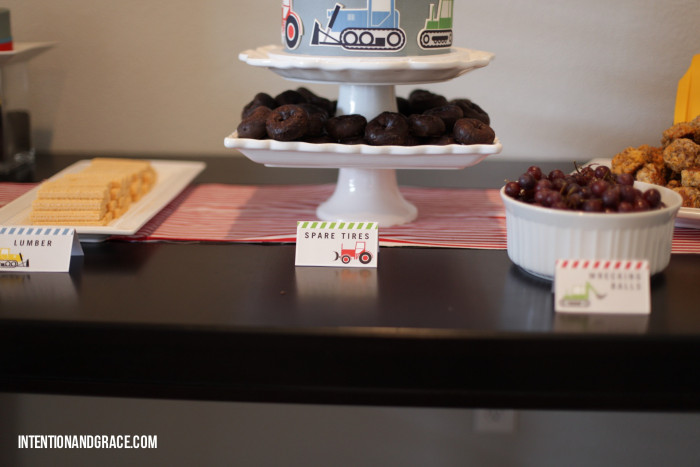
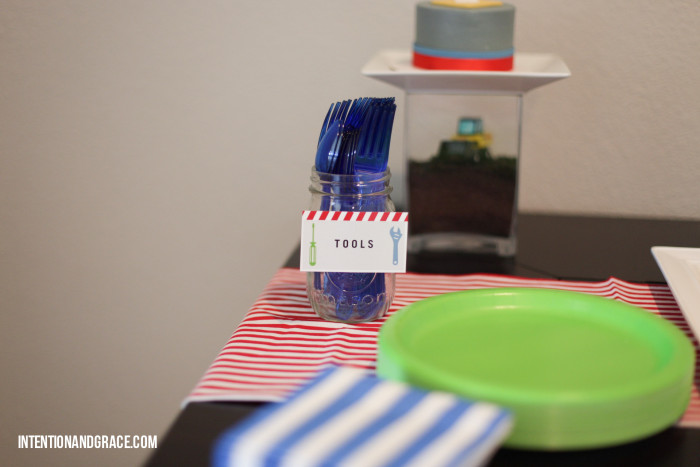
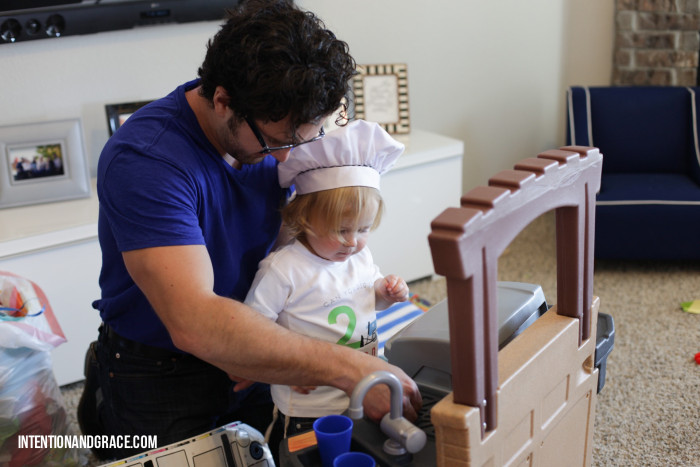
Last weekend our baby boy Maddax turned TWO! I just can’t believe it’s been two years since he was born. He has brought so much joy and laughter into our lives, and we loved being able to celebrate that with our sweet friends and family. We planned a fun tractor and truck themed birthday bash. This kid LOVES all things with wheels: tractors, trucks, trains, cars. Every time we drive anywhere, he points out any type of manly vehicle. By yelling at the top of his lungs. So this year I took this fun theme and ran with it. I hope you dig it!


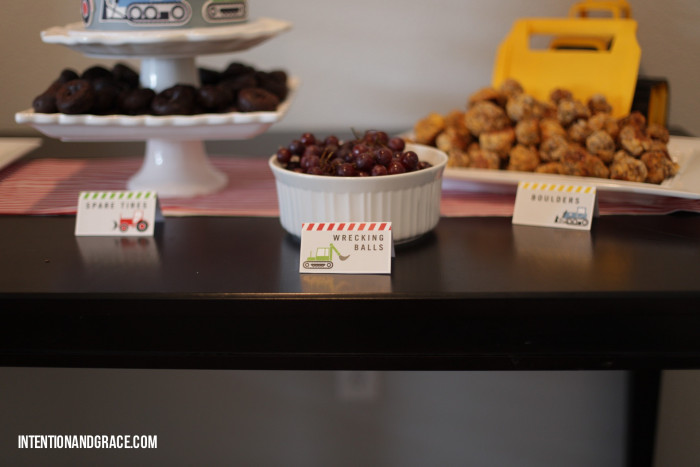


Want to use this theme for your lil one? Check my etsy shop for custom party listings or email me directly at courtney@intentionandgrace.com. Also, be sure to check out Maddax’s first birthday bash HERE.
Mar. 25, 2015

This year I have seen dyeable craft eggs popping up all over the place (Michaels, Hobby Lobby, Walmart, etc.) and they are cheap! I snagged these from Walmart for $2 a dozen, which is about what I would spend on real eggs, but I can use these every year. I was so excited to take them home and create some beautiful things with my family, but after a bit of trial and error discovered these eggs, although pretty and fun, are definitely not an egg substitute. Since they are pretty new, I thought I’d share my pros and cons for dyeable craft eggs if anyone else wants to give them a shot.
Pros:
1. Great for toddlers and kids! We dropped several of these along the way and none of them broke! Dax just loved helping and I felt better about letting him be in control without having to worry about several cracked eggs.
2. They don’t expire. These eggs won’t start to stink up the house after a few days, and you can store them away for next year!
3. The dye is instant. Craft eggs don’t darken if they sit in the dye longer, so the dyeing process goes rather quickly. Simply dip and dry. No need to wait on an egg to get to the desired shade, you’re already there.
Cons:
1. They are super light! They float, so if you want them to be covered in dye, you have to spoon it around the egg rather than simply drop it into the dye like you would with a normal egg.
2. You can’t use water. For the colors above we could only use vinegar with the dye tablets. The problem with this was that 4tsp of vinegar is really just not deep enough to dye a whole egg. The require lots of swishing and spooning to cover an egg in dye, making it a bit more frustrating than normal egg dye which allows for 1/2 cup water to be added.
3. They don’t dry quickly. The dye seems to linger on these for a long time, not absorbing into the craft eggs like normal eggs do, so even after several minutes of “drying” I would pick an egg up to see that it was still dripping quite a bit at the base. I also found that if you overlap two colors they sometimes bleed together unless they have had significant dry time.
Techniques:
After playing with the craft eggs and the dye for quite some time this week we found four fantastic ways to use them in your home.
1. Solid coloring: Simply roll these around in the dye until completely covered and then set aside to dry. The pastels are beautiful and great for decorating with or use in an easter egg hunt.

2. Dip dyeing: Since the dye is very shallow we would tilt the cup or bowl then dip the egg in and set aside for drying, after a few minutes (5-10) turn over or around and dip another side. While one egg is drying get some others started or work on a different dying technique so you don’t have to wait around. I love the shapes you can create with this technique.

3. Watercolor: For these we grabbed a simple watercolor set by Crayola. The eggs absorbed the paints wonderfully and Dax had such a fun time painting away. I love how they turned out!

4. Sharpie: We used sharpie brush markers (my new obsession) to create fun swirls, dots, patters and calligraphy. Don’t worry about being too fancy with these, I think they more they look hand drawn, the better. I also found a fun little set of monogram stickers to create some with our initials on them.

Have you used these dyeable craft eggs before? Share some fun techniques you used!

Jan. 9, 2015
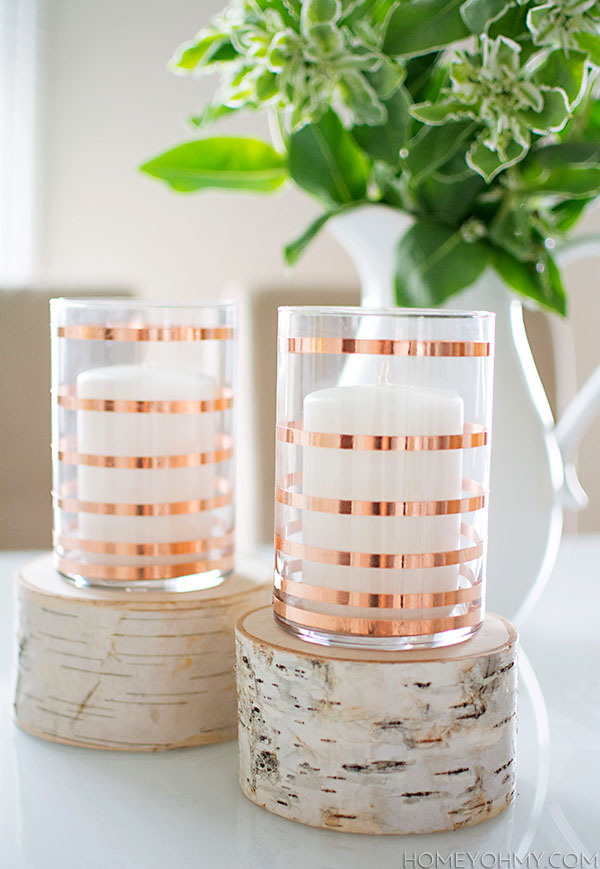
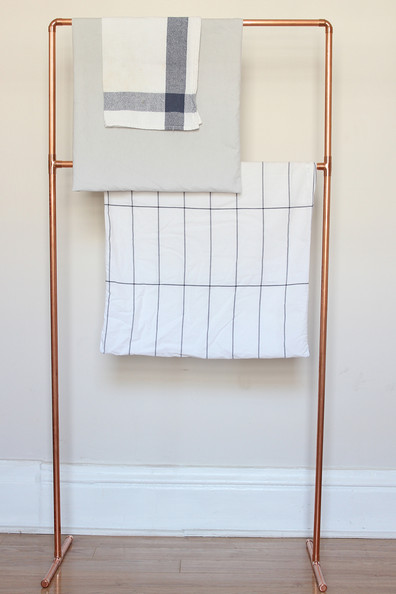
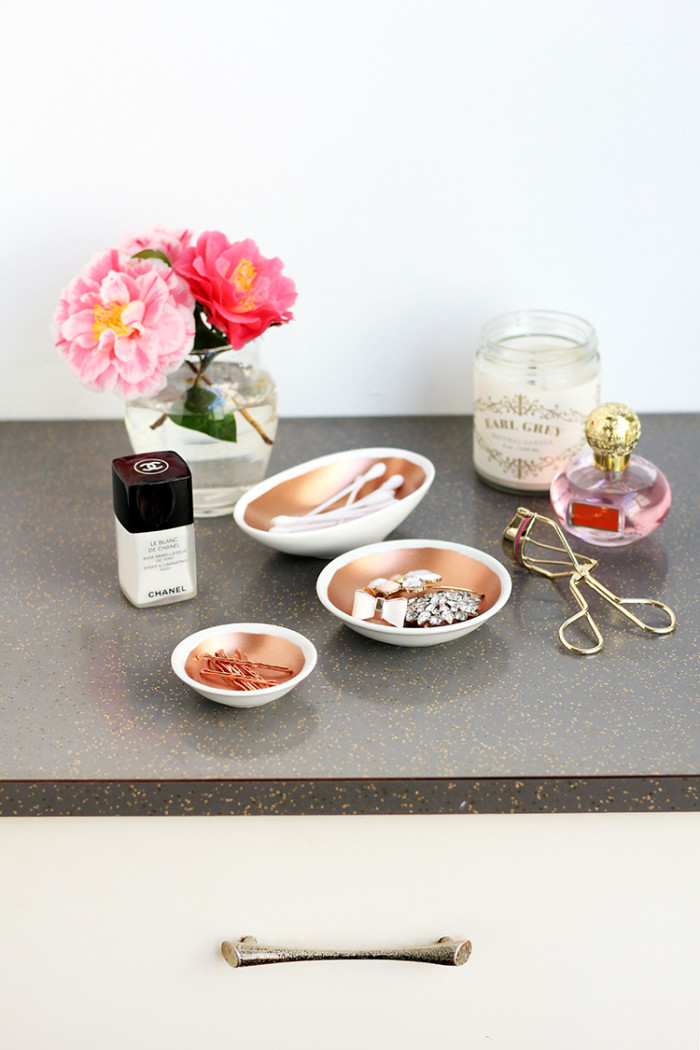
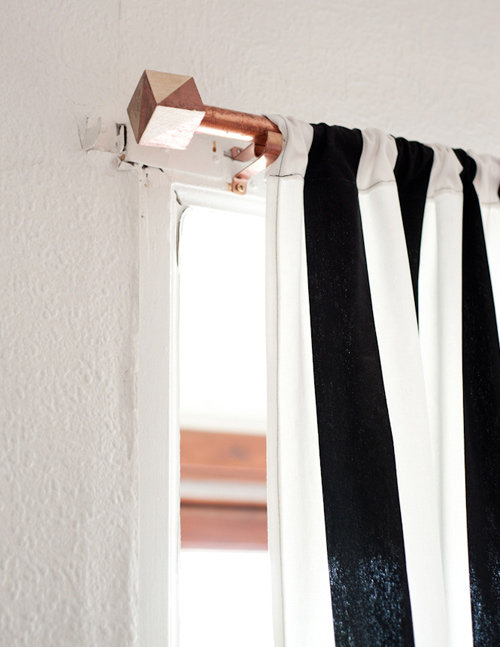
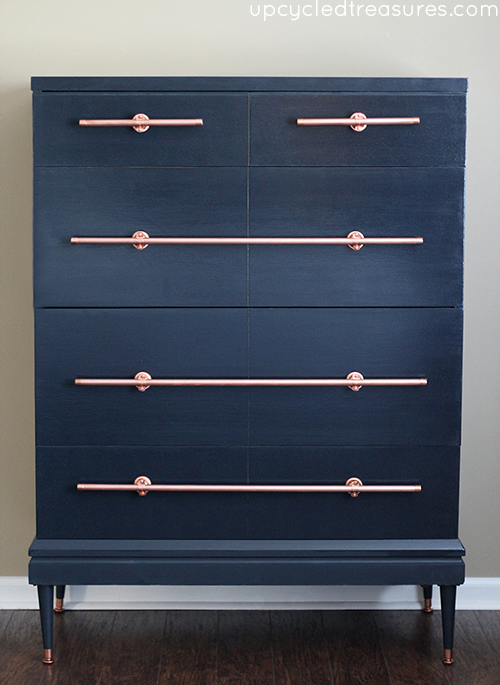
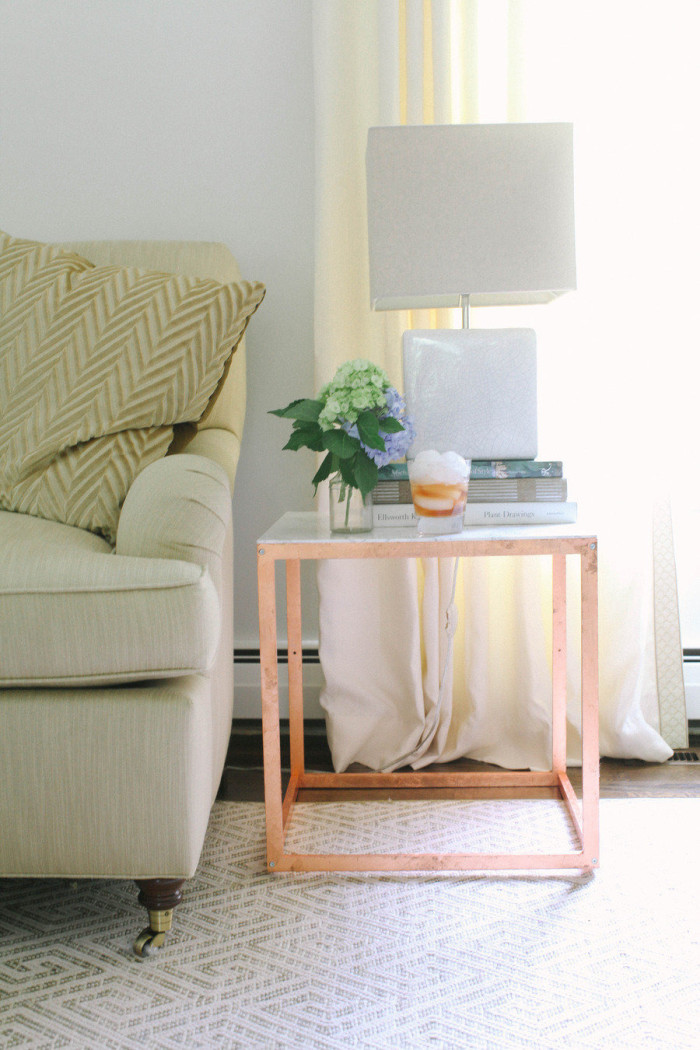
Ever since my first moscow mule a little over a year ago, I’ve been on the hunt for beautiful copper things to add in our home. Luckily, that hunt is getting easier as copper slow takes over the top spot from gold this year. My mom is remodeling her kitchen and chose these amazing lights for above her kitchen island. In helping her research items for the new space, I’ve found so many beautiful copper DIY projects out there and just can’t decide which one to try first! Here are my top 25 ideas to share, which is your favorite? What pieces of sparkle to you like to add to your space? Do you prefer silver, gold or share my new love of copper? Happy DIYing.
DIY copper striped vases | Homey Oh My
DIY copper towel rack | Lonny
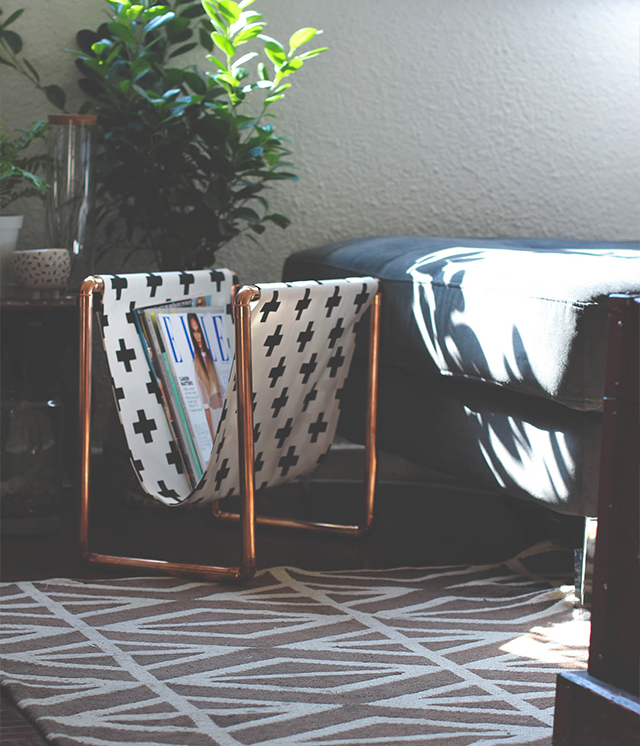
DIY copper magazine Rack | Zana
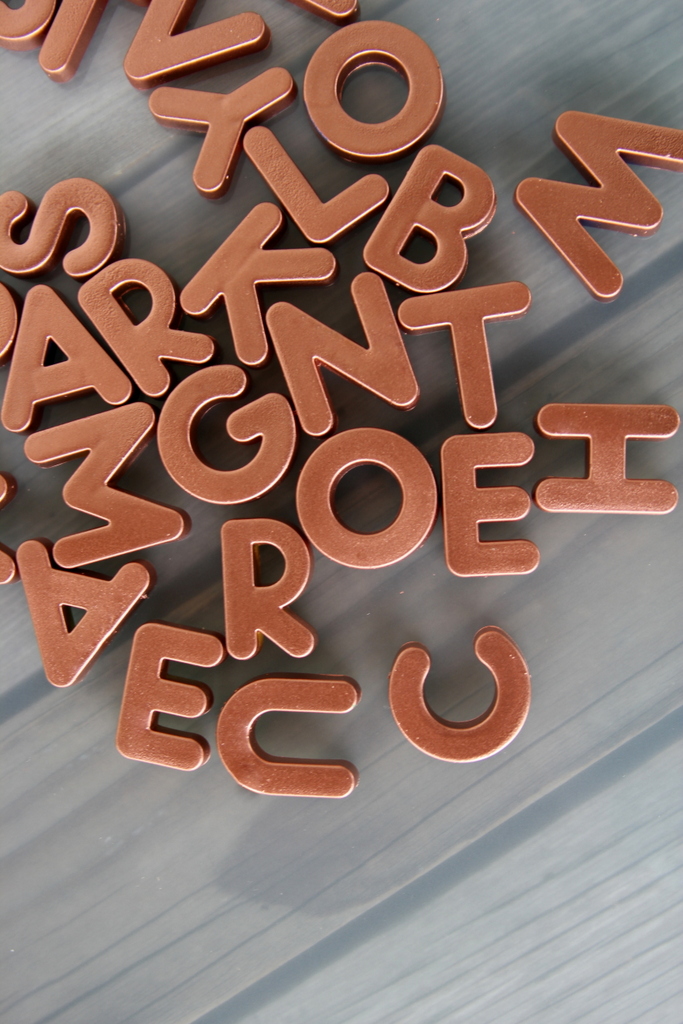
DIY copper Alphabet magnets | Kojodesigns
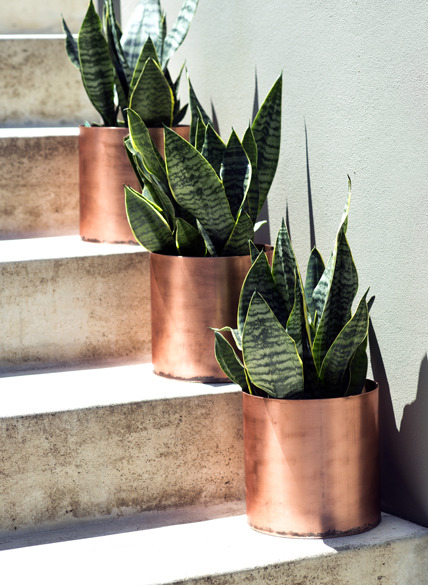
DIY copper planters | Man Made DIY
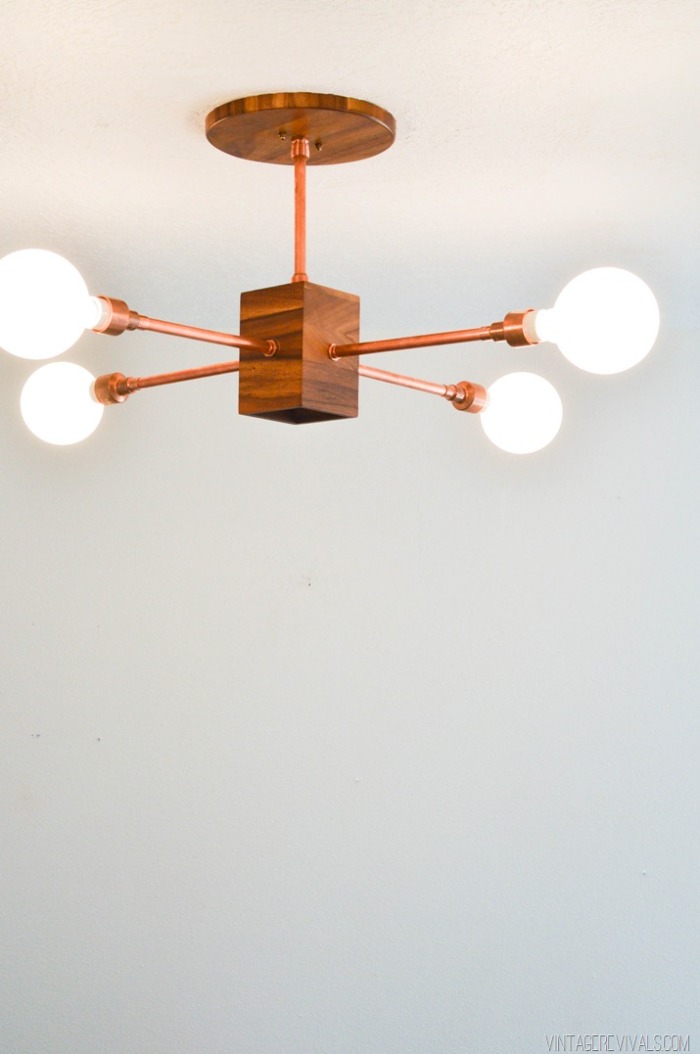
DIY copper and wood light | Vintage Revivals
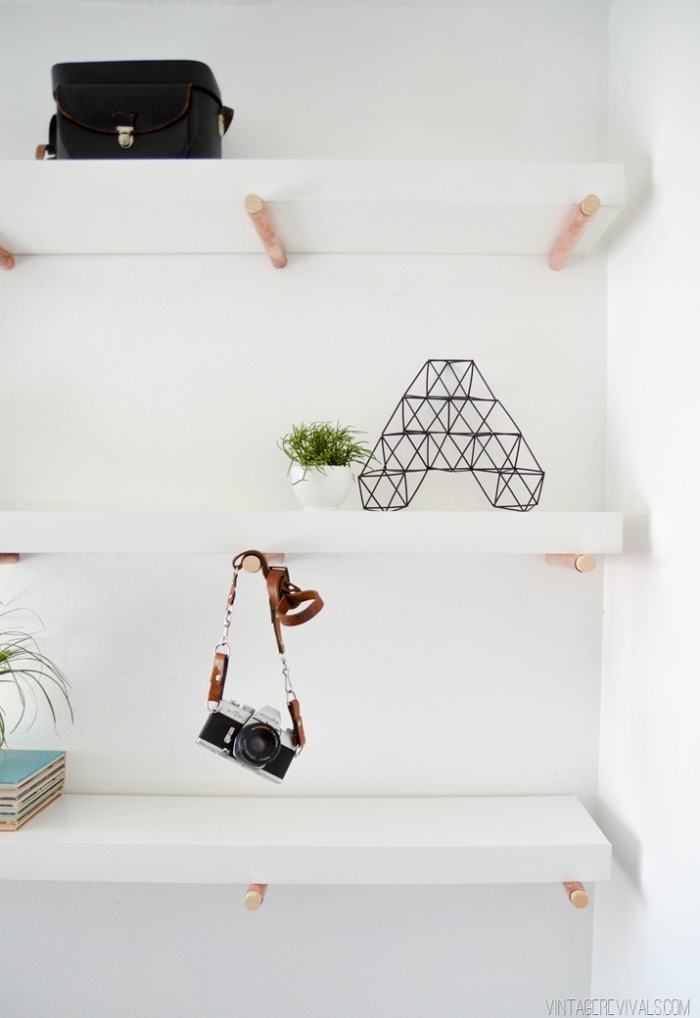
DIY copper peg shelves | Vintage Revivals
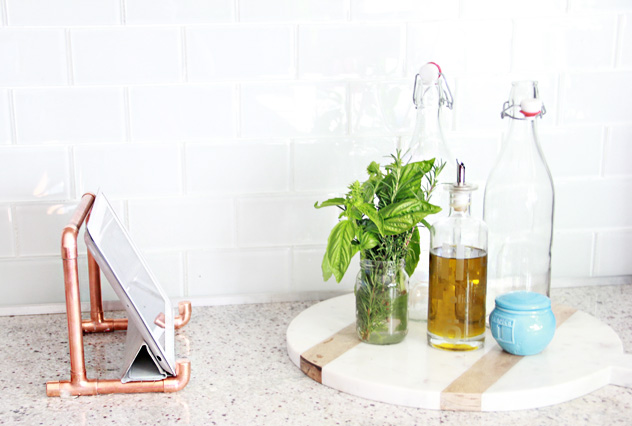
DIY copper ipad stand | A Bubbly Life
DIY copper and marble tray | Almost Makes Perfect

DIY copper foiled vase | Say Yes

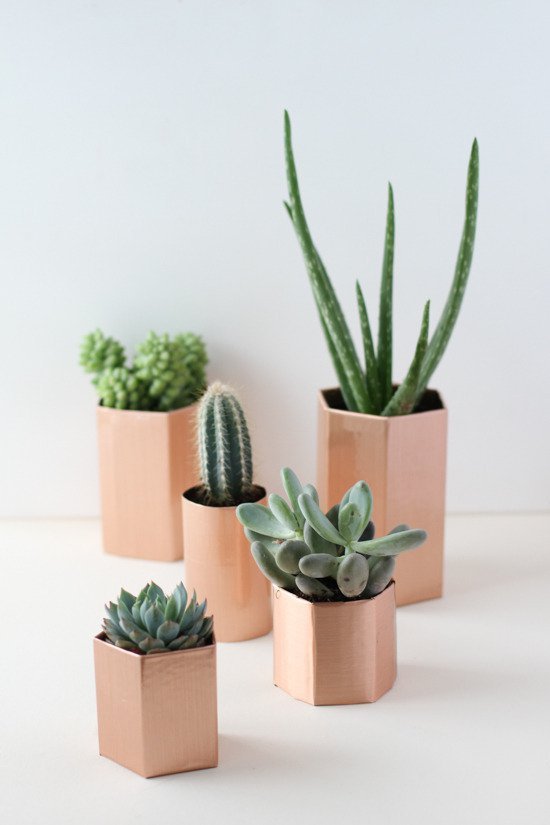
DIY geometric faux copper pots | Curbly
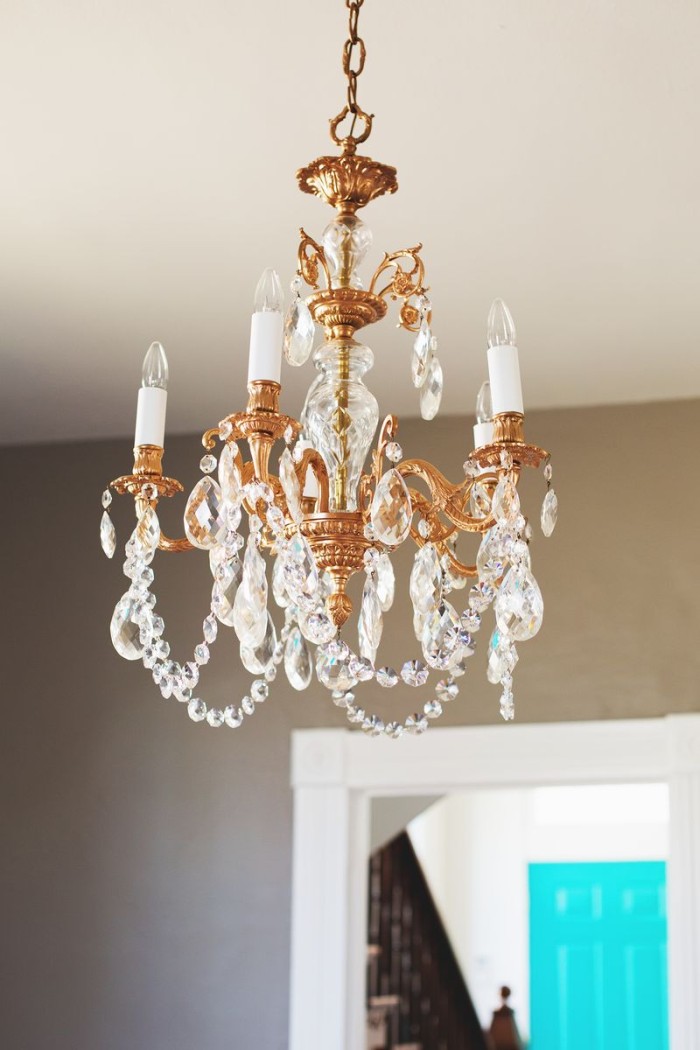
Repurposed copper chandlier | A Beautiful Mess
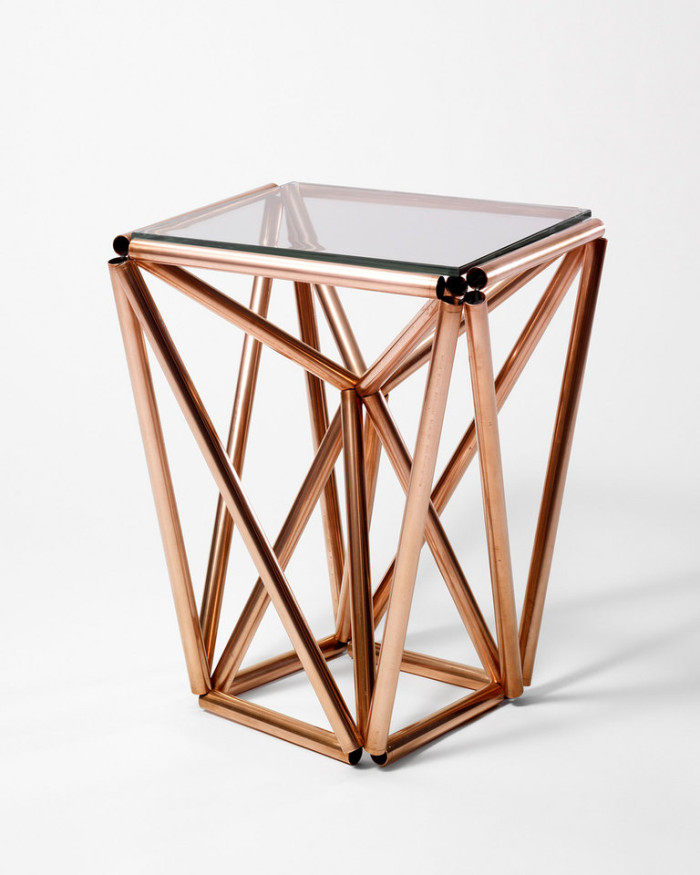
DIY Copper pipe side table | Paul Loebach
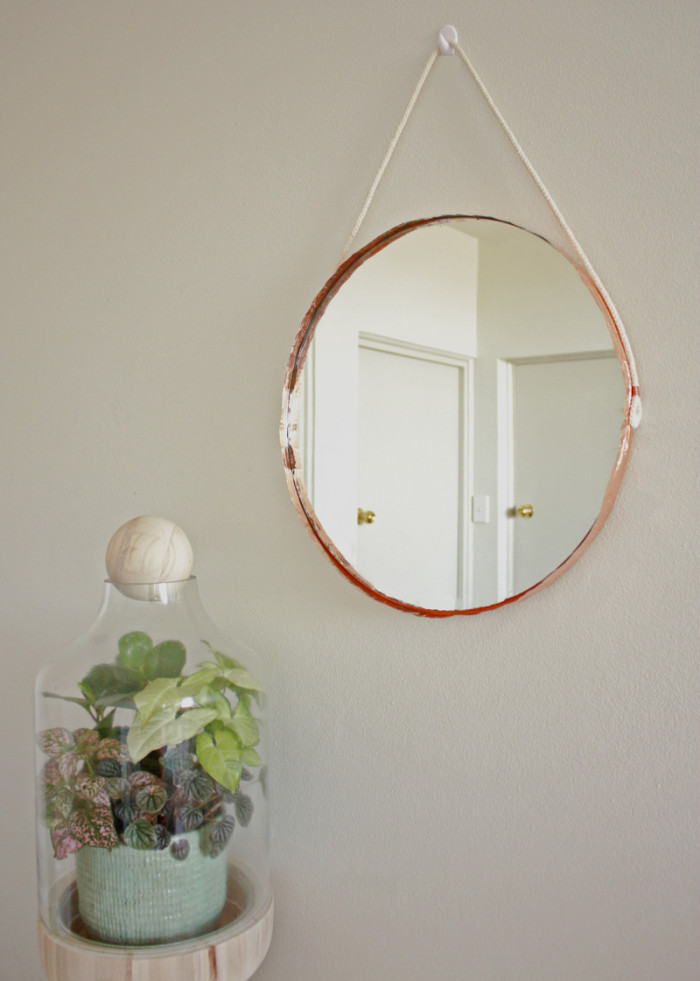
DIY copper and rope mirror | Makers Society
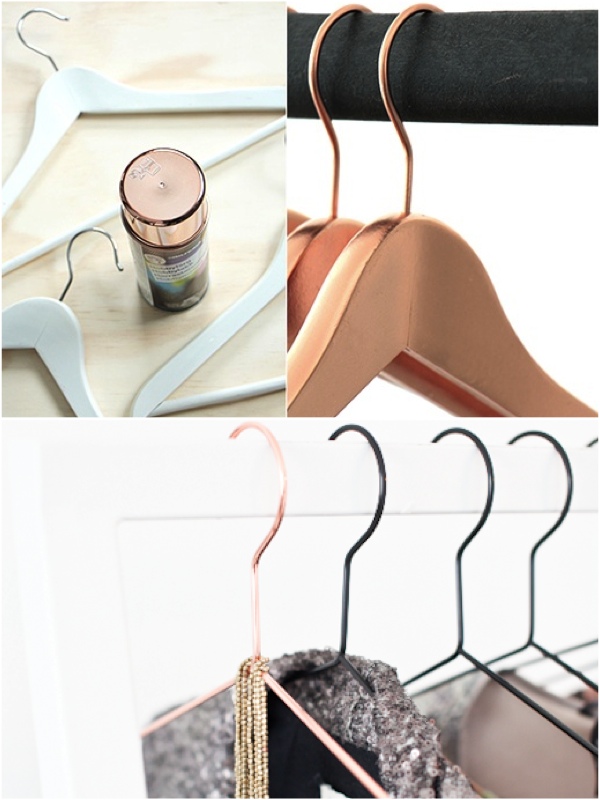
DIY Copper hangers | Homesick
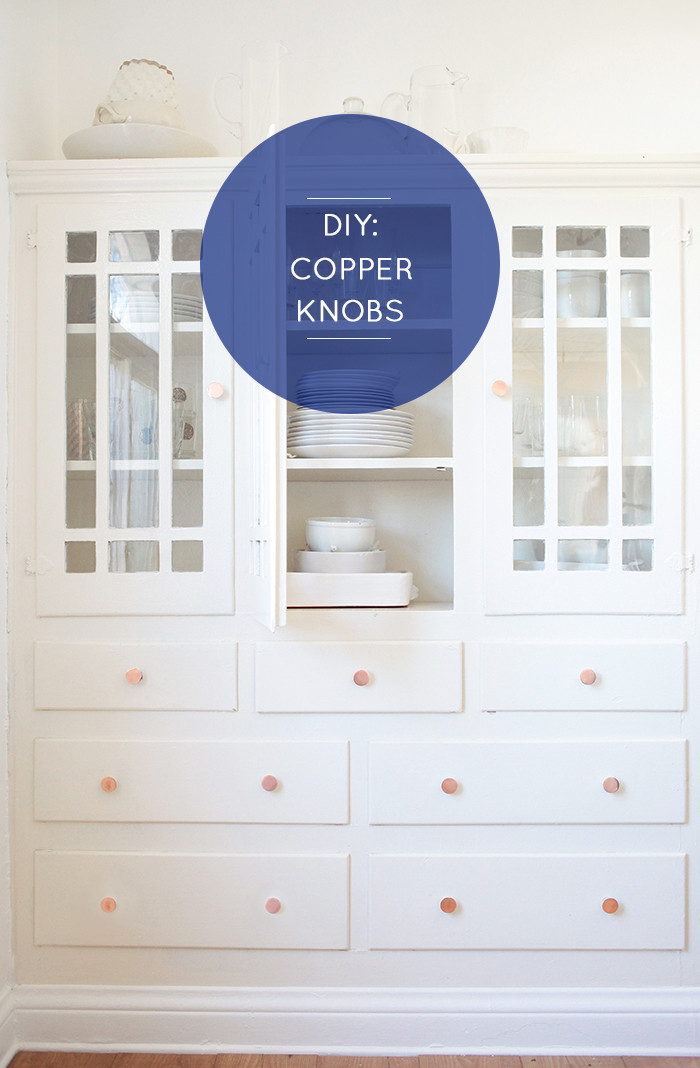
DIY Copper painted knobs | Emily Henderson
DIY Copper pipe pendant light | The Gathered Home

DIY copper painted ceramic bowls | FreutCake
DIY Copper and wood block curtain rods |
DIY Copper pulls on upcycled dresser |
DIY Ikea hack with copper legs and marble top | Style Me Pretty
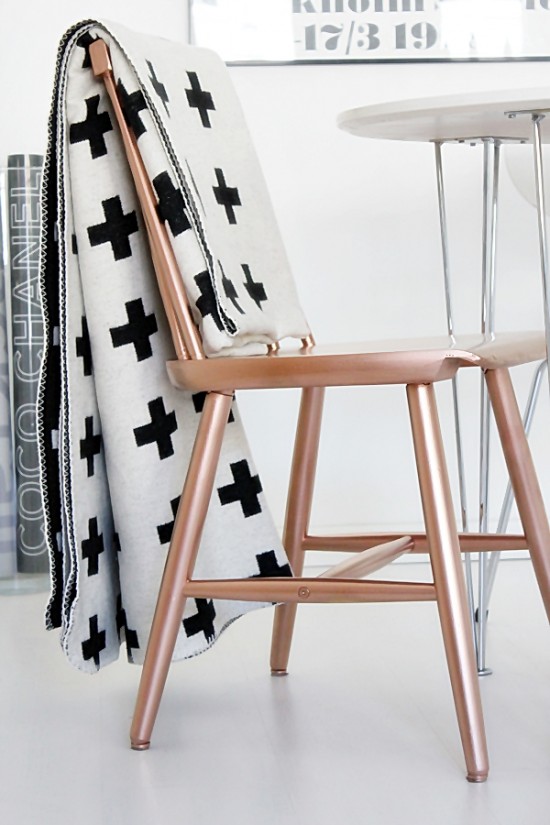
Repurposed copper painted chair | Room of Karma
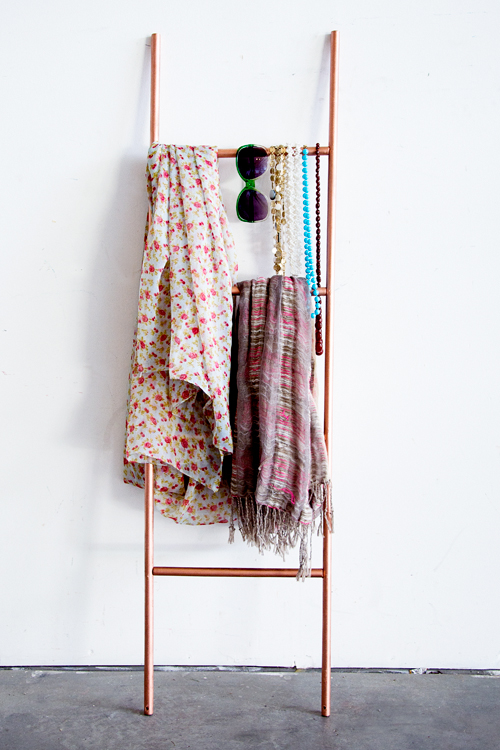
DIY Copper scarf ladder | Natalme
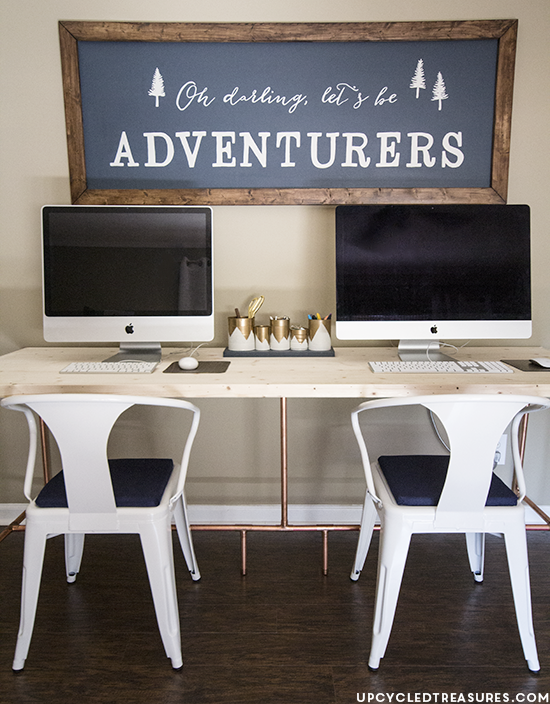
DIY Copper pipe desk | Upcycled Treasures
Nov. 18, 2014
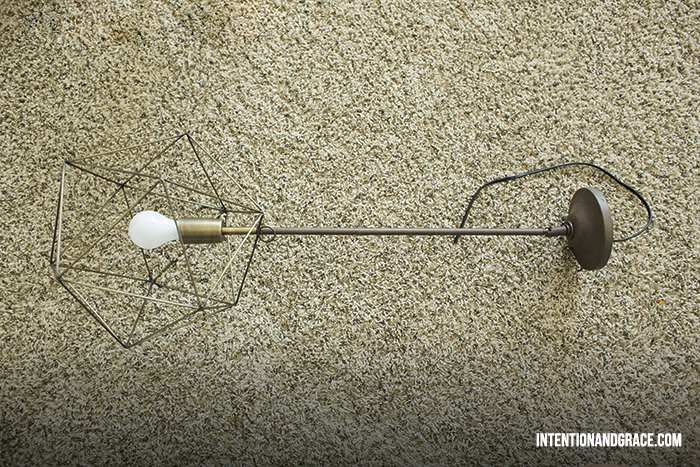
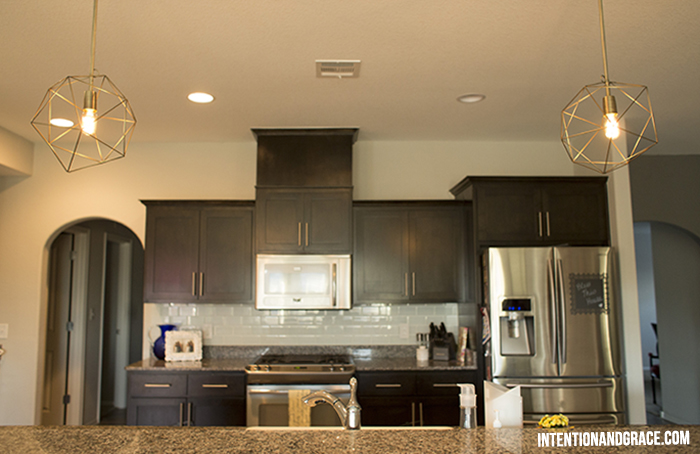
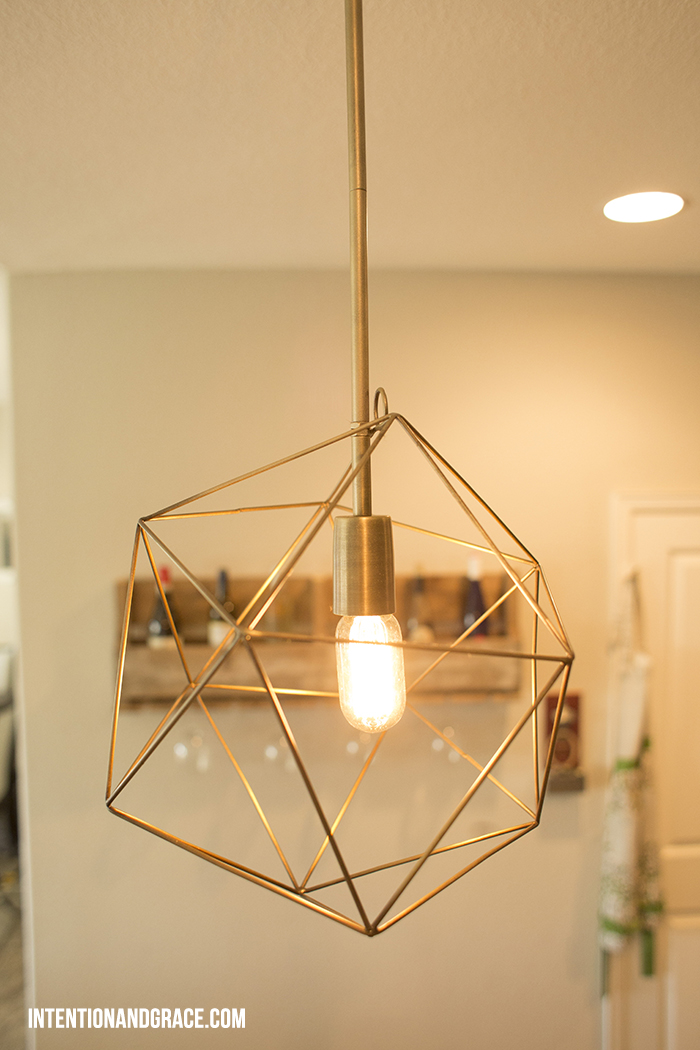
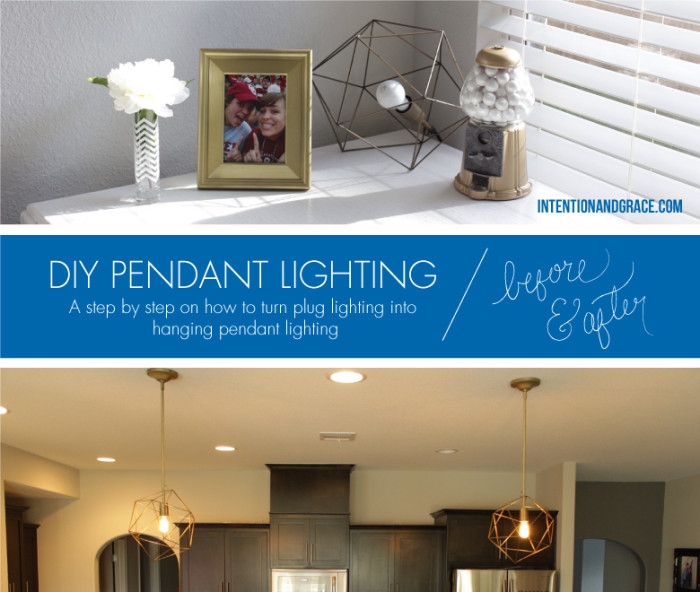 I had seen these amazing pendant lights on Pinterest months ago, but at nearly $800 each there was no way those were going to fit in our budget. Then a bit later I came across these from West Elm and fell in love with their style, but I wasn’t thrilled with their spotted glass style. So when I saw these geo desk lamps on Urban Outfitters for only $69, I knew they would work perfectly for what we wanted in our kitchen. Yay!
I’m sure you’ve seen them in my past posts here and here hanging out on my office desk, but we finally had time to put them up a couple of weeks ago and I could not be more thrilled with how they turned out!
This project could really be done with any plug-in hanging lights and it only took my amazing husband just over an hour total!
To do something like this in your home you’ll need a couple ceiling fan electrical boxes (we got ours at lowes for $2.72 each), wire cutters, a small saw, a sharpie/pencil, some wire ties, electrical wire, and string. We also purchased two pendant light conversion kits from lowes because I wanted something a bit more sturdy and professional in my kitchen than what was currently on the lights. They have several colors and styles to choose from and the were only $20 each.

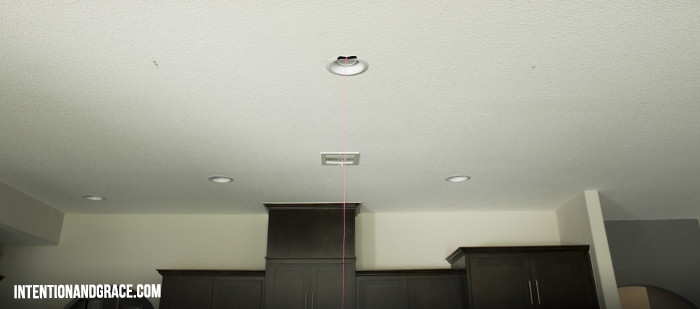
To start we hung string from our ceiling to get a better visual of where our center light was. Using a sharpie we marked the string at our desired height for the pendants to hang creating a visual guide of how low the new lights would hang. This guide also allowed us to view and measure where exactly we wanted our new lights to be installed. Measuring off our center light on both sides we marked the ceiling with a small black x and confirmed that all three lights would be in a straight line with one another.
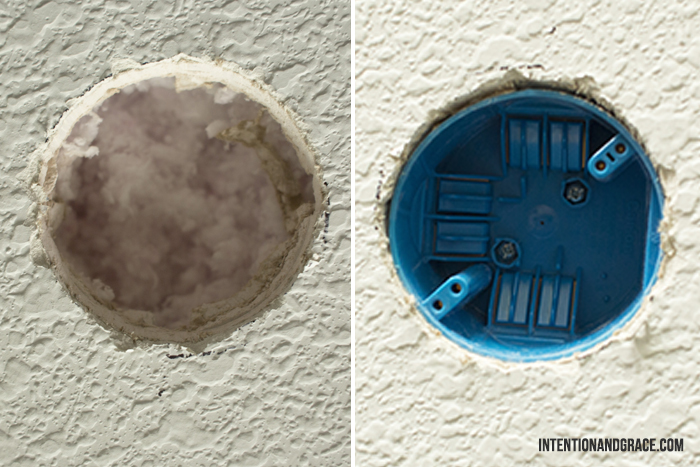
Once the marking was done we simply traced the blue electrical box using a pencil and cut the holes in the ceiling. Once we made confirmed they were the perfect size for the fan boxes we went up into the attic and screwed the boxes into place.
Because our lights were being installed near an existing light the wiring was very simple, we just tapped off of the center can light and ran the wires through the electrical boxes.
NOTE: If you’re not confident in how to wire or change electrical wiring, please consult an electrician.
Now it was time to modify the existing lights. We cut the wiring below the switch on the desk lamps as shown below, making sure to leave a good amount of extra wire to work with. Then we took apart the pendant light kits we had purchased from Lowes, stripping them of their existing wiring leaving just the metal pipe.

Then it was time to run the lamp wire through the pendant light kits. Simply thread it up the pipe and through the end. We matched our pendant light kit as closely to the lamps as possible when we were purchasing them, but they weren’t the perfect match I was hoping for, so we took them outside and lightly dusted them with some extra gold spray paint. It worked perfectly!
Once the lights were wired into the fan boxes in the ceiling we simply screwed on the pendant bases and we were done! I could not believe how well they turned out for under $90 each! Not only are they one of a kind, but they are better in my opinion than the two I had previously found online. Saving hundreds of dollars doesn’t hurt either.
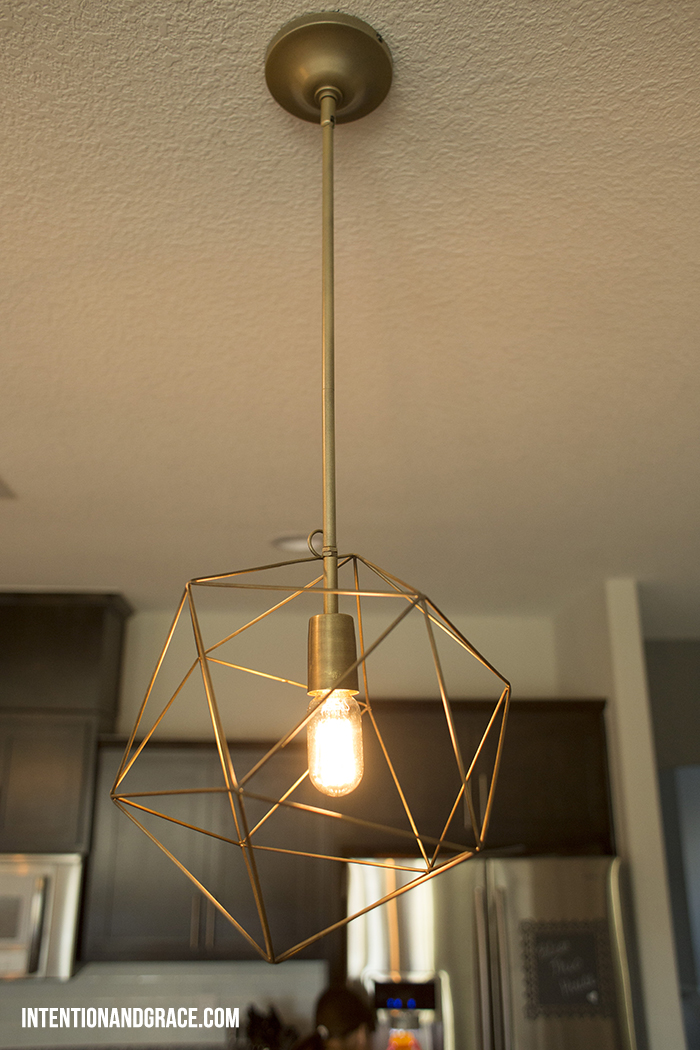
I hope you enjoyed this lil DIY from our house to yours. If you ever have any questions about your DIY project please don’t hesitate to ask!


